TL;DR
- LUTs (Look-Up Tables) map existing color data to new 3D values, creating nuanced, cinematic color transformations that dynamic slider adjustments can’t achieve.
- Presets apply fixed slider offsets (exposure, contrast, sharpness) across an image, whereas LUTs remap individual color and tonal values dynamically based on original image data.
- Always perform core exposure, white balance, and base color corrections beforeapplying a creative LUT to prevent unwanted color banding and clipping.
- LUTs overlay temporary color remaps on RAW or 16-bit files, allowing photographers to dial down intensity, adjust tone curves, or layer styles without corrupting original image data.
- While LUTs apply static mathematical formulas, modern AI profiles analyze contextual scene data (faces, skies, ambient light) to adjust color dynamically per image.
Imagine this: You’ve just wrapped up a stunning sunset portrait session on the beach. The lighting was perfect, the colors were breathtaking, and every shot felt like a masterpiece. But when you get home and upload the images, something’s off. The warm golden hues you saw in person look dull, the skin tones are inconsistent, and the magic of that sunset glow seems to have disappeared.
This is where LUTs come to the rescue.
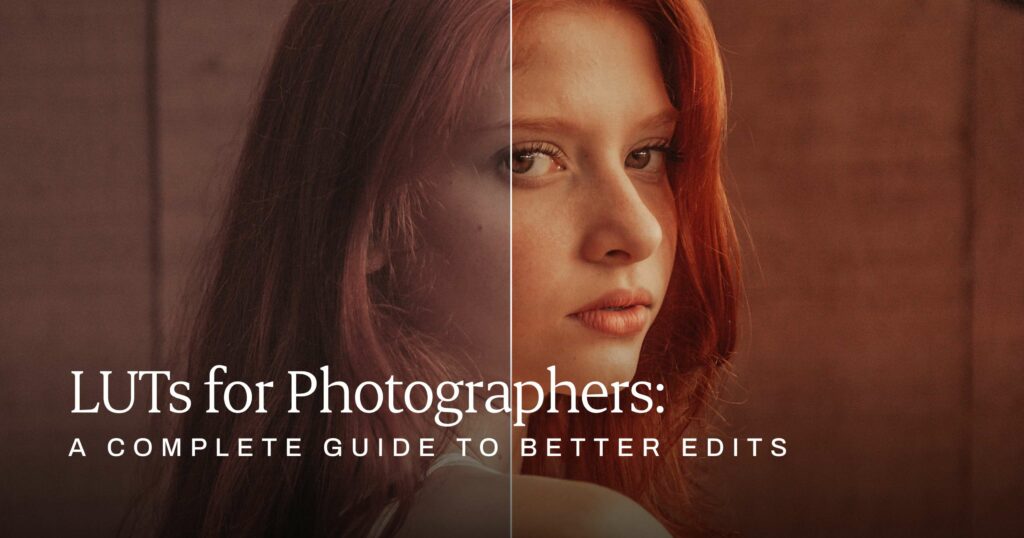
With just a few clicks, you apply a cinematic LUT, and suddenly, those rich sunset oranges return, the skin tones smooth out, and the entire series takes on the polished, professional look you envisioned. What could have taken an hour of manual color adjustments is now done in seconds.
LUTs are a game-changer for photographers who want to enhance mood, boost contrast, and easily create a signature style. In this guide, we’ll walk you through how LUTs work and how to use them to elevate your photography effortlessly.
What is a LUT in Photography?
If you’ve ever wondered what LUTs are in photography, here’s the short answer:
LUT stands for Look-Up Table, a mathematical formula that transforms colors in your images. It takes an original color value, looks it up in a table, and returns a new value.
A LUT operates in a three-dimensional space, assigning specific values for red, green, and blue channels to each pixel. This 3D approach enables complex color manipulations that create distinctive visual aesthetics.
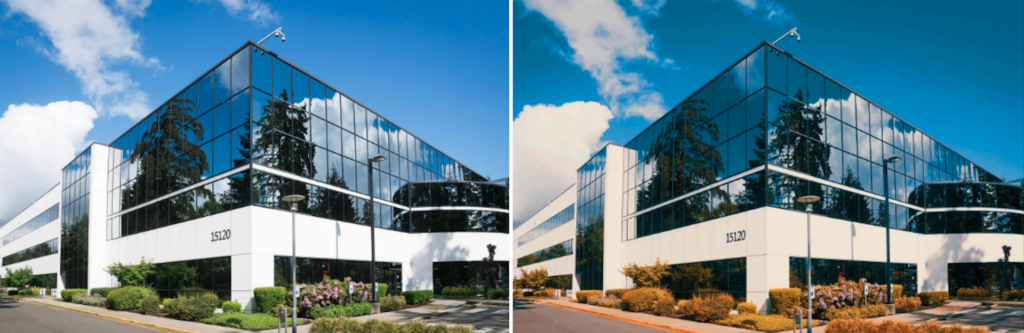
But wait, doesn’t this just sound like simple monitor manipulation or using presets? Well, not quite.
While presets are collections of slider adjustments that apply the same settings regardless of an image’s starting point, LUTs offer a more advanced approach to color grading. They don’t just tweak brightness or saturation; they mathematically map every color in an image to a precise new value, creating a controlled, film-like transformation.
Think of it this way: When you apply a preset that boosts saturation by +15, it increases the vibrancy across the entire image equally, whether the original colors were muted or already intense.
A well-designed LUT might deepen a bright blue sky into a cinematic teal while subtly warming skin tones, maintaining natural color relationships in a way simple slider adjustments can’t.
This precision level allows LUTs to independently adjust shadows, midtones, and highlights, crafting depth, contrast, and mood more accurately. Instead of applying a one-size-fits-all filter, you’re sculpting the color atmosphere of your image, giving it personality, emotion, and a professional, polished look.

How LUTs Work?
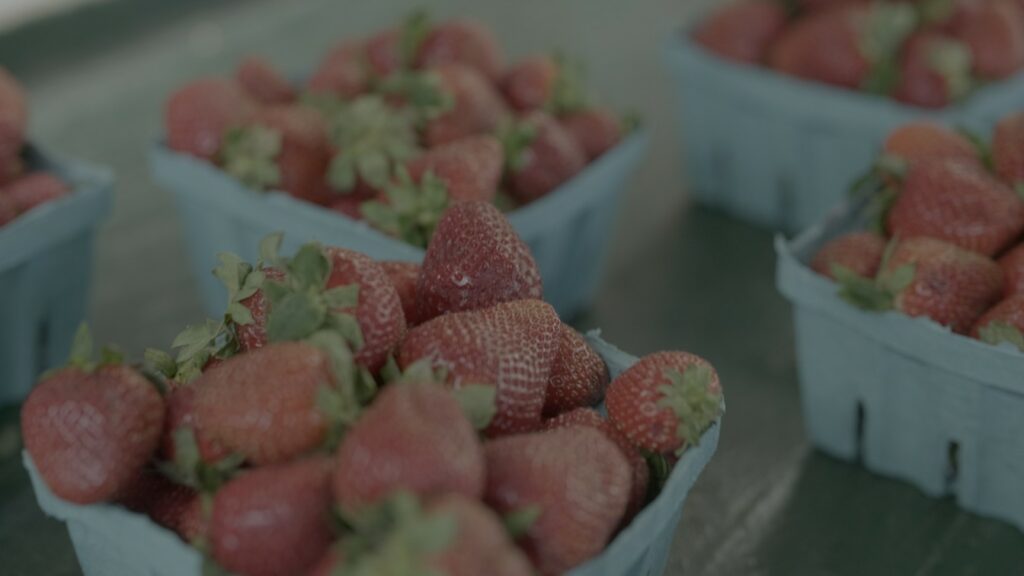
What makes LUTs unique is how they work with image data. Rather than applying adjustments regardless of the underlying information (as presets do), LUTs consider existing color and tonal values, creating more nuanced transformations.
LUTs are especially useful because they’re a nondestructive way to modify your photos. They don’t permanently change the original image file. Instead, they apply a temporary color shift, which you can easily adjust or remove.
This makes LUTs a powerful tool for photographers experimenting with different photo editing styles without committing to a single look.
Types of LUTs
LUTs come in several varieties, each serving a different purpose depending on your needs in photography.
Creative LUTs add stylistic effects and transform the look and feel of your image. Photographers often use these LUTs to give their photos a specific aesthetic or mood, such as a vintage look, a high-contrast black-and-white effect, or a cinematic color tone.

- Technical LUTs adjust and map colors from one color profile to another, ensuring your colors appear correctly across various platforms or media.
- For example, when working with RAW images or specific file formats, you may need to convert the color space to ensure accurate color display on different devices or software.
- Camera-specific LUTs are tailored for specific camera models or sensors. Every camera captures color slightly differently, and these LUTs help correct those color discrepancies.
- Every major camera brand incorporating video into its cameras, such as Nikon, Fujifilm, Sony, Canon, and Panasonic, provides LUTs tailored to its sensor and color science. These camera-specific LUTs help standardize color output and ensure consistency when matching footage across different cameras or achieving a specific look.
- 3D LUTs (three-dimensional LUTs) are more advanced and provide precise color grading by mapping colors in three dimensions, allowing for complex color adjustments. They are often used to create more intricate, nuanced color effects or when working with high-end video or photography workflows.
- 1D LUTs (one-dimensional LUTs) are simpler and only adjust a single channel at a time, usually either red, green, or blue. They are ideal for basic color corrections, such as tweaking an image’s brightness or contrast, and are often used for quick fixes or when working with less complex images.
Each type of LUT serves a unique function and can help you achieve the perfect look for your photos, whether for a dramatic cinematic effect or ensuring accurate color reproduction.
How To Use LUTs in Your Photography Workflow
LUTs are compatible with most popular photo editing programs, so you’re covered no matter what software you use. Here’s how to get started.
Installing and Applying LUTs
LUTs are not natively included with most editing software, so you’ll need to download them from trusted sources online.
You can find LUTs in many places, some for free, others for purchase. Websites like FilterGrade offer various LUTs tailored to different styles, from cinematic looks to specific film stock emulations.
Also Read: Wedding Photography Editing Techniques and Styles


You can even find LUTs designed for particular photography genres, like portraiture or landscape. Once you’ve found a LUT you like, you’ll simply download it to your computer.
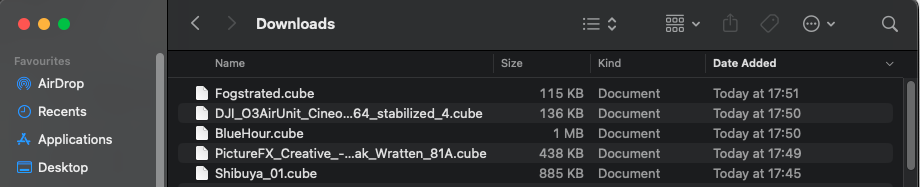
When you download a LUT, it’ll usually come in a file type that might be unfamiliar. The file type you’ll be using to import LUTs depends on which software you’re using.
You’ll typically see LUTs with the .xmp file extension for Adobe Lightroom. This is because Lightroom uses XMP files to apply LUTs within its editing environment. The most common file extension for Photoshop, After Effects, or Premiere is .CUBE.
| Software | Common LUT file format |
|---|---|
| Adobe Lightroom / Lightroom Classic | .xmp |
| Adobe Photoshop | .cube |
| Adobe Premiere Pro / After Effects | .cube |
| DaVinci Resolve | .cube, .3dl |
| Capture One | .cube |
Once you’ve downloaded your LUT, it’s time to install it into your photo editing software. This process can vary slightly depending on the program, but here’s the general flow:
- Locate the LUT folder: Most editing programs have a specific folder where LUTs are stored. You can usually find this in the program’s settings or preferences menu.
- Drag and drop the LUT file: Once you’ve located the appropriate folder (often labeled “LUTs” or “Presets”), simply drag and drop your downloaded file into that folder.
Some programs might require you to restart the application before the LUT shows up, while others will immediately recognize it.
If you can’t find the perfect LUT for your shot, don’t worry; you can always make your own! Programs like 3D LUT Creator and Lutify.me let you design custom LUTs that match your exact vision, download, and import them into your photo editing software.
What are the Best Practices for Editing Your Photos with LUTs
Once your LUT is installed, applying it is super simple, just like adding a filter. But just a heads-up, LUTs aren’t magic fixes for bad photos.
If your shot is underexposed or the colors are way off, a LUT won’t fix that. Think of them as a shortcut to enhancing your images, not a one-size-fits-all solution.
To get the best results when using LUTs, follow these best practices:
- Calibrate your monitor: Colors can look different on various screens. To ensure consistent and accurate results, calibrate your monitor regularly to ensure the colors you see are true to what others will see.
- Work in a non-destructive workflow: Use RAW files to retain maximum dynamic range. Edit in 16-bit color depth (instead of 8-bit) to prevent banding when applying LUTs. Convert your image to a linear gamma space if working with LUTs designed for log profiles.
- Perform color correction first: Creative LUTs are meant to enhance the look of your image, not fix its color balance. Always start by adjusting white balance, exposure, and contrast before applying LUTs to avoid unwanted color shifts.
- Adjust the intensity: Instead of applying a creative LUT at full strength, dial it down to around 50% for more balanced and visually pleasing results. This helps preserve image quality and gives you more control over the effect.
- Make tone curve adjustments: Tone curve adjustments provide balance since LUTs often crush blacks and whites. If highlights get too hot, pull down the top-right point of the curve. Lift the black point slightly for a faded film look.
- Adjust hue, saturation, and luminance (HSL): Some LUTs oversaturate specific colors, so reduce individual HSL values. If skin tones look unnatural, adjust Reds and Oranges in HSL.
- Match to color space: If a LUT was designed for Rec.709, apply it in an sRGB workspace. If designed for log (e.g., C-Log, S-Log, V-Log).
Also Read: How to Build Your AI Editing Profile
LUTs vs. Presets: What’s the Real Difference?
It’s easy to lump LUTs and presets together since both apply a look in one click. But they work differently under the hood.
A preset is a saved collection of slider adjustments (exposure, contrast, saturation, and more) applied on top of your existing edit. An LUT maps every color value in your image to a new one using a fixed mathematical table, independent of your sliders.
| Feature | LUTs | Presets |
|---|---|---|
| What it changes | Color and tonal values only | A broader range: exposure, contrast, sharpness, vignetting, and more |
| How it applies | Remaps existing color data using a lookup table | Applies slider adjustments on top of the current edit |
| Editability after applying | Can be layered with opacity or intensity adjustments | Fully editable—sliders can be adjusted individually |
| Best for | Matching a specific cinematic or technical color grade | Building a broader, repeatable editing style |
| Typical file format | .cube, .xmp | .xmp, .lrtemplate |
In short: presets are more flexible for full-image edits, while LUTs are more precise for color and tone. Many photographers use both, a preset for overall exposure and mood, then a LUT for the final color grade.
Streamline Your Post-Processing Workflow: LUTs vs. AI Editing
Editing efficiency is crucial for photographers, but setting up LUTs and manually adjusting each image can be time-consuming. What if you could speed up the process without sacrificing quality?
With Aftershoot’s Instant AI Profile, photographers can automate much of the initial image correction, such as adjusting white balance and exposure, saving time, and ensuring consistency.
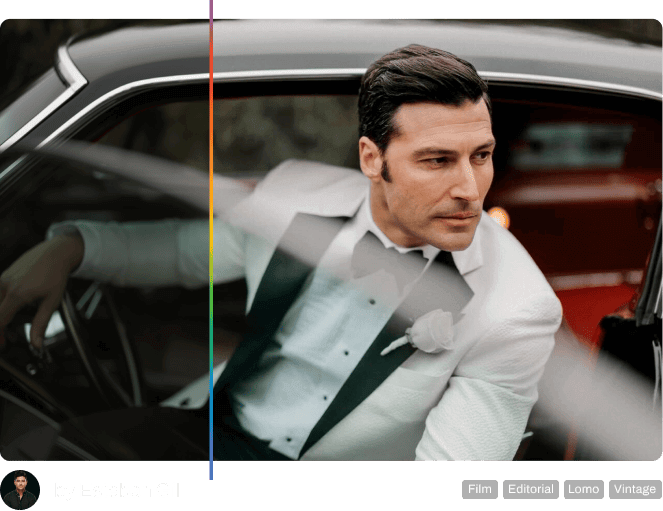
Unlike traditional LUTs or Lightroom presets, AI Profiles are dynamic and adaptive. They learn from previously edited images, allowing photographers to create personalized profiles that reflect their unique editing style. Once trained, the AI applies consistent edits while making intelligent adjustments based on the content of each photo.
For those who prefer a ready-made solution, Aftershoot also offers AI Styles: pre-existing AI presets available in the Aftershoot marketplace. These styles allow photographers to achieve professional, AI-powered edits without the need to train a custom profile.
| LUTs | AI Profiles | |
| Processing Method | Use fixed mathematical formulas to transform colors based on predefined input-output mappings. | Use machine learning algorithms trained on thousands of images to recognize patterns and make dynamic, intelligent adjustments. |
| Adaptability | Apply the same transformation to every image, regardless of its content; they don’t “see” or respond to what’s in your photo. | Analyze an image’s content (recognizing faces, skies, landscapes, etc.) and make context-aware adjustments for more natural results. |
| Learning Capability | Static. They don’t learn or improve over time. | Can be trained on your specific editing style, evolving with your preferences to deliver increasingly personalized edits. |
| Contextual Understanding | Modify colors without understanding the image itself. | Detect lighting conditions, subject matter, and compositional elements, allowing for more intelligent, tailored adjustments. |
Also Read: Wedding Photography Styles that You Should Try
Mastering LUTs Requires Patience
Creating the perfect LUT takes time, experimentation, and practice. While it can initially feel overwhelming, the more you work with LUTs, the more you’ll develop an instinct for color grading.
Over time, you’ll learn to identify which photos will benefit from a particular LUT and how to tweak them for the best results. With consistent practice, you’ll find your rhythm and be able to apply LUTs quickly and effectively, giving your photos a professional, polished look with minimal effort.
Remember, post-processing is a skill that grows the more you invest in it; so, embrace the learning curve and let your creative eye guide you to the best edits.
Using AI to handle the bulk of the editing process saves valuable time and energy. This allows you to focus on creative refinements and deliver stunning, professional-quality photos to your clients faster than ever. See for yourself; sign up for a free 30-day Aftershoot trial today.
Q1. Can you use LUTs on JPEG images?
Yes, but with caution. JPEGs hold far less color data than RAW files (8-bit vs. RAW’s higher bit depth), so a strong LUT is more likely to cause banding or color artifacts on a JPEG. For best results, apply LUTs to RAW files whenever possible.
Q2. Do LUTs work in Adobe Lightroom?
Yes, but Adobe Lightroom supports LUTs through .xmp profile files, applied via the Profile Browser in the Develop module. Photoshop, Premiere Pro, and After Effects typically use .cube files instead.
Q3. Are LUTs free?
Some are, some aren’t. Sites like FilterGrade offer free LUT packs alongside paid ones, and camera manufacturers often provide free camera-specific LUTs for their own sensors. Paid, professionally graded LUT packs tend to offer more consistency across varied lighting conditions.
Q4. Can a LUT fix a poorly exposed or white-balanced photo?
No. LUTs assume your base exposure and white balance are already correct, they only remap color and tone on top of that. Fix exposure and white balance first, then apply the LUT, or the color shift will look off.
Q5. What’s the difference between a 1D and 3D LUT?
A 1D LUT adjusts one color channel (red, green, or blue) independently and is best for simple corrections. A 3D LUT maps all three channels together in relation to each other, which is why it’s the standard for nuanced, cinematic color grading.
Q6: What is the main difference between a LUT and a preset?
Presets are saved combinations of software sliders (exposure, contrast, sharpness) applied on top of an edit. LUTs are fixed mathematical tables that remap specific RGB color and tonal values into new ones, independent of slider positions.