TL;DR
- Fix white balance first, then exposure, then sync by scene, then local adjustments, retouching and export. Fixing things out of order means doing them twice.
- Pull highlights to keep lace detail. Set white balance per lighting scene, judging by skin rather than the dress.
- Perfect one anchor image per lighting setup, sync it across similar frames, and fix only the outliers.
- Set white balance for faces and mask the background. Run AI Denoise early, before sharpening.
- Use frequency separation or light Lightroom retouching, and save detailed work for hero shots.
- Light and airy, dark and moody or film-inspired all come down to the same few adjustments, applied the same way across every image.
- Lightroom Classic handles the volume, Photoshop handles hero images, and AI tools like Aftershoot apply your editing style across the gallery so you can focus on the final calls.
The ceremony was perfect. Then you open the RAW files: a groom lit orange by tungsten, a dress with no detail left in the highlights, and more than a thousand frames that need to look like they came from the same day.
Wedding photography editing techniques close that gap. They aren’t one magic preset. They’re a repeatable order of decisions: white balance per scene, exposure that protects the dress, and skin tones that hold from getting-ready to the dance floor. Apply them fast enough and you still deliver on time.
This guide covers the techniques working wedding photographers rely on in Lightroom and Photoshop, the settings to start from, how popular editing looks are built, and where AI can take the repetitive part off your plate. If you’re still defining your look, start with our guide to building a consistent editing style.
How to edit wedding photos (the short answer you’re looking for)
- Back up the RAW files and cull down to your keepers.
- Apply your base preset or AI profile to the whole gallery.
- Correct white balance and exposure on one anchor image per lighting scene.
- Sync those settings across each scene, then fix the outliers.
- Refine key images with local adjustments: masks, dodging and burning.
- Retouch skin and remove distractions on hero shots only.
- Export sRGB JPEGs for web and full-resolution files for print.
Before You Edit: Three Checks That Can Save You Hours
Editing technique can’t rescue a messy starting point. Run these three checks before you touch a slider. For the full import-to-delivery process, see our wedding photography editing workflow.
1. Backup Raw Files
Wedding photos are irreplaceable treasures capturing a couple’s special day. That’s why safeguarding your original, unedited RAW files is paramount. Copy every card to your working drive, then create a second copy on a separate drive and a third off-site or in the cloud before you format anything. Wedding files can’t be reshot. Our photography backup plan walks through a setup that works. You can also invest in reliable external hard drives and cloud storage solutions to create a robust backup system.
This ensures you have pristine copies in case of accidental deletion or hardware failure.
2. Organizing and Culling Photos
Once your backup is complete, you can move on to organizing and culling your photos. In this step, we are dealing with thousands of images. To avoid feeling overwhelmed, embrace the power of organization. Most editing software comes with built-in tagging and categorization features. Use these tools to group photos by ceremony, reception, or key moments.
Next comes the crucial step of culling, where you select the best images and discard blurry, repetitive, or out-of-focus shots. Traditionally, this can be a time-consuming process.
However, with AI-powered culling software like Aftershoot, it is easier to analyze your photos and identify strong contenders based on factors like sharpness, exposure, and composition. These tools can significantly accelerate the process, freeing up your time to focus on the finer details of your editing.
3. Calibrate your monitor
To ensure your editing reflects your artistic intent, calibrating your monitor is crucial. If your screen runs warm or bright, every skin tone you “fix” will be wrong on your client’s phone and in print. A hardware calibrator such as a Calibrite or Datacolor device takes a few minutes and should be re-run monthly. This process adjusts your display’s settings to accurately represent colors and prevent edits that might appear different when viewed on other devices.
The Wedding Photo Editing Order That Keeps Galleries Consistent
The order you edit in matters as much as the adjustments themselves. Global changes like white balance and exposure affect everything downstream. Retouching a face before fixing its colour means doing it twice. If you’re newer to the Develop module, our guide to editing photos in Lightroom covers the basics.
| Step | What You Adjust | Where | Why It Comes Here |
|---|---|---|---|
| 1 | Profile, preset or AI profile | Develop (Lightroom Classic) or Aftershoot | Puts the whole gallery in the same starting look |
| 2 | White balance | Basic panel | Every colour decision after this depends on it |
| 3 | Exposure and tone | Basic panel, Tone Curve | Protects dress highlights before contrast is added |
| 4 | Sync by scene | Library/Develop: Sync or Auto Sync | Turns one good edit into fifty |
| 5 | Noise reduction | AI Denoise | Works best early, before sharpening and masks |
| 6 | Local adjustments | Masking | Directs attention once the global look is set |
| 7 | Skin and distractions | Lightroom Remove tool, Photoshop | Only on hero images, where it’s worth the time |
| 8 | Crop, final check and export | Crop tool, Export | Final framing and output for web and print |
11 Wedding Photography Editing Techniques Professional Photographers Rely On
Don’t feel like playing around with AI just now and want to do the work yourself? We have some editing ideas and tips for you too.
PS: These are the techniques that do the heavy lifting in a wedding edit. The slider values are starting points, not rules. Your camera, your light and your style will move them.
1. Fix White Balance for Skin Tones
Most editing software offers various white balance presets like “daylight” or “tungsten,” or allows you to adjust the color temperature manually. Choose the setting that best represents the lighting environment where the photo was taken.
Wedding days move through several lighting setups: window light in the prep room, shade at the ceremony, tungsten at the reception. Set white balance per scene, not per gallery.
Use the eyedropper on something truly neutral, like a grey card, a white shirt collar or a light grey wall. Don’t sample the dress. Bridal whites are often ivory or champagne, and neutralising them turns skin grey. Then judge by skin rather than by the numbers. Skin should look warm and healthy, with no green or magenta cast in the midtones.
Starting point: Fix Temp first, then Tint. Most wedding skin reads best slightly on the warm side of neutral.
2. Recover Exposure Without Losing the Dress
The dress is usually the brightest thing in the frame, so expose and edit around it. Hold Alt/Option while dragging the Whites slider to see exactly where clipping starts. Pull Highlights down until lace and fabric texture return, then lift Shadows to open up dark suits and faces.
Starting point: Highlights −30 to −60, Shadows +20 to +40, then set Whites and Blacks with the clipping preview.
Bracketing only helps for static subjects like the venue, the rings or the table setup. There, Lightroom’s HDR Merge can combine frames. For people in motion, a single well-exposed RAW file plus careful highlight recovery is the practical answer.
3. Batch-Sync Edits by Scene
Batch editing is what makes a wedding edit finishable. Perfect one anchor image per scene, select every frame from that scene, and sync the settings (Ctrl/Cmd + Shift + S, or turn on Auto Sync). Then scroll through and fix only the outliers, usually exposure after your flash misfired or someone stepped into shade.
In Lightroom Classic, Match Total Exposures can even out brightness across a burst shot at slightly different settings. Leave crops and local masks out of the sync. They rarely translate from frame to frame.
4. Handle Mixed and Low Light at the Reception
Receptions combine dim ambient light, tungsten, LEDs and your flash, often all in one frame. Prioritise skin. Set white balance for the faces, then use a mask to correct the background separately. A people mask with slightly cooler Temp can tame orange uplighting behind the couple without touching their skin.
For high-ISO files, run AI Denoise early. It creates a new DNG, so apply it before masking and sharpening. Keep sharpening subtle afterwards. Denoised files tolerate less than you’d expect before looking crunchy.
5. Use AI Masks to Direct the Eye
Lightroom’s AI masks select the subject, sky, background or individual people in a click. People masks can isolate facial skin, eyes, lips, teeth and hair. Use them to do what dodging and burning did in the darkroom: brighten the couple slightly, drop a busy background, add a little light to the eyes.
A subtle radial or edge darkening does the job of a vignette with more control. Keep it light enough that nobody notices it. Our guide to AI masking goes deeper.
This feature then adapts your wedding photography editing style and applies it automatically to all your selected photos. It also helps to make sure all your edits are consistent.
6. Refine Skin Tones With HSL
Most skin lives in the orange channel, with some red. If skin looks too saturated or ruddy after your preset, pull Orange Saturation down slightly and lift Orange Luminance to brighten faces. Check reds for flushed cheeks and hands.
Starting point: Orange Saturation −5 to −15, Orange Luminance +5 to +10. Watch other orange elements in the scene, such as wooden floors and autumn leaves; a people mask keeps the change on skin only.
7. Retouch Skin Without the Plastic Look
Retouching wedding portraits is about refinement, not transformation. Remove temporary things like blemishes, redness and stray hairs, and leave permanent features alone unless the client asks.
For light work, Lightroom’s Remove tool and a mask with slightly negative Texture handle most images. For hero portraits, frequency separation in Photoshop splits the image into two layers: a low-frequency layer holding colour and tone, and a high-frequency layer holding texture and fine detail. Heal blemishes on the high-frequency layer, and smooth blotchy tone on the low-frequency layer. Pores and fine texture stay intact, so skin never goes plastic.
Doing this across hundreds of portraits is where AI retouching helps. It handles blemishes and skin evenness across a gallery, and you review the result.
Also read: Wedding Retouching
8.Remove Distractions in Seconds
Exit signs, fire alarms, a guest’s phone above the aisle. Lightroom’s Remove tool, including Generative Remove, handles most of these without leaving Lightroom. For larger or more complex removals on key images, Photoshop’s Generative Fill and Content-Aware Fill give more control. Save this for images the couple will print or share. It isn’t worth it on every frame.
9. Crop and Straighten With Intent
Straighten first: horizons, door frames and church aisles should be level and vertical. Then crop for the story. A tight crop on an embrace creates intimacy, while a wider frame that keeps the venue sets the scene. Stay with standard print ratios (2:3, 4:5) on images the couple is likely to print or put in an album. Our guide to photography composition techniques covers the principles.
10. Color Grade for a Consistent Look
Colour grading is where your style lives. Lightroom’s Color Grading panel tints shadows, midtones and highlights separately. Warm highlights with slightly cool shadows is a classic cinematic split. Keep saturation values low; single digits to the low teens is usually enough.
Save your grade as a preset or apply it through LUTs so every wedding starts from the same look. If you’re looking for a starting point, see our roundup of wedding Lightroom presets.
Film effects like grain and slightly lifted blacks belong here too. Apply them consistently across the gallery or not at all. A few grainy frames among clean ones looks like a mistake.
11. Convert Key Moments to Black and White
Black and white conversion isn’t a one-size-fits-all technique, but a powerful tool for professional wedding photographers to evoke specific emotions and create timeless narratives. Black and white strips away color distractions, allowing raw emotion to take center stage.
Use it for intimate moments like stolen glances, heartfelt speeches, or first dances. Or accentuate textures like lace on a wedding dress, the intricate details of floral arrangements, or the weathered brick of a historic building.
Don’t just desaturate. In the B&W mix, raise orange and red luminance to keep skin bright, and darken blues for a deeper sky. It’s also a clean fix for frames with ugly mixed light that colour correction can’t save.
Export Settings for Wedding Galleries
Most couples need two versions of every image: one sized for phones and social media, and one for prints and albums.
| Setting | Web / Social | Print / Album |
|---|---|---|
| File type | JPEG | JPEG (or TIFF if your lab asks) |
| Colour space | sRGB | sRGB for most labs; use the lab’s profile if they supply one |
| Size | ~2048 px on the long edge | Full resolution, no resizing |
| Quality | 75–85 | 90–100 |
| Output sharpening | Screen, Standard | Matte or Glossy, to match the paper |
| PPI | Irrelevant for screens | 300 (only affects print size metadata) |
Pixel dimensions, not PPI, decide how sharp an image looks on screen. Deliver through a proper client gallery rather than a download link. It’s the last impression the couple gets of your work.
Popular Wedding Photo Editing Styles and How They’re Built
Every wedding editing style is a combination of the techniques above, pushed in a particular direction. Here’s how the most requested looks are built. For client-facing descriptions and examples, see our breakdown of wedding photography styles.
| Style | Key Adjustments | Works Best For | Watch Out For |
|---|---|---|---|
| Light and airy | Higher exposure, lifted shadows, low contrast, softened greens, pastel tones | Outdoor and daylight weddings | Blown dress highlights; washed-out skin |
| True-to-colour | Neutral white balance, moderate contrast, restrained saturation | Any venue; timeless galleries | Mixed light shows every colour cast |
| Dark and moody | Lower exposure, deep but detailed shadows, warm or earthy tones, muted greens | Evening, autumn, candlelit or indoor venues | Muddy skin; crushed blacks |
| Film-inspired | Faded blacks via the tone curve, grain, film-stock colour shifts | Editorial and destination work | Inconsistent grain across the gallery |
| Bright and vibrant | Punchy saturation, higher contrast, clean whites | Colourful décor, cultural weddings | Oversaturated skin (check orange in HSL) |
| Black and white | B&W mix tuned for skin, added contrast | Emotional moments; messy mixed light | Flat, grey conversions |
Start From a Photographer’s Look With AI Styles
Want a look like one of these without building it from scratch? The Aftershoot Marketplace offers AI Styles created by working wedding photographers. Each one applies the photographer’s look image by image rather than as a fixed preset. Creator styles are sold individually, and several list at $99, so check each style’s page for current pricing.
| AI Style | Creator | The Look |
|---|---|---|
| Creamy Dreamy | Cassidy Lynne | Soft, editorial, true-to-colour with creamy skin tones |
| The Founder Style | Justin Benson | Detail-rich; built for images underexposed in camera and lifted in post |
| Lilly Red | Lilly Red | Bold, vibrant and fashion-forward, with true tones |
| Paris | Joy Zamora | Nostalgic black and white |
| Elevated Edit: Soulful, Luxury + True-to-Life | Katie Monroe | Film-inspired, luminous true-to-life colour, evolved from Kreate Naturelle |
5 Creative Wedding Photography Editing Styles, Techniques & Ideas You Should Try Out
Now that your photos are safely backed up, organized, and culled, it’s time to unleash your creativity! As a photographer, this is where we want to show our personality, style, and uniqueness.
By consistently using specific creative editing techniques, photographers develop a recognizable signature style. This visual language becomes their calling card, attracting clients who resonate with their artistic approach. Don’t be afraid to experiment, push boundaries, and discover your unique style.
Below, we’ve outlined a mix of basic, advanced, and creative wedding photo editing styles, ideas, and techniques to help you get started.
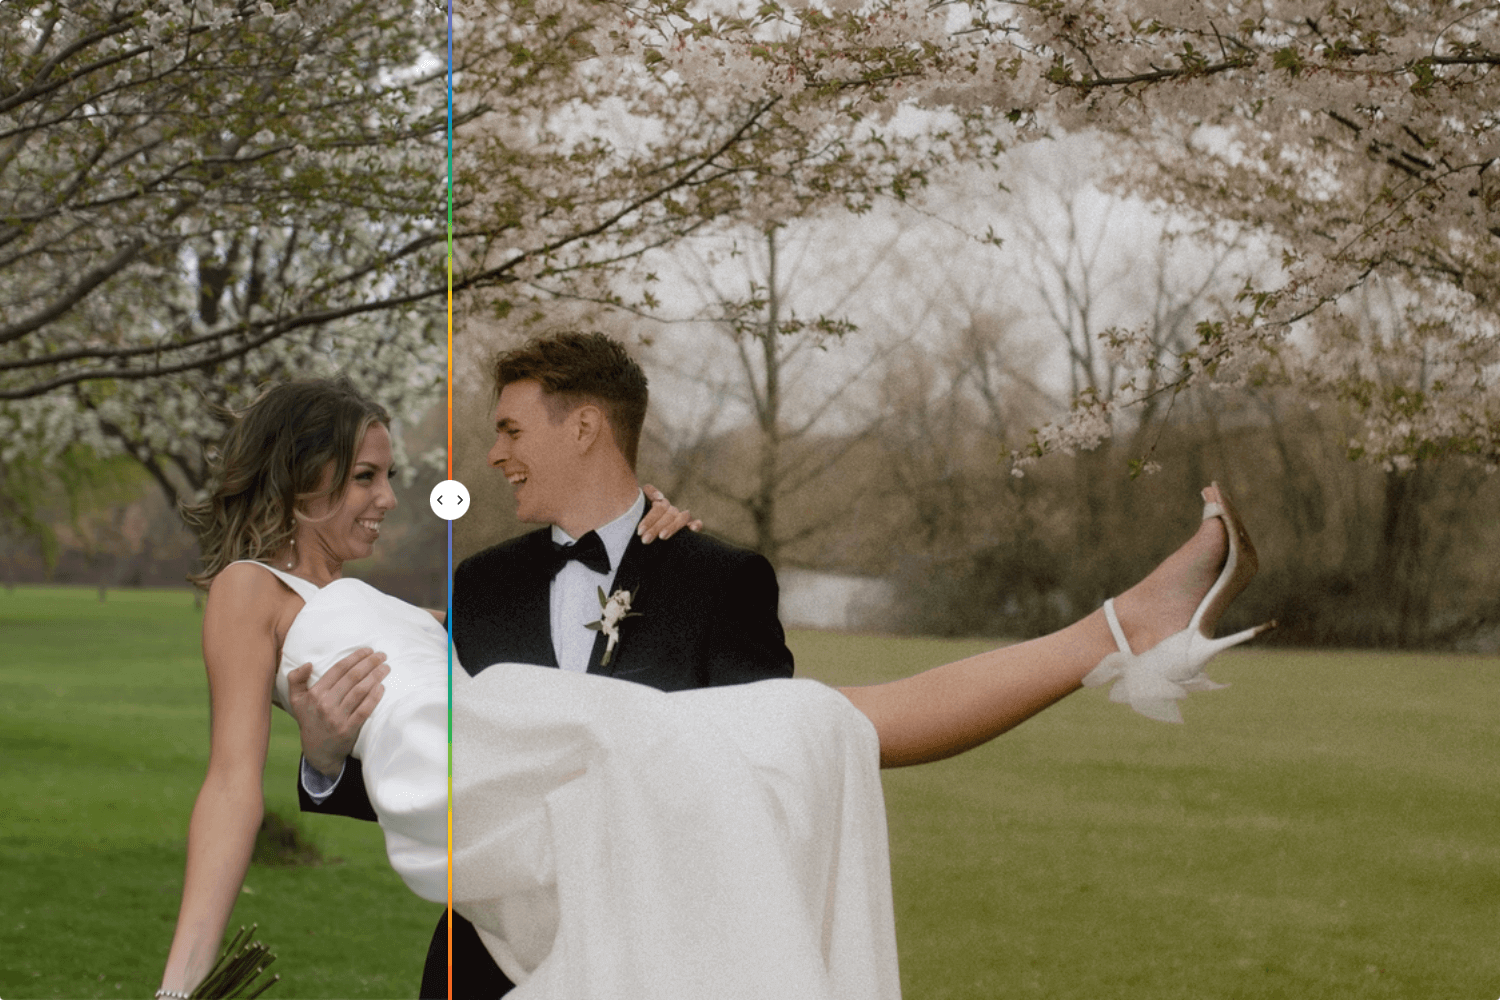
#1 – Cassidy Lynne’s Creamy Dreamy Style
Add a soft dreamy look to your photos to make your clients’ special day one to remember. This is an editorial, subtle, and soft editing style, with true-to-color edits and ultra creamy skin tones.
Try out this AI style from the Aftershoot marketplace.
#2 – Justin Benson’s The Founder Style
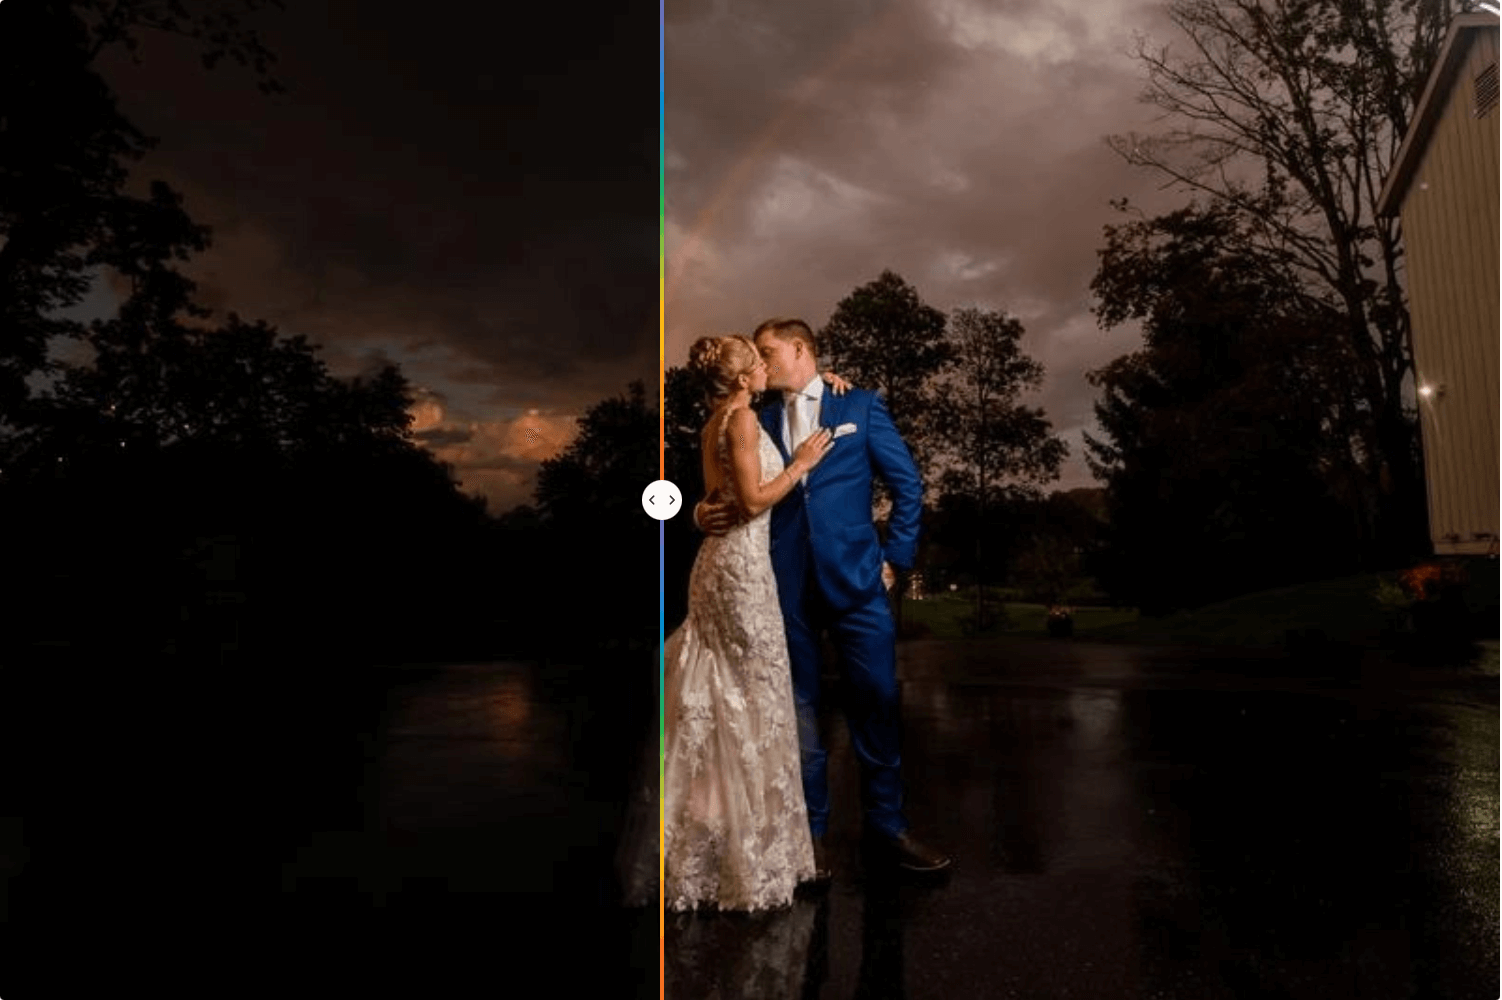
From Aftershoot co-founder Justin Benson comes this complex style that plays with exposure to draw out the details. By underexposing pictures during the shoot and cranking up the exposure during post, this editing style plays with highlights and shadows beautifully.
Get this AI style from the Aftershoot marketplace.
#3 – The Iconic Lilly Red
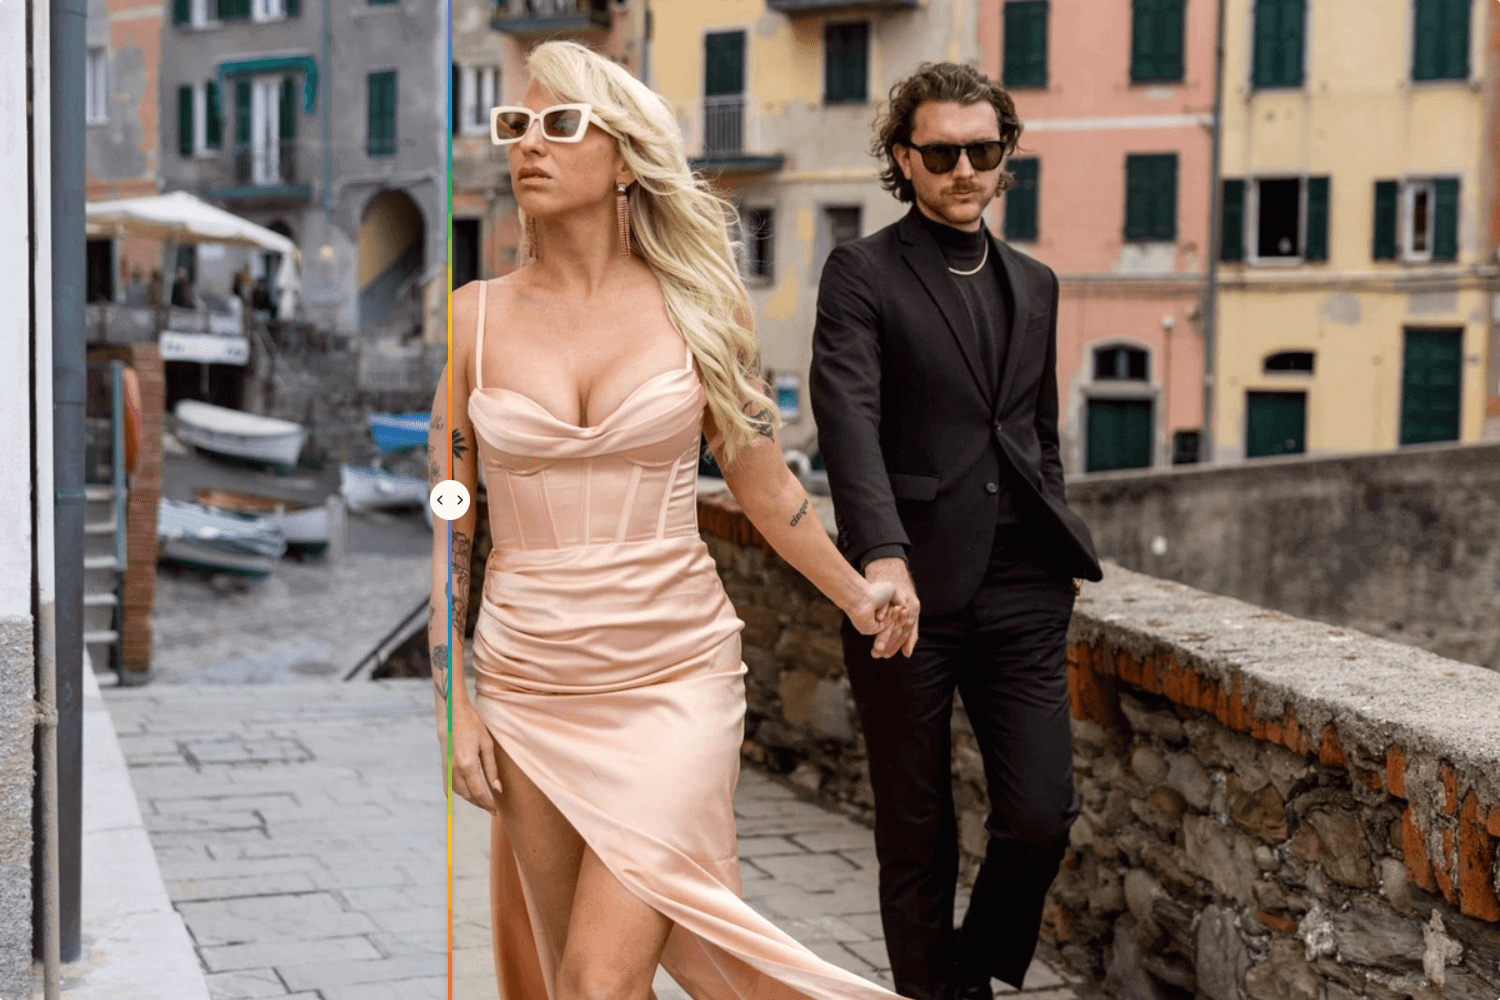
Lilly Red is famous for her bold, vibrant, and fashionable shots, and you too can try out her editing techniques by using this artistic style!
Try out this AI editing style on the Aftershoot marketplace.
#4 – Joy Zamora’s Paris
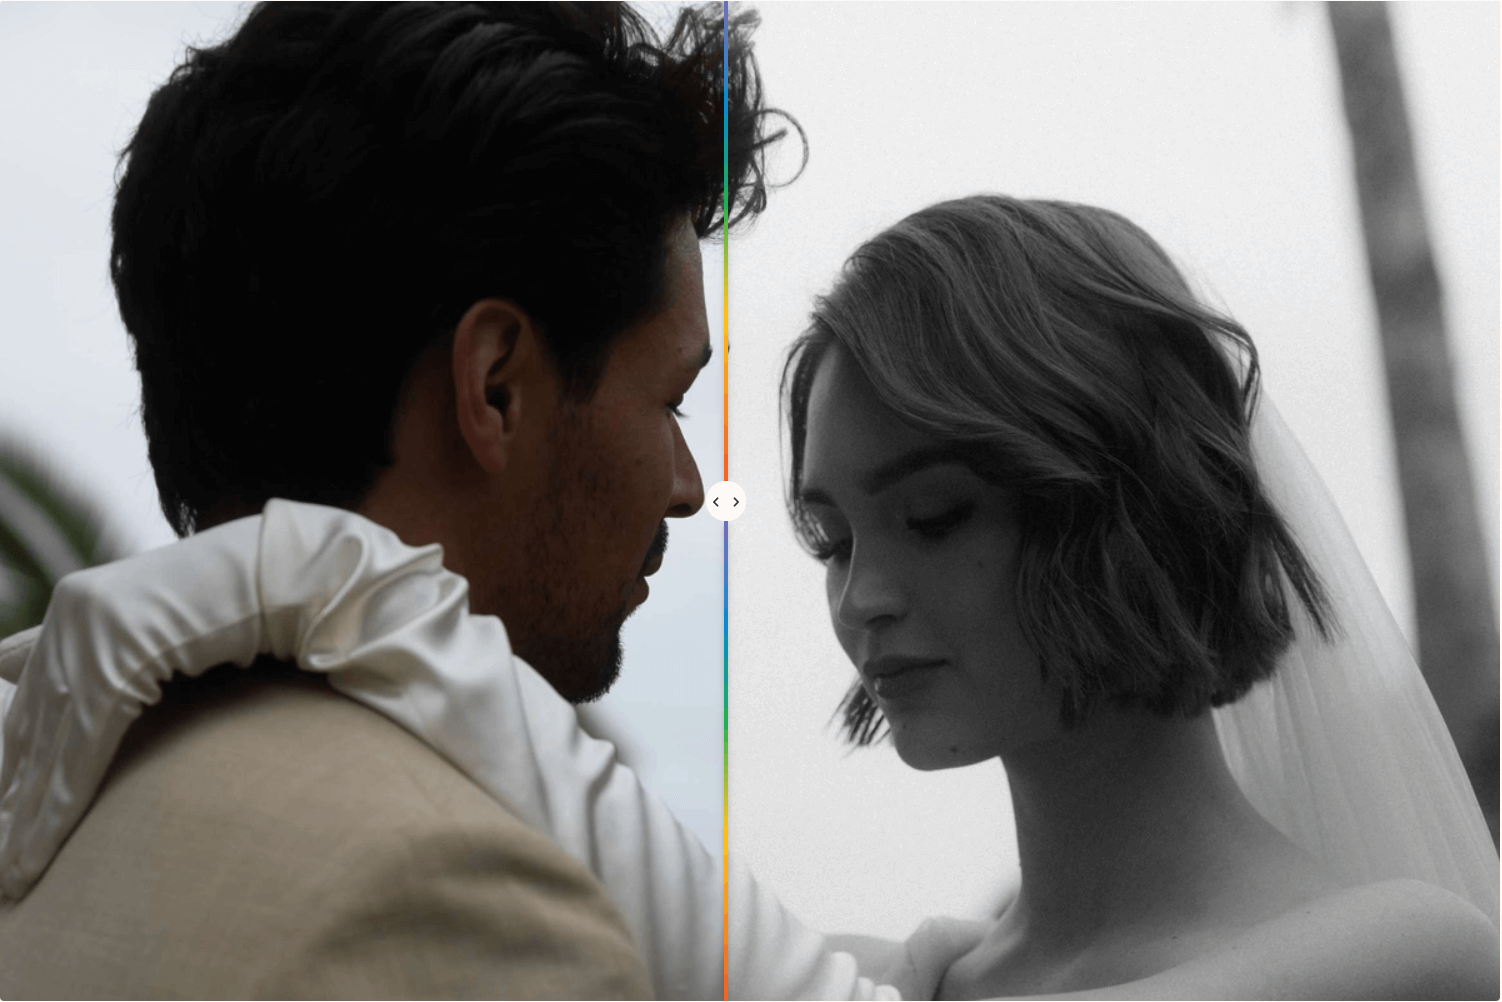
Sometimes a picture speaks for itself, and nothing spells romance more than nostalgic black and white captures that highlight raw emotions free from any distractions.
Try out this AI style on the Aftershoot Marketplace.
#5 – Katie Monroe’s Kreate Naturelle Style
One of the most popular AI styles on Aftershoot, Kreate Naturelle gives off a feeling of refined luxury and elegance while staying bold, vibrant, and true to life.
Try out this AI style on the Aftershoot Marketplace today.
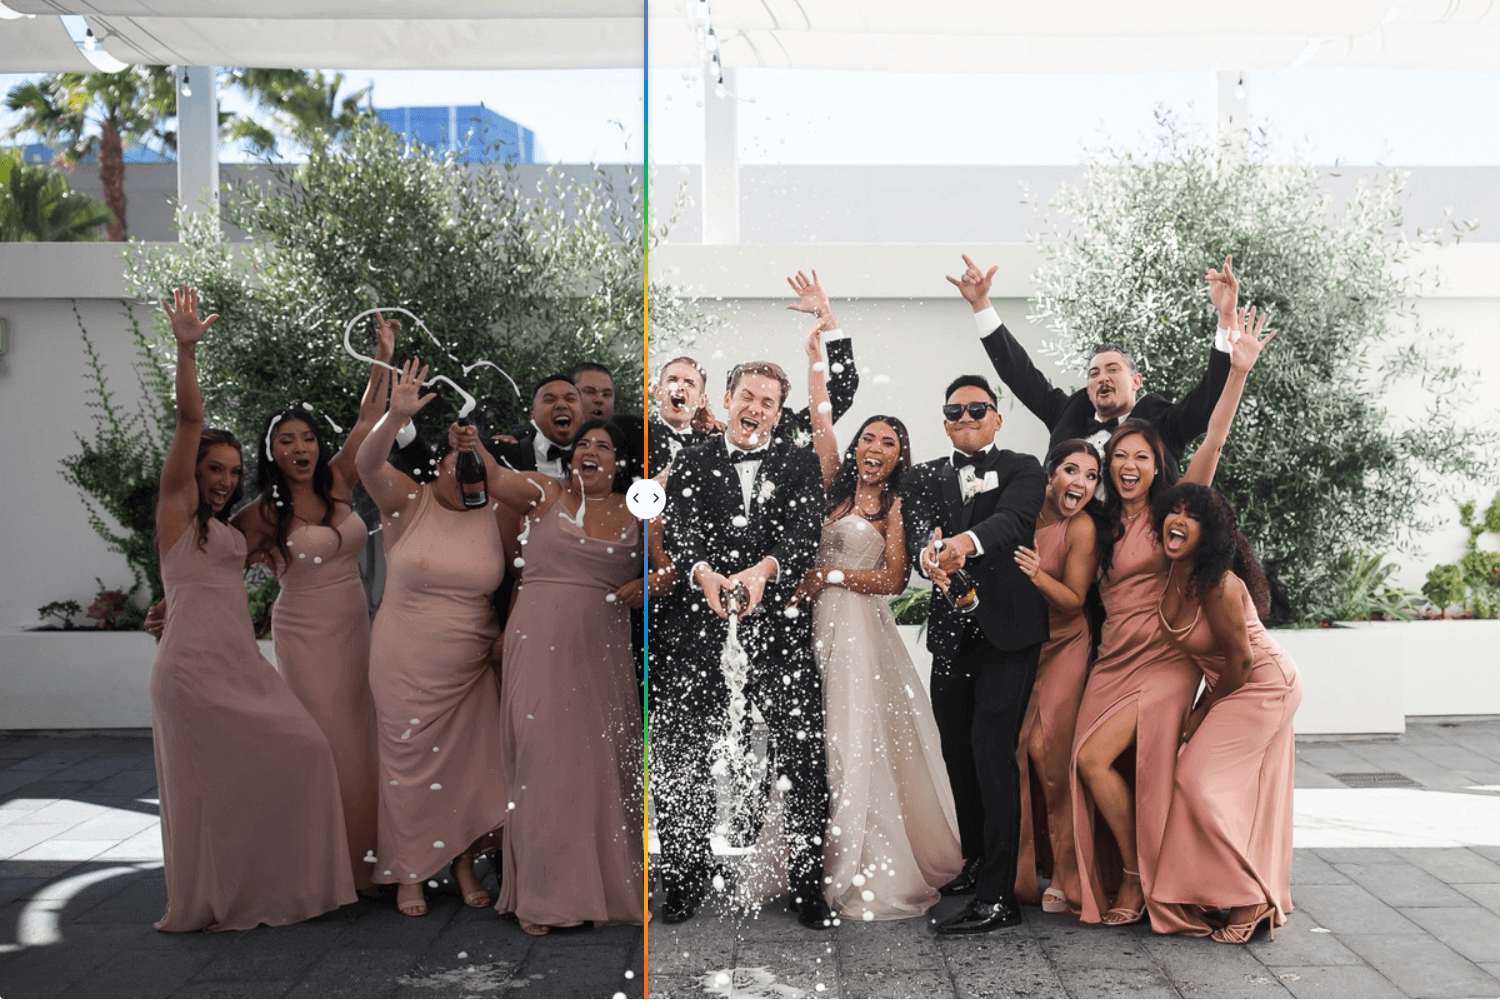
How to Edit Wedding Photos Faster With AI in Aftershoot
Did we tell you that you can do all this on Aftershoot with just a few clicks? Let’s talk about how to edit wedding photos using AI. It’s super simple, quick, and efficient.
Everything above works, and it’s also repetitive. White balance per scene, exposure fixes, syncing, fixing outliers: that’s the part of a wedding edit AI handles well, while you keep the creative calls. AI photo editing in Aftershoot learns how you edit and applies it image by image, adjusting for each frame’s light rather than pasting one preset across everything.
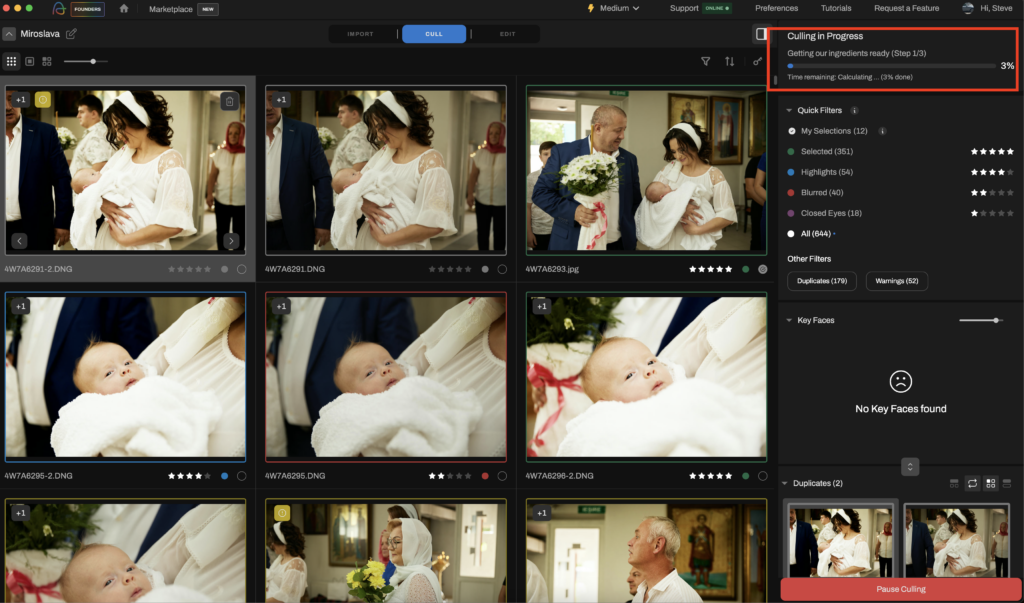
Step 1: Import and Cull
Create a new album, import the wedding, and cull. The AI flags blur, closed eyes and duplicates, and you review its selections before anything moves forward.
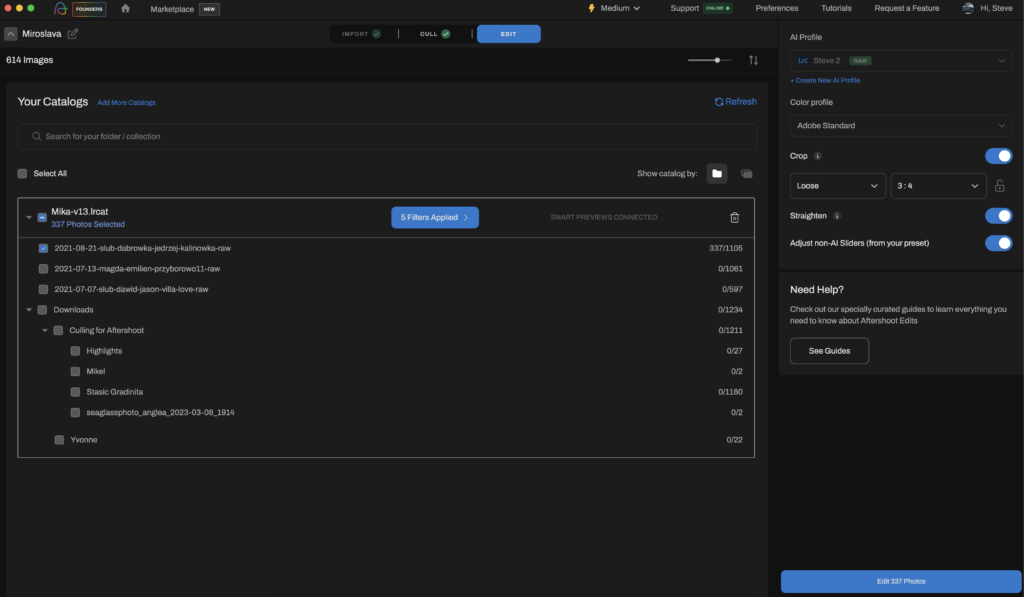
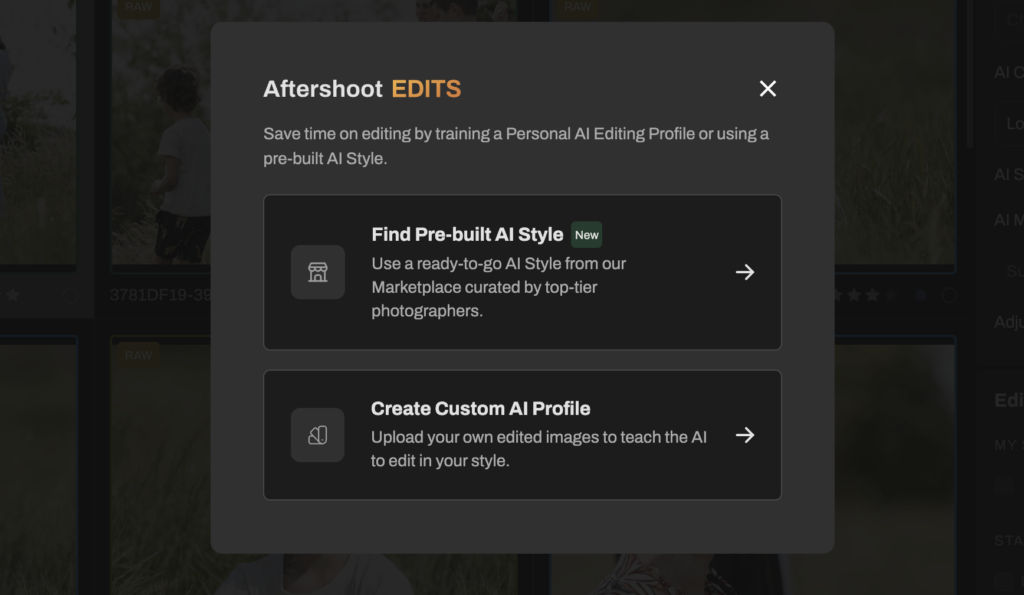
Step 2: Choose How the AI Edits
Open the Edit tab and pick one of three starting points:
- A Personal AI Editing Profile, trained on your own past edits (at least 2,500 edited images from Lightroom or Capture One catalogs)
- An Instant AI Profile, created from a Lightroom preset you already use: drop in the preset file and calibrate exposure and white balance on three photos
- An AI Style from the Aftershoot Marketplace, built from a professional photographer’s look
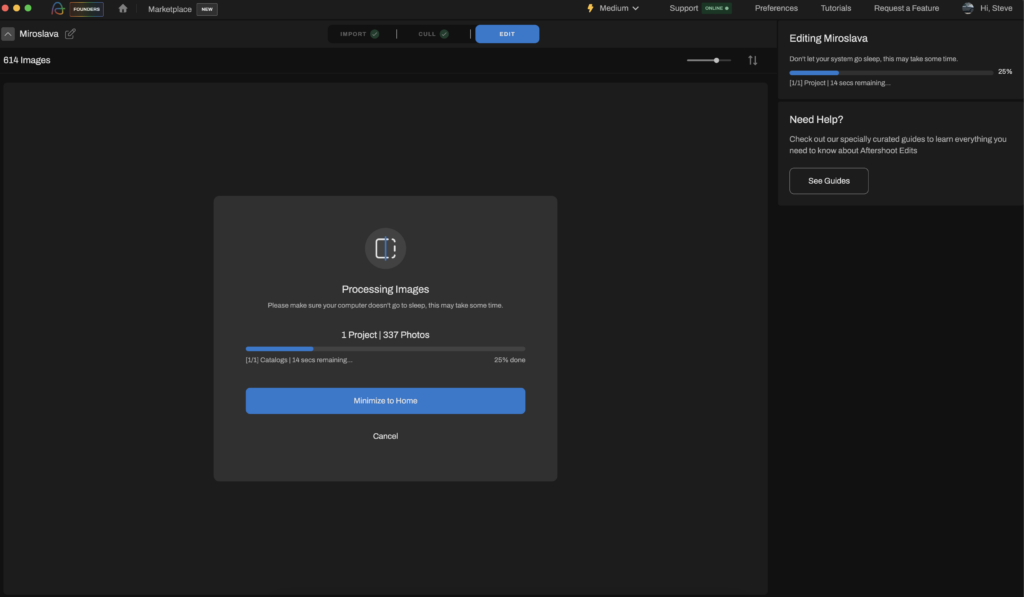
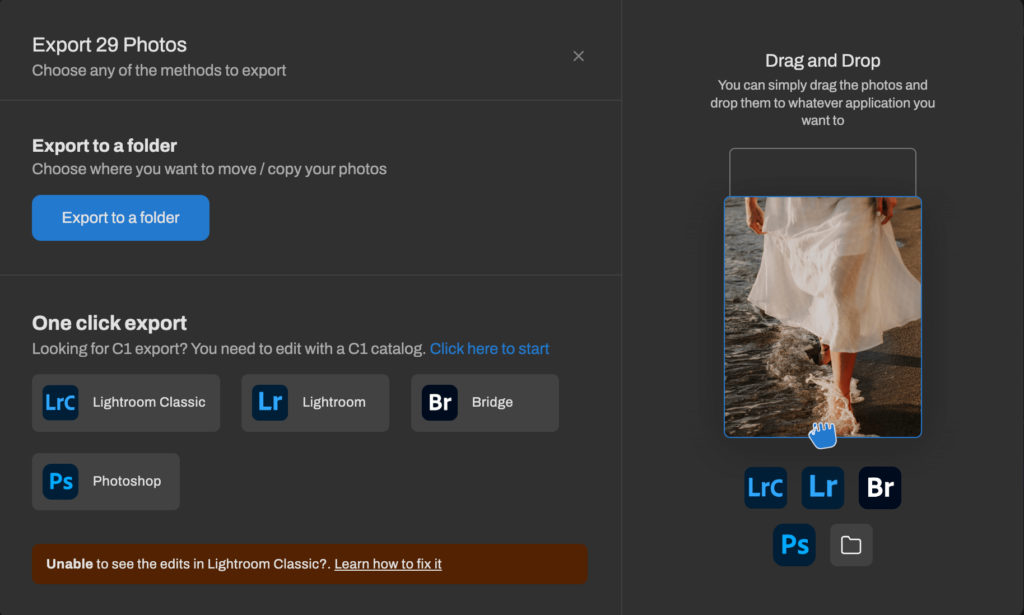
Step 3: Review and Export
Open the edits in Lightroom, Capture One or Photoshop and review them there. Tweak whatever needs your judgement, like hero portraits or tricky mixed light. Your Personal AI Profile keeps learning from your corrections.
Best Wedding Photo Editing Software Compared
Most wedding photographers edit in Lightroom Classic and finish hero images in Photoshop. The question is what you add on top to cut the hours. Here’s how the main options compare for wedding work. Pricing is as of September 2026; check each vendor for current rates.
| Tool | Best For in a Wedding Workflow | Pricing | Trade-offs |
|---|---|---|---|
| Adobe Lightroom Classic | Organising, global edits, batch syncing, AI masks | Subscription only; Lightroom plan from $14.99/mo (annual, billed monthly); plans with Photoshop cost more | No perpetual licence; catalog-based |
| Adobe Photoshop | Frequency separation, Generative Fill, hero-image retouching | Included in Adobe’s photography bundles | Too slow for full-gallery work |
| Capture One Pro | Colour control, tethered portraits | Subscription or perpetual licence; prices rose 6% in 2026 | Steeper learning curve; fewer preset options |
| ON1 Photo RAW 2026 | All-in-one editing without a subscription | One-time licence (list $99.99, often discounted) or subscription | Heavier on GPU; smaller ecosystem |
| Aftershoot | AI culling, editing in your style and retouching; unlimited images, runs locally | Edit from $30/mo annual ($35 monthly); Select + Edit + Retouch bundle $45/mo annual ($55 monthly); 30-day free trial | Personal profiles need a past catalog (or start from a preset with Instant AI Profiles) |
| Imagen | AI editing billed per photo | From $0.05 per edited photo pay-as-you-go ($7 monthly minimum), extra per AI tool; flat Limitless plan available | Costs scale with volume |
For a deeper look at each option, see our guide to the best wedding photo editing software.
Your Edit Is Your Signature
Clients book you for how your photos feel, and that feeling is built in the edit. Consistent white balance, protected highlights, natural skin and a colour grade you apply the same way every time are what turn a folder of RAW files into a gallery that looks unmistakably yours. Before your next gallery goes out, run it past our list of common photo editing mistakes.
If the repetitive part is what’s slowing you down, Aftershoot can cull, edit and retouch in your style while you keep the final say. Try it free for 30 days, no credit card required.
Q1. How do wedding photographers edit their photos?
Most wedding photographers cull first, apply a base preset or AI profile, then correct white balance and exposure for one image per lighting scene and sync it across similar frames. Local adjustments, retouching and distraction removal are saved for key images. Lightroom Classic handles most of the work, with Photoshop for detailed retouching.
Q2. What software do most wedding photographers use?
Lightroom Classic is the industry standard for editing a full wedding, with Photoshop for hero-image retouching. Capture One and ON1 Photo RAW are common alternatives. Many photographers add AI tools like Aftershoot to automate culling and apply their editing style across the gallery.
Q3. How long does it take to edit a wedding?
It depends on gallery size, style complexity and tools. Manually, a full wedding typically takes several working days of culling and editing. AI can cut that sharply. Aftershoot co-founder Justin Benson went from about 20 hours of culling and editing per wedding to about 3 after switching to AI.
Q4. Should I edit wedding photos in Lightroom or Photoshop?
Use both, for different jobs. Lightroom is built for editing hundreds of images consistently through presets, syncing and masks. Photoshop is for pixel-level work on a handful of hero images, such as frequency separation or removing large distractions. Editing a whole wedding in Photoshop isn’t practical.
Q5. Can AI edit wedding photos in my style?
Yes. AI editing tools learn from your past edits and apply your look image by image, adjusting for each frame’s light. In Aftershoot, you can train a Personal AI Profile on at least 2,500 of your edited images, or create an Instant AI Profile from a Lightroom preset. You review and adjust the results before delivery.
Q6. How do you keep skin tones consistent across a wedding gallery?
Set white balance for skin in each lighting scene, not once for the whole gallery. Perfect an anchor image, sync it to similar frames, and fine-tune the orange channel in HSL. Where lighting is mixed, use a people mask to correct skin separately from the background.