- Editing engagement photos requires balancing print-ready accuracy with your signature style.
- Align with the couple on their aesthetic and intended output (e.g., 5×7 save-the-dates), and shoot intentionally in RAW while exposing for skin.
- Cull to 50–100 keepers using AI tools, then batch-edit by lighting scene using presets or AI profiles for consistency.
- Nail white balance and HSL sliders (specifically Orange/Red) for natural skin tones. Shape mood with tone curves, remove background distractions, and crop intentionally for social media, prints, and banners.
- Limit retouching to temporary blemishes, sequence the gallery like a narrative arc, export in sRGB JPEG format, and deliver 5–10 quick sneak peeks to build client excitement.
Engagement sessions are short, usually shot in golden hour, and often end up on save-the-dates, wedding websites and framed prints. That changes how you edit them. Skin tones need to hold up in print. Crops need to fit a 5×7 card. The gallery sets your couple’s expectations for the wedding itself.
This guide covers engagement photo editing from start to finish: 12 tips, style settings by location, an editing workflow, and the software photographers use for each step.
Quick answer: How do you edit engagement photos?
Cull to your strongest 50-100 frames. Apply a consistent base edit, then correct white balance for natural skin tones. Shape light and contrast to match your style, then straighten and crop for how the photos will be used. Remove distractions, retouch lightly, and export in sRGB for online galleries and print.
| Engagement Photo Editing Tip | What to Do | Why It Matters |
|---|---|---|
| Start with the couple’s vision | Agree on mood and on where the photos will be used | Guides every edit and cuts revision rounds |
| Shoot with the edit in mind | Shoot RAW and expose for skin | Less fixing in post |
| Cull first | Pick keepers before editing | You only edit what you deliver |
| Build a consistent base | Presets or AI profiles, synced by lighting scene | A gallery that looks like one set |
| Nail white balance | Temp/Tint, then HSL for skin | Natural, flattering skin tones |
| Shape light and contrast | Tone curve and masks | Sets the gallery’s mood |
| Straighten and crop | Level horizons; crop for 5×7 and social | Works on save-the-dates and feeds |
| Clean the background | Remove tool, lens blur, vignette | Keeps focus on the couple |
| Retouch naturally | Flyaways and blemishes; keep texture | They still look like themselves |
| Grade and sequence | Color grade; order images as a story | A gallery that feels intentional |
| Export and deliver | sRGB JPEGs, sneak peek, clear revision policy | Faster delivery, fewer back-and-forths |
Top 12 Engagement Photo Editing Tips
These engagement photo editing tips follow the order most photographers actually work in: cull, build a base edit, correct color, then refine. The order matters. Fixing white balance before you color grade, for example, saves you from redoing the grade when skin tones shift. Start with the keepers, and every step after gets faster.
PS: The first two tips happen before you open Lightroom.
1. Start With the Couple’s Vision
Before you even press the shutter, have a conversation.
Ask them:
→ “How do you want your photos to feel?”
→ “How would you describe your relationship: Playful? Soft? Dramatic?”
→ “Are you drawn to soft and romantic? Moody and cinematic? Bold and colorful?”
Understanding their aesthetic preferences will guide your editing style later, from how you use contrast to which presets you choose.
Ask one more practical question: where will these photos end up? Save-the-dates, a wedding website banner, a framed print and an Instagram announcement all need different crops. Knowing that up front shapes how you compose and how you crop in Tip 7.
Bonus: This convo also builds trust and makes revision rounds smoother.
Need help including engagement photography in your package? Here is a quick guide to building an engagement photography package that sells itself
2. Shoot With Your Edit in Mind
Editing starts at the shoot, not after.
Be intentional with composition, light, and location. Think:
- Are there distracting elements in the background?
- Is the lighting flattering to their skin tones?
- How can you make the best of the golden hour?
- How will this image look and feel with your usual edit?
A few habits that save the most time later:
- Shoot RAW. You’ll need the latitude when golden hour backlight throws off skin tones.
- Expose for skin, not the sky. A blown highlight on a cheek can’t be recovered; a slightly bright sky usually can.
- Grab one neutral reference frame per location, such as a grey card or a white shirt in the same light. It gives you a white balance anchor when you sync edits later.
- Check the horizon in camera. Straightening in post costs you resolution.
Work through these in order. Each step builds on the one before, so fixing white balance before you grade saves you from redoing the grade.
3. Cull Before You Touch a Slider
A one- to two-hour engagement session can easily produce several hundred frames. Most couples receive a gallery in the 50–100 range, so culling is where the biggest time savings are.
Do a fast first pass for technical rejects (missed focus, closed eyes, awkward mid-blinks). Then do a slower pass to pick the strongest frame from each pose or moment.
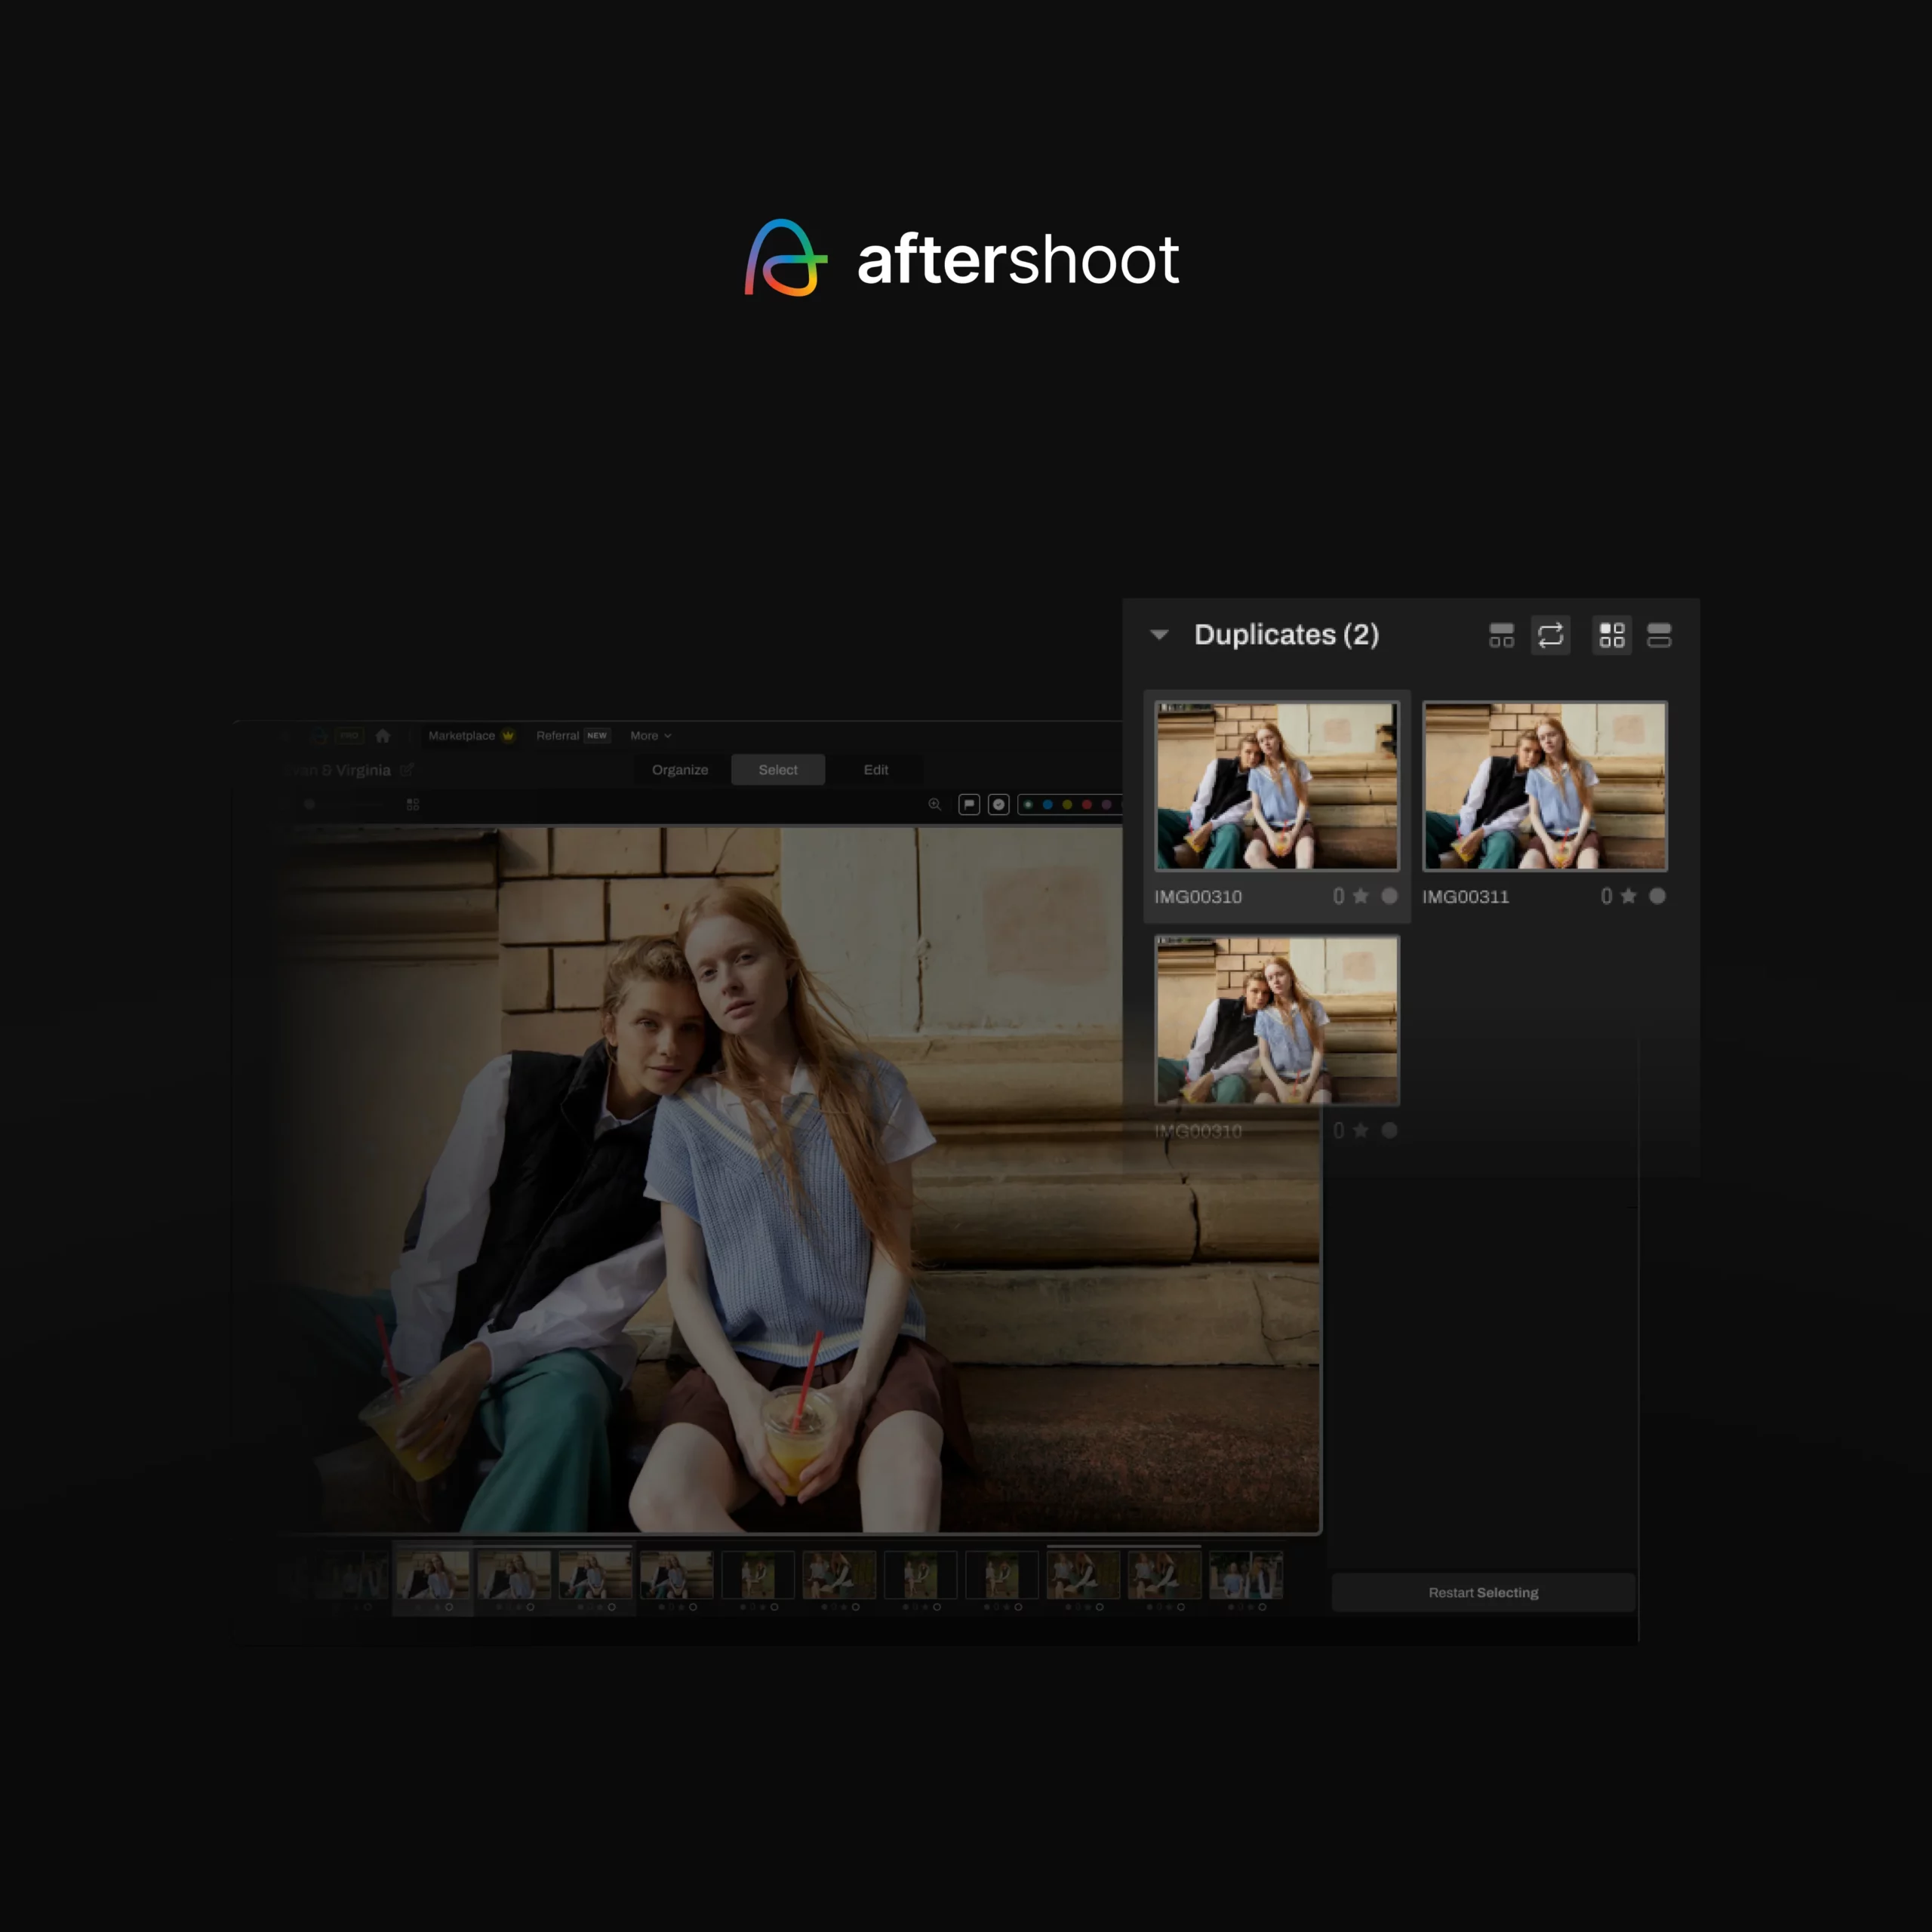
AI culling tools like Aftershoot Select speed up that first pass. Select flags blurry frames and closed eyes, groups near-duplicates, and surfaces key faces. You then decide how much control to hand over: let the AI make the picks (AI-Automated), or have it group and flag while you make every final call (AI-Assisted). If you already know your delivery number, Cull to Target lets you set the final count up front.
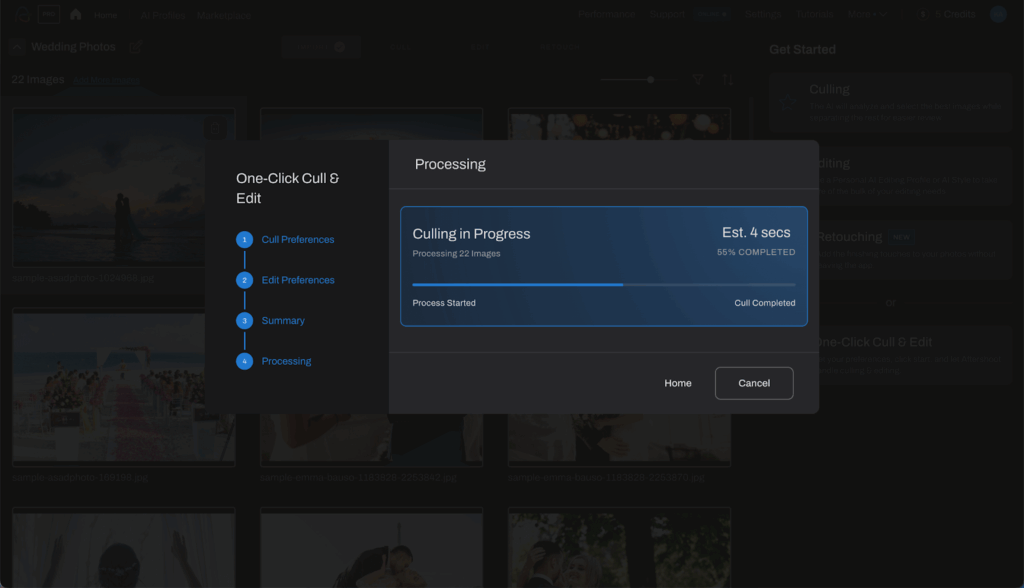
Grouped duplicates and flagged picks in Aftershoot Select.💡 Pro tip: Pick out the right culling tool for you from our list of best culling software for photographers
4. Build a Consistent Base With Presets or AI Profiles
A consistent look is what makes 80 images read as one gallery. But no preset works blind. Golden hour, shade and backlight each shift how the same preset lands.
The practical fix is to batch by lighting scene, not by session. Edit one hero image per location or light. Sync it to the rest of that scene in Lightroom (Sync Settings or Auto Sync), then fine-tune exposure and white balance per image.
Presets give you a starting point. AI editing adapts it per image. With Aftershoot Edit, you can:
- train an AI profile on your past edited work;
- turn your existing Lightroom presets into Instant AI Profiles;
- start from one of the Marketplace styles built by working photographers.
The edits come back into Lightroom, where you still make the final adjustments.
✨ You already know it: Delivering quicker than promised = instant client love.
Try Aftershoot for Free Today to stand out from the competition.
5. Nail White Balance for Perfect Skin Tones
Skin tones are everything in engagement photography. You want them to look true-to-life and flattering, especially when shooting in mixed lighting. Use the temperature and tint sliders to correct lighting or overly warm tones. You want the couple looking glowy, not greenish or orange.
Once white balance is close, fine-tune skin in the HSL / Color Mixer:
- Orange Hue shifts skin between yellow and red. Nudge it slightly left if skin reads yellow.
- Orange Saturation pulls back skin that looks sunburned or “spray-tanned”. It’s common after warming a golden hour image.
- Orange Luminance brightens skin without lifting the whole frame.
- Red Saturation calms flushed cheeks and noses on cold-weather sessions.
Correct each lighting scene once, then sync. The goal is that the couple’s skin looks the same in the shade shot as in the sunset shot.
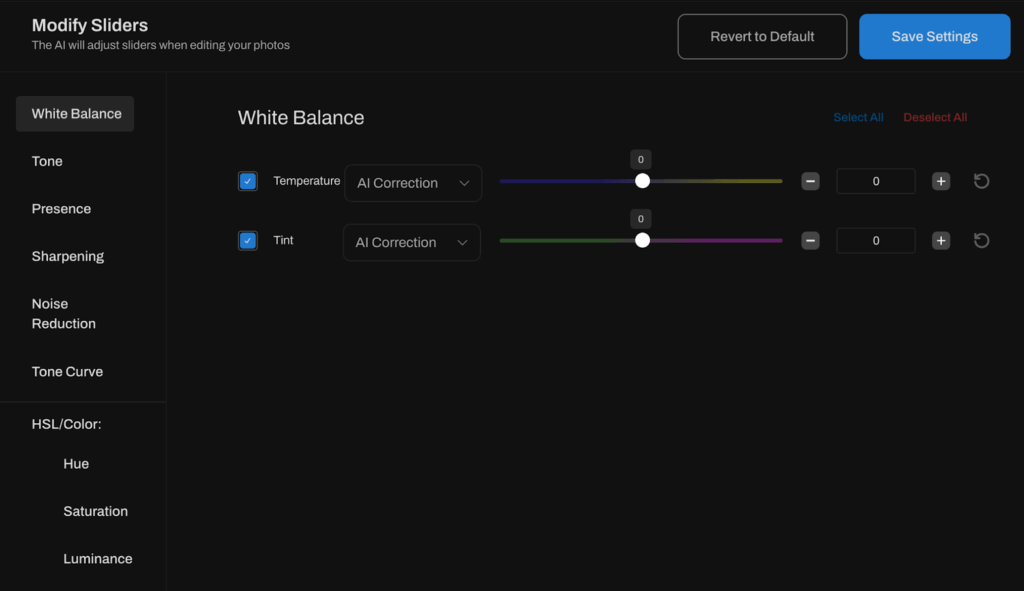
📸 Pro tip: Use eyedropper tools to sample neutral grays in the image and adjust from there. Then fine-tune manually for that natural, radiant finish.
6. Shape Light and Contrast to Set the Mood
For more control than global sliders, use the tone curve. Lift the black point for a faded, film-like look; add a gentle S-curve for depth.
Then use masks to direct light:
- a Subject mask with +0.2 to +0.4 exposure lifts the couple off a darker background;
- a Sky mask recovers golden hour color without darkening faces.
Settings for specific styles and locations are in the styles table below.
7. Straighten, Crop, and Plan for Save-the-Dates
Start by leveling the horizon. Use the Straighten tool (or Auto in the Crop panel) on anything with a skyline, shoreline or architecture. A tilted beach horizon is the first thing clients’ eyes catch.
Then crop for connection. If the scenery is swallowing the couple, crop tighter to bring forward expressions, eye contact and hand squeezes. When the place itself matters, such as where they met or proposed, keep the wide frame and let the location tell the story.
Engagement photos get reused more than almost any other session, so crop with the destination in mind:
| Use | Aspect Ratio | Notes |
|---|---|---|
| Save-the-date card (5×7 in) | 5:7 | Leave negative space for text |
| Postcard / 4×6 print | 2:3 | Native to most full-frame sensors, so no crop is needed |
| 8×10 print | 4:5 | Crops noticeably from 2:3, so watch the edges |
| Instagram feed | 4:5 or 3:4 | Portrait crops take up more screen |
| Instagram / Facebook Stories | 9:16 | Center the couple vertically |
| Wedding website banner | 16:9 or wider | Place the couple off-center for text overlay |
Pro tip: Deliver a few versions of your hero images with extra negative space. Couples designing save-the-dates will thank you.
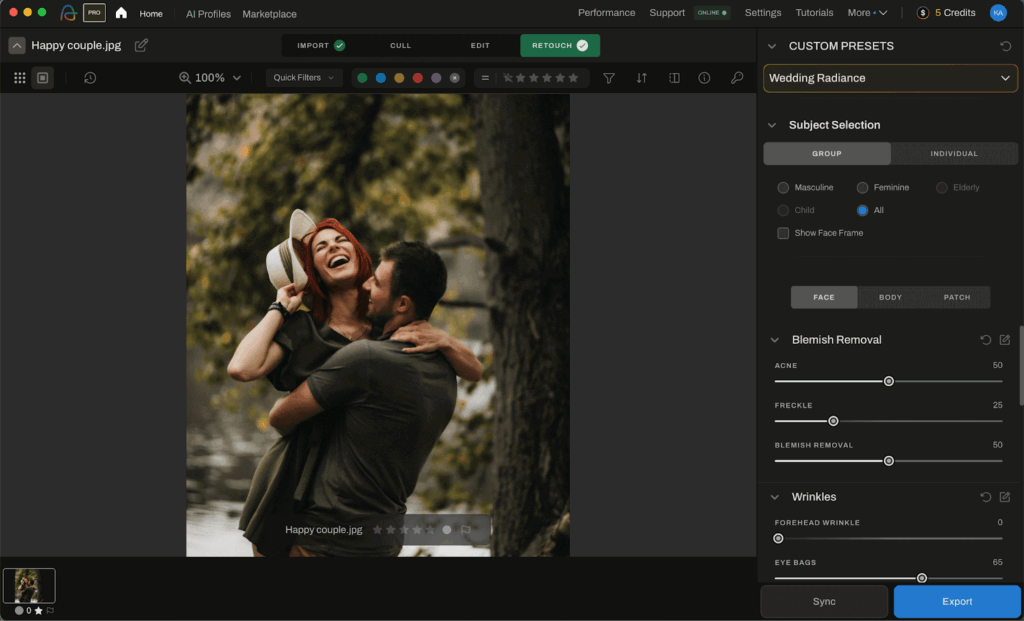
🎯 Pro tip: Avoid over-smoothing. Texture = realness = beauty.
8. Clean Up the Background Without Overpowering It
You want scenic backdrops, not scene-stealers.
Keep attention on the couple with Lens Blur in Lightroom, a radial mask with slightly lowered exposure and clarity, or a gentle vignette.
For clutter like a trash can, a stranger or a sign, Lightroom’s Remove tool (with Generative AI enabled) handles most cases. Save Photoshop’s Generative Fill for bigger fixes. Or try a gentle vignette for a soft focal pull. If the background is too cluttered, consider cropping creatively or using clone tools to eliminate distractions.
On the other hand, sometimes a location is the shot, maybe it’s a meaningful place for the couple, or it goes along well with the story you’re building. At those moments, it’s okay to zoom out and grab an artistic shot with the larger details.
9. Retouch Naturally
Engagement photos should still look like the couple.
Use subtle retouching to remove distractions like flyaways or temporary blemishes but preserve natural features unless explicitly asked for a specific edit.
Stick to temporary things: blemishes, flyaways, under-eye shadows, shine, lint on a sweater. Leave permanent features alone unless the couple asks.
In Lightroom, a People mask → Facial Skin with a small negative Texture adjustment (around −10 to −20) softens without flattening. AI retouching tools like Aftershoot Retouch apply skin, blemish and shine fixes across the whole gallery at once, with presets you can adjust. That matters when the same couple appears in 80 frames.
Pro tip: Always keep in mind that texture = realness = beauty.
10. Edit for Story, Not Perfection in Engagement Photo Galleries
You’re responsible for telling your couple’s love story.
Arrange your photos in an emotional sequence; not just your “best shots.” Think:
- Quiet, intimate wide shots
- Genuine laughter close-ups
- Tender in-between gestures
Use color grading to support that journey. Warm tones for coziness, cool tones for elegance, you get the idea. In Lightroom’s Color Grading panel, a touch of warmth in highlights and cooler shadows gives a cinematic feel without touching skin. Keep midtone saturation low so faces stay natural.
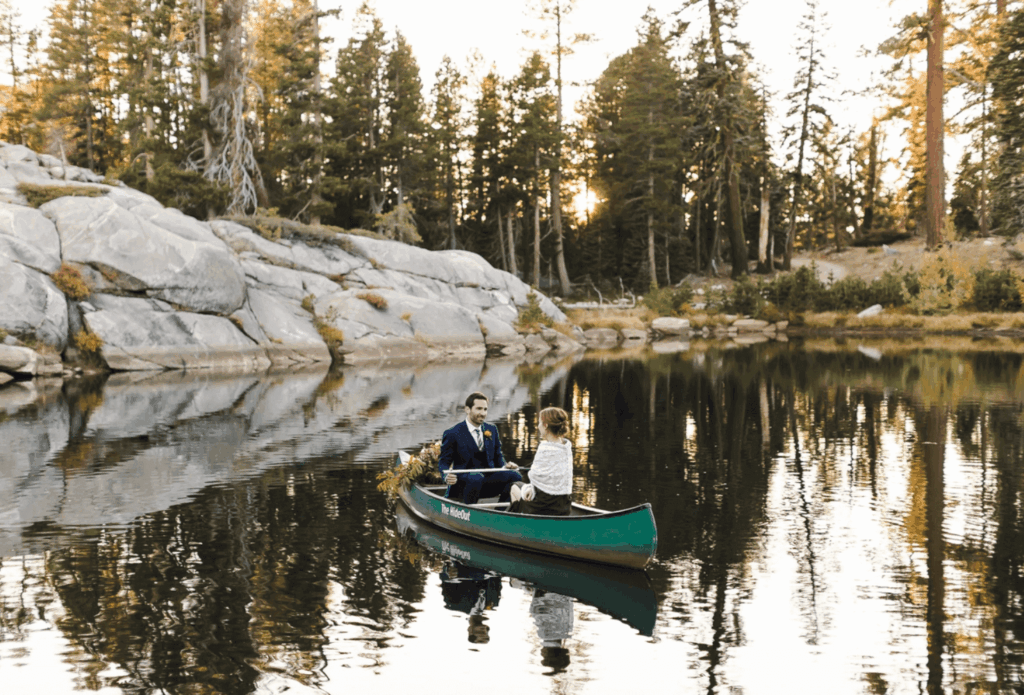
11. Use Cropping to Highlight Connection
Sometimes, less is more.
If your shot includes too much scenery, the intimacy can get lost. Don’t be afraid to crop tighter to showcase expressions, eye contact, or little hand squeezes.
📸 Pro tip: Watch your aspect ratio and make sure your crops still work for albums, social media, or prints. Add a variety for different types of media and channels.
12. Export, Deliver, and Invite Feedback Gracefully
Before delivery, match your export to where the photos are going:
| Destination | Format | Color Space | Size |
|---|---|---|---|
| Client online gallery | JPEG, quality 90–100 | sRGB | Full resolution |
| Social media / sneak peek | JPEG, quality ~80 | sRGB | 2048 px long edge |
| Print lab | JPEG or TIFF (per lab) | sRGB unless the lab asks otherwise | Full resolution |
| Save-the-date designer | JPEG | sRGB | Full resolution, cropped versions included |
Send 5–10 sneak peeks within a day or two. It’s the easiest way to earn excitement (and social shares) while you finish the full gallery.
Even if you nailed the brief, your couple might want a few tweaks. And that’s okay.
Offer one review round and be clear up front about what counts as an edit and what counts as a re-edit. If proofing rounds tend to drag, here’s how to send photo proofs without endless back-and-forth.
Guiding clients through this process builds confidence and leaves them feeling heard without compromising your creative integrity.
Engagement Photo Editing Styles by Location and Light
The right style depends as much on where you shot as on your brand. For a deeper look at the looks themselves, see our guide to photo editing styles. These are starting points, not recipes. Adjust for each camera and each couple.
| Session Setting | Styles That Suit It | Starting Adjustments | Watch Out For |
|---|---|---|---|
| Golden hour field or park | Light and airy; warm film | Slight + exposure, lift shadows, pull highlights, shift greens toward yellow and lower their saturation | Haze flattening faces; orange skin from over-warming |
| Beach or coast | True-to-color; bright and clean | Pull highlights hard, protect whites, slightly desaturate aqua and blue | Squint shadows on midday faces (use a subject mask) |
| Forest or overcast | Moody; true-to-color | Warm up the cool light, darken and desaturate greens, subject mask + exposure, vignette | Green bounce on skin (tint toward magenta, check Orange Hue) |
| City at dusk | Cinematic | White balance for skin, reduce saturation on yellow and orange streetlights, contrast via tone curve | Mixed color casts; noise (run Denoise first) |
| At-home or indoor lifestyle | Soft true-to-color; film | Window-light white balance, lifted shadows, light grain | Tungsten lamps adding orange casts |
| Snow or winter | Bright and clean | + exposure (cameras underexpose snow), neutral whites | Blue or grey snow; red noses (Red Saturation −) |
Whichever style you pick, keep it close to your portfolio. Couples book you for the look they’ve already seen.
Common Engagement Photo Editing Mistakes (and Fixes)
| Engagement Photo Editing Mistake | Fix |
|---|---|
| Applying a preset without adjusting exposure first | Correct exposure and white balance, then apply the look |
| Orange or “spray-tan” skin after warming golden hour shots | Lower Orange Saturation; nudge Orange Hue |
| White balance jumping between locations | Edit one hero per lighting scene, then sync |
| Plastic-looking skin | Keep Texture above −20; retouch temporary flaws only |
| Crooked horizons on beach or city shots | Straighten before cropping |
| Crops that don’t fit a 5×7 save-the-date | Check 5:7 and 4:5 crops on hero images |
| Delivering near-duplicates | Keep the strongest frame per pose or moment |
| A gallery that doesn’t match your portfolio | Save your core look as a preset or AI profile |
Engagement Photo Editing Workflow: From Culling to Delivery
Here’s how the steps above fit together into a repeatable post-processing system, and the tools photographers commonly use at each stage.
| Stage | What Happens | Common Tools | Time-Saver |
|---|---|---|---|
| Ingest and back up | Copy cards to two drives; add copyright metadata | Photo Mechanic, Lightroom Classic | Save an import preset |
| Cull | Pick the keepers | Aftershoot Select, Photo Mechanic, Lightroom flags | AI grouping of duplicates; you make final calls |
| Base edit | Profile, white balance, exposure, style | Lightroom Classic, Aftershoot Edit, Imagen | Batch by lighting scene |
| Retouch | Skin, flyaways, distractions | Aftershoot Retouch, Lightroom masks, Photoshop | Batch retouching with adjustable presets |
| Final polish | Horizon, crop, grade, sequence | Lightroom Classic | Crop for 5:7 and 4:5 while you’re there |
| Deliver | Gallery, sneak peeks, prints | Aftershoot Galleries, Pic-Time, Pixieset | Sneak peeks within 48 hours |
For more on speeding up the base-edit stage, see these tips for faster bulk photo editing. When you’re ready to share, Aftershoot Galleries lets you deliver from the same place you culled and edited.
Best Software for Editing Engagement Photos
Most photographers pair a Lightroom-based editor with one or two speed tools. Here’s how the options that come up most compare. Pricing was verified September 2026; always check the vendor page before buying.
| Tool | Best For | Pricing (USD) | Free Option |
|---|---|---|---|
| Adobe Lightroom Classic + Photoshop (Photography plan, 1TB) | Core editing plus heavy retouching and compositing | $19.99/mo, annual commitment | 7-day trial |
| Aftershoot | AI culling, editing and retouching at unlimited volume | Select $10/mo · Edit $30/mo · Retouch $20/mo · Complete $45/mo (billed annually); monthly plans also available | 30-day free trial, no card |
| Imagen | Per-photo AI editing inside Lightroom | Pay-as-you-go from $0.05/photo (monthly minimum applies); flat-fee Limitless plan also offered | Check site |
| Photo Mechanic | Fast ingest, culling and metadata | $14.99/mo · $149/yr · $299 perpetual (Standard) | 30-day trial |
| BeFunky | Quick browser edits and collages (DIY couples) | Plus from $6.99/mo billed annually | Free plan |
| Lightroom Mobile, Snapseed, VSCO | Phone edits and social sneak peeks | Free tiers; premium features vary | Yes |
If you already edit in Lightroom, adding a culling tool usually saves the most time per session. Editing tools pay off once you’re delivering several galleries a month. For a full breakdown of Aftershoot’s modules, see Aftershoot pricing.
“Aftershoot has completely changed the way I work. During wedding season, you can lose yourself in an endless cycle of edits. You blink, and weeks have gone by without seeing your family or doing anything besides sitting in front of a screen. This software has literally given me my time back. I’m getting days of my life returned to me — time I can spend with the people I care about instead of being buried under thousands of photos. What really makes it stand out is that it learns and edits just like I do. I don’t have to sacrifice my style or compromise the look my clients expect. It feels like an extension of my own workflow instead of a generic editing tool.”
– ⭐⭐⭐⭐⭐ (Seth Williamson)
From Pretty Pictures to Powerful Storytelling
Every adjustment you make shapes how your couple remembers this season. Before you export, ask one question of every frame: “Does this feel like them?”
Engagement galleries also set the tone for the wedding. When you’re ready for the bigger day, our guide to wedding photography editing techniques picks up where this leaves off.
Try Aftershoot free for 30 days, no credit card required, and see how much faster your next engagement gallery comes together.
FAQs for Engagement Photo Editing Tips
Q1. What’s the best technique to edit engagement photos so they look natural?
Correct white balance first, then fine-tune skin in the HSL panel (mostly the orange sliders). Keep contrast moderate and limit retouching to temporary flaws like blemishes and flyaways. Apply one consistent look across the gallery so every image feels like part of the same session.
Q2. What’s the best editing style for engagement photos?
The one that matches your portfolio and the session’s light. Light and airy suits golden hour fields and beaches, moody suits forests and overcast days, and true-to-color ages best. Clients book the style they’ve already seen, so consistency matters more than trends.
Q3. How long does it take to edit engagement photos?
Editing time depends on your culling speed and gallery size. Delivery commonly lands between two and six weeks; one photographer’s guide cites 2–6 weeks as the standard range and notes some photographers offer paid rush delivery. AI culling and editing tools can shorten the process significantly.
Q4. How many edited photos should you deliver from an engagement session?
There’s no fixed rule. A common range for a one- to two-hour session is 50–100 edited images, but it varies by photographer and package. State the number (or range) in your contract so expectations are set before the shoot.
Q5. What software do professional photographers use to edit engagement photos?
Lightroom Classic is the most common core editor, with Photoshop for heavier retouching. Many photographers add a culling tool (Aftershoot or Photo Mechanic) and an AI editing tool (Aftershoot or Imagen) to cut post-production time.
Q6. Should engagement photos be edited the same way as the wedding photos?
Use the same core style so the engagement gallery previews what the couple will get on the wedding day. Engagement sessions are usually shot in more controlled light, so they often need lighter correction than a full wedding day.