TL;DR
- Flyaway hair is one of the quickest ways a great portrait loses its polish, but over-editing it leads to a stiff, plastic “helmet head” look.
- Distinguish between distracting strays (facial crossings, erratic silhouette spikes) and natural character (baby hairs, curl texture, intentional styling).
- Manual Photoshop techniques (Healing Brush, Clone Stamp, Frequency Separation, Surface Blur) provide surgical control for signature hero shots.
- Complex backgrounds, backlit rim light, and curly hair require selective, low-opacity retouching rather than aggressive automated fills.
- Simple in-camera prep like carrying a spoolie with hairspray and positioning subjects relative to the wind prevents hours of post-processing.
- For full galleries, starting with dedicated batch tools like Aftershoot AI Stray Hair Remover cleans up baseline frizz in seconds while preserving volume and natural flow.
- A balanced, objective comparison reveals that while AI handles bulk gallery consistency effortlessly, manual Photoshop tools (Healing Brush, Clone Stamp, Frequency Separation) remain irreplaceable for high-complexity hero frames and intricate backgrounds.
- Reserve manual Photoshop passes for the 10% high-complexity hero shots, combining speed with surgical precision.
Every wedding and portrait photographer knows the feeling. You nail the lighting, the posing is effortless, and the client’s expression is genuine. Then you zoom in to 100% on your monitor, and a rogue wisp of hair cuts straight across the bride’s eye, or a halo of backlight frizz makes the groom’s silhouette look electric.
Cleaning up stray strands is a deceptively time-consuming part of post-production. Push too hard with a clone tool or an aggressive blur, and hair ends up looking like molded plastic. Skip it, and that stray wisp pulls the client’s eye every time they view the gallery.
In this guide, we break down how to edit flyaway hair naturally, the step-by-step manual techniques that still matter, how to solve the trickiest lighting and background scenarios, and how to maintain consistent hair cleanup across an entire gallery without losing your weekend to Photoshop.
What Counts as a Distraction vs. Natural Texture?
A portrait loses its organic feel the moment you eliminate hair that actually belongs there. When retouchers treat every single detached strand as a defect, the subject’s hairline turns into a hard, unnatural contour.
Before picking up a brush or running an automated action, separate distracting strays from vital texture.
Which Flyaway Hairs Should You Edit in Photos?
- Facial obstructions: Single hairs cutting across eyes, pupils, lips, or the bridge of the nose.
- Rogue outliers: Isolated, wire-thin hairs extending far outside the natural silhouette against plain backdrops or skies.
- Group shot crossovers: Strays that extend across another subject’s dark jacket or shoulder.
- Static and wind-whipped chaos: Fine frizz sticking straight up off the crown caused by dry weather, humidity, or wardrobe changes.
Which Natural Hair Textures Should You Preserve When Editing?
- Baby hairs and temple wisps: Soft, downy hair around the forehead and neckline provides realistic softness to an updo or pulled-back hairstyle.
- Natural curl definition: Stray loops in curly, coily, or textured hair provide necessary volume and shape.
- Styled flyaways: Wisps that were intentionally curled or pulled out by the hair stylist to frame the face.
- Motion in dynamic shots: Movement during a first dance, veil toss, or walking shot that provides energy and context to the moment.
A good rule of thumb: if removing the strand makes your subject look like they’re wearing a wig, dial back the opacity. Your goal is to recreate how the person looked in real life, not turn them into a digital mannequin.
How to Edit Flyaway Hair with AI
For years, the standard advice for fixing flyaway hair began and ended with Photoshop: open each frame, zoom in, clone stamp, heal, and repeat hundreds of times.
Today, most working wedding, portrait, and event photographers approach hair retouching in reverse. Rather than opening every image in Photoshop right away, they start by running an automated AI pass across the gallery.
Modern AI hair retouching works through strand-direction analysis and depth separation. Instead of applying a flat blur or indiscriminately erasing fine details, dedicated algorithms analyze facial anatomy, head shape, and hair density. The model differentiates between intentional volume (the core hairstyle and curl groupings) and erratic, detached strays. The software then regenerates the clean background texture or underlying skin beneath the stray strand, leaving edge softness and hair texture intact.
Starting with an AI pass removes the repetitive 80% of hair cleanup across an entire shoot in minutes, leaving only the complex hero frames for manual refinement.
How to Remove Stray Hair in Photos Using Aftershoot Retouch
Manual Photoshop retouching offers incredible precision, but applying it to hundreds of photos during peak season quickly eats into your evenings and weekends.
Aftershoot AI Stray Hair Remover is designed specifically to solve this problem at scale. Instead of functioning like a generic beauty filter that blurs hairlines, it uses hair-aware AI detection to clean up loose strands and environmental frizz while preserving the subject’s natural hairstyle, volume, and texture.
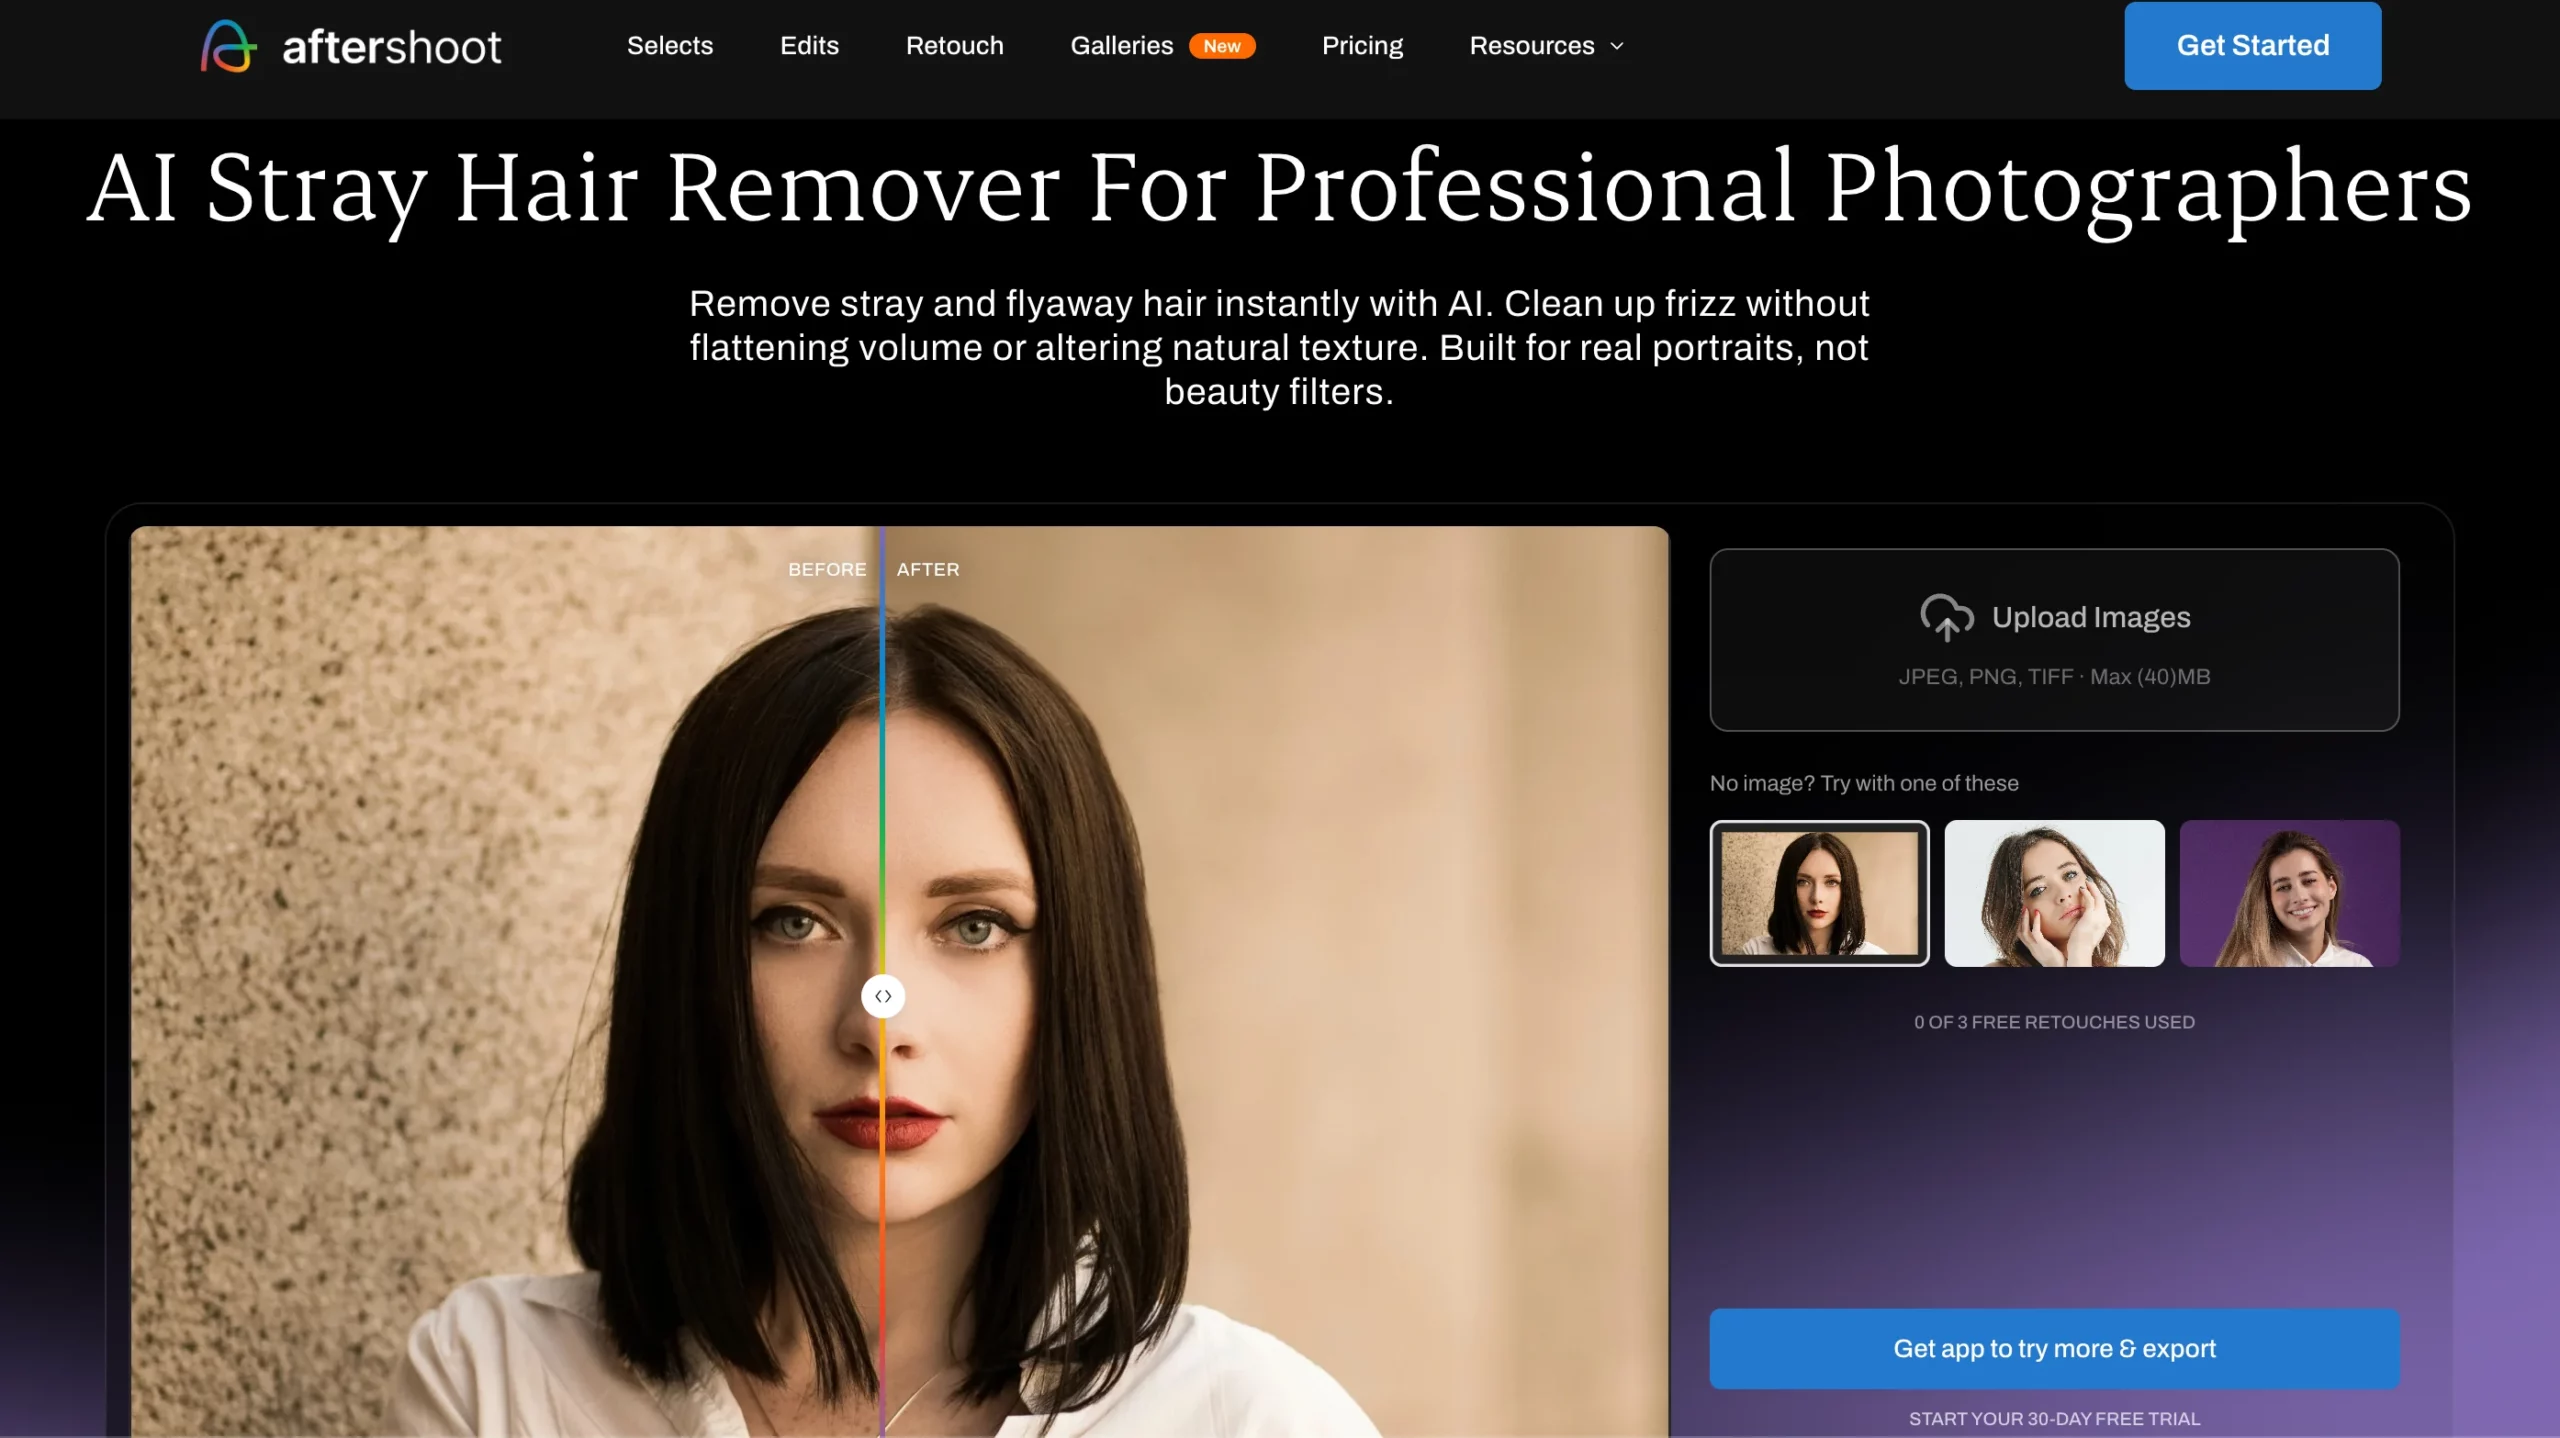
Natural Results Built for Real Galleries
Aftershoot AI Retouching also handles skin, eye, and blemish cleanup at full gallery scale. Rather than applying a blanket filter, Aftershoot’s AI analyzes facial anatomy, hair direction, background depth, and lighting across each frame.
- Dedicated Stray Hair Removal: Detects erratic flyaways against backgrounds and skin, gently cleaning them up while keeping edge softness and natural head volume intact. Slide the Stray Hair / Flyaways control to your desired intensity. A moderate setting (between 35 and 55) removes distracting flyaways against the sky or skin while keeping edge softness and head volume completely natural. Dialing it higher provides a cleaner, studio-polished finish for corporate headshots or formal studio portraits.
- Adjustable Control: Retain complete creative control by adjusting the Retouch intensity slider to match your aesthetic, from subtle organic cleanup to commercial polish.
- Subject-Specific Detection: AI identifies individual people in group shots, allowing you to apply custom retouching settings to key subjects without over-editing everyone in the frame.
- Batch Sync in Seconds: Apply your flyaway settings to a single image, select the rest of the shoot in your filmstrip, and hit Sync. Your entire gallery is polished consistently in moments.
- Complete Creative Control: Runs locally on your machine for maximum privacy, supports full RAW, JPEG, and TIFF workflows, and integrates directly with your existing Lightroom Classic or Capture One catalog.
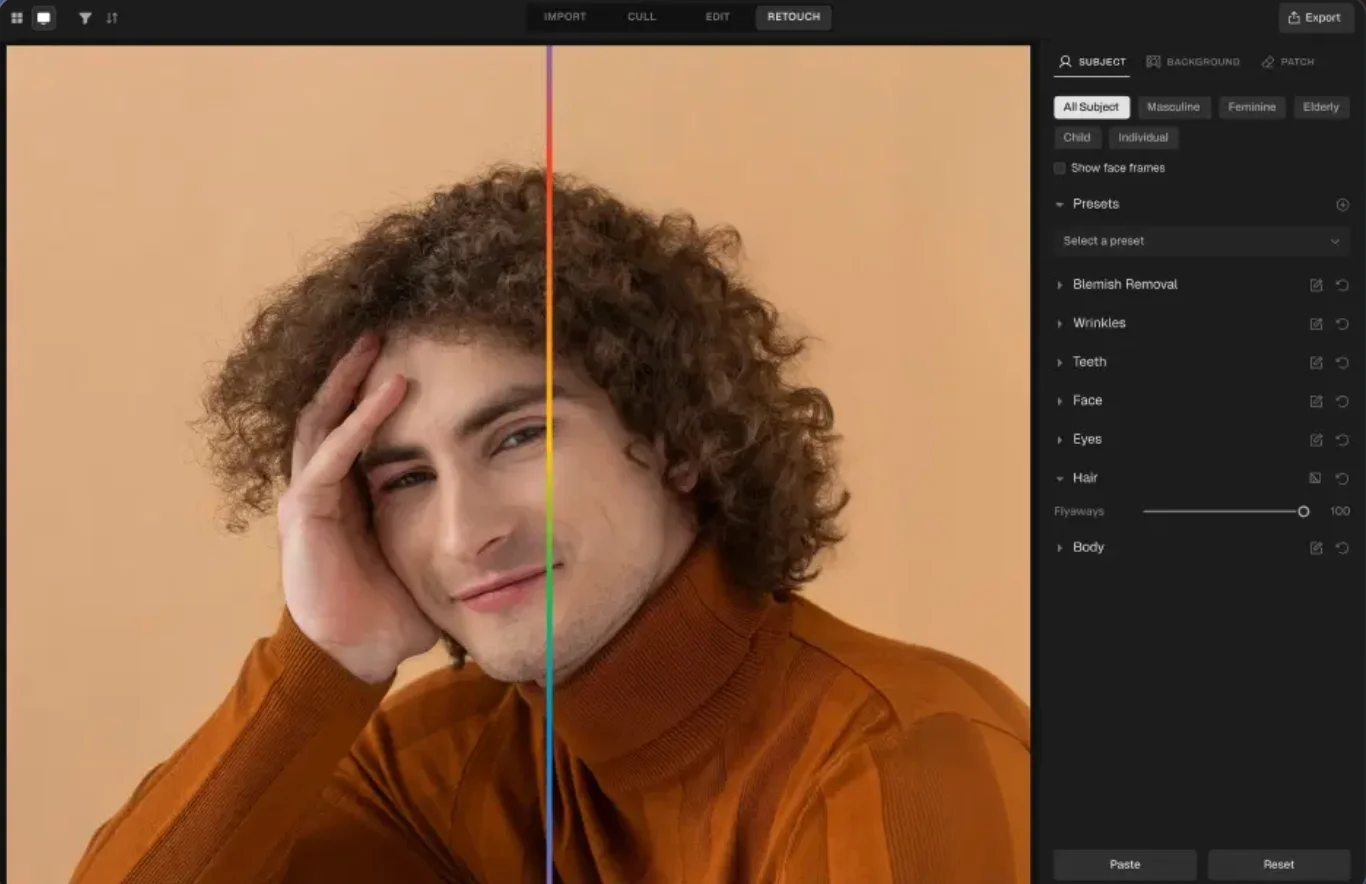
You can test Aftershoot AI Retouching free for 30 days with unlimited exports, no credit card required.
“AI Retouching has been a game-changer! It cut my retouching time in half, making wedding photo editing faster and more efficient.” – SOKRATIS KATSANOS
5 Methods to Manually Edit Flyaway Hair in Photoshop
When you have a signature hero image that needs meticulous, pixel-level care, manual Photoshop techniques give you complete control. Here are the five most dependable techniques used by professional retouchers.
1. Spot Healing Brush and Healing Brush (Best for Skin and Facial Crossings)
For hair strands running across forehead skin or cheeks, the Healing Brush preserves the underlying skin texture while blending the hair away.
- Create a blank layer above your background and label it Hair – Healing.
- Select the Healing Brush Tool (J) and ensure the sample mode is set to Current & Below.
- Set the brush hardness between 15% and 30%, keeping the diameter only slightly wider than the strand itself.
- Alt-click (Option-click on Mac) to sample clean skin adjacent to the hair, matching the lighting angle and pore texture.
- Paint in short, deliberate strokes along the path of the strand. Avoid dragging long strokes across varying skin tones.
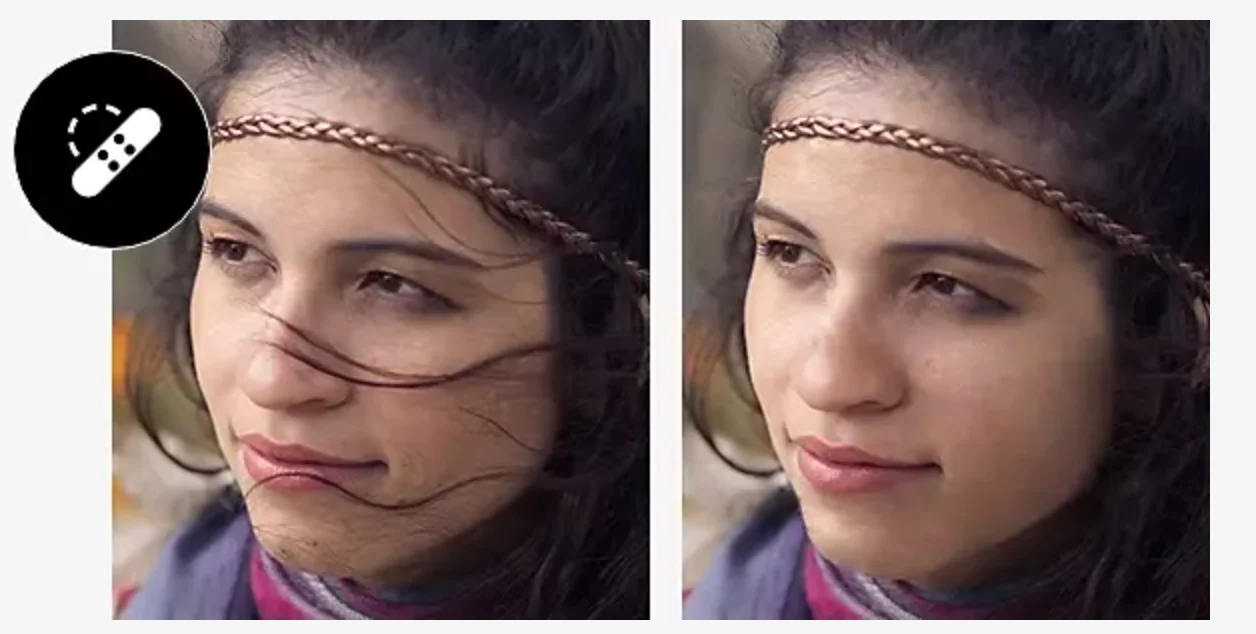
Pro tip: If a hair strand crosses an eyebrow or eyelash, switch to the standard Clone Stamp Tool set to Darken or Lighten blend mode. This replaces only the hair pixels without blurring the distinct brow edge.
2. Clone Stamp with Low Hardness (Best for Studio Backdrops and Sky)
When removing rogue hair extending into a seamless paper backdrop, flat wall, or clear sky, the Clone Stamp offers clean, artifact-free removal.
- Add a new blank layer named Hair – Background.
- Select the Clone Stamp Tool (S) with Current & Below selected.
- Keep hardness between 0% and 10% for soft backdrops, or match the grain sharpness of the original image.
- Sample from an area of the background equidistant from the light source to keep tone and color seamless.
- Stamp out the loose tips, working inward toward the main hair body. Leave a tiny bit of transition feathering so the hair doesn’t look cut with a razor.
3. Frequency Separation (Best for Maintaining Hair Volume and Scalp Texture)
When stray strands sit against other hair, detailed fabric, or textured skin, normal cloning creates muddy, smudged patches. Frequency separation splits your image into color (low frequency) and fine detail (high frequency).
- Duplicate your background layer twice. Name the lower copy Low Frequency (Color) and the top copy High Frequency (Texture).
- Select the low-frequency layer and apply Filter > Blur > Gaussian Blur. Choose a radius (typically between 4.0 and 8.0 pixels) until the sharp hair strands disappear, but broad tones remain.
- Select the high-frequency layer and navigate to Image > Apply Image.
- For 8-bit images: Target layer Low Frequency, Blending Subtract, Scale 2, Offset 128.
- For 16-bit images: Target layer Low Frequency, Blending Add, Scale 2, Offset 0, check Invert.
- Set the high-frequency layer blending mode to Linear Light.
- To remove the hair strand’s shadow or highlight line, use the Lasso Tool with a 15px feather on the Low Frequency layer and apply a mild Gaussian Blur.
- To remove the sharp hair strand itself, use the Clone Stamp Tool (set to Current Layer) on the High Frequency layer. This erases the physical strand while leaving the natural tonal gradients undisturbed.
4. Surface Blur Masking (Best for Taming Overall Crown Frizz)
If your subject has fine, spiderweb-like halo frizz around the entire perimeter, cloning individual strands can take thirty minutes per frame.
- Duplicate your retouched image to a new layer named Crown De-Frizz.
- Go to Filter > Blur > Surface Blur.
- Set Radius to approximately 10–15 pixels and Threshold to 15–20 levels. This smooths out fine hairs while protecting larger background gradients.
- Add a black (inverted) layer mask by holding Alt/Option and clicking the Add Layer Mask button.
- Select a soft white brush with 30% flow and gently brush over the frizz halo outside the main hair shape.
- Reduce the overall layer opacity to 60–75% so faint natural strands remain visible.
5. Selection and Masking with Refine Edge (Best for Backlit Edges)
Golden-hour portraits often produce glowing rim light that highlights every micro-fiber of hair.
- Use the Quick Selection Tool (W) or Select Subject to create a base selection of your subject.
- Click Select and Mask in the top options bar.
- Grab the Refine Edge Brush Tool (R) and brush around the glowing perimeter where backlighting and stray strands overlap.
- Under Output Settings, check Decontaminate Colors and adjust the slider to eliminate unwanted color fringing from bright backgrounds.
- Output the selection to a New Layer with Layer Mask, and clean up any remaining outlier hairs with a gentle soft brush on the mask.
5 Common Mistakes Photographers Make When Editing Flyaway Hair
Most unnatural hair edits come down to a handful of recurring technical and creative errors. Recognizing these mistakes before you begin editing will save you from having to undo hours of heavy-handed brushwork.
1. Creating the “Helmet Head” Cutout
Using a hard-edged brush or aggressive selection tool around the perimeter of the head strips away soft transitional hairs. Real hair blends gradually into the background. When that natural gradient is erased, the head looks pasted onto the backdrop like a magazine cutout.
2. Smudging Textured Backgrounds
Standard healing and content-aware tools pull texture from neighboring pixels. When you run a healing brush over a stray hair sitting against brick mortar, architectural lines, or foliage, the tool often smears the background into a muddy, blurry streak that draws far more attention than the original hair.
3. Flattening Curls and Textured Hair
Applying straight-hair smoothing rules to curly or coily hair flattens the natural bounce and volume of the style. Curls rely on individual strands breaking away from the core bundle to create dimension. Removing those outer loops makes the hairstyle look rigid and unnatural.
4. Over-Smoothing Skin Underneath Facial Strays
When removing hairs that cross the forehead or cheekbones, retouchers frequently use large, soft brushes that erase skin pores, freckles, and natural highlights. The result is a waxy patch on the skin that immediately signals heavy retouching.
5. Zooming In to 300% and Never Zooming Out
Zooming in close makes every microscopic strand feel like a crisis. When photographers spend forty minutes cleaning microscopic hairs at high magnification without zooming out to evaluate the image at normal viewing size, they invariably over-edit. Always check your work at fit-to-screen to ensure the overall silhouette remains balanced.
Solving 4 Difficult Hair Retouching Scenarios
Different shooting conditions bring unique challenges. Here is how to handle the trickiest real-world situations:
| Scenario | Primary Challenge | Recommended Fix |
| Textured Backgrounds (Foliage, brick, wallpaper) | Healing tools sample neighboring patterns, creating blurred, smeared patches. | Align Clone Stamp along structural lines (mortar/grain) with sample alignment enabled. |
| Curly & Coily Hair | Automated tools misread natural spring loops as strays, flattening volume. | Retouch only detached outer frizz; preserve the rounded contour of curl clumps. |
| Heavy Backlighting | Flare turns fine hair translucent and blows out edge contrast. | Use a clipped Curves layer to restore hair density before doing light clone cleanup. |
| Multi-Subject Overlap | Strays from one person cross another person’s face or dark suit jacket. | Use Frequency Separation to clean hair detail on High layer while preserving fabric weave below. |
1. Complex Backgrounds (Foliage, Architecture, Brick)
Standard healing tools average surrounding pixels, causing smeared patches when used over architectural lines or leaf textures.
Use the Clone Stamp tool aligned directly along structural lines (such as a mortar line or window frame). Set sample alignment to ON, sample along the line, and paint parallel to the architecture so patterns remain unbroken.
2. Curly, Coily, and Textured Hair
Curly hair naturally has individual strands coiling outward to build shape and volume. Treating curly hair with straight-hair smoothing rules ruins the hairstyle.
Focus exclusively on the outer 5% of erratic, broken frizz. Never smooth the rounded contour of a curl clump. If a strand loops back into another curl, leave it alone.
3. Heavy Backlighting and Rim Light
Sun flare and backlight turn fine hair translucent and flare out the background details.
Avoid hard cloning, which replaces glowing flare with flat background color. Instead, use a Curves adjustment layer clipped to your hair layer. Lower the highlights and add slight contrast to restore hair density before doing light clone cleanup.
4. Batch Consistency Across Full Galleries
Spending eight minutes per photo on hair cleanup is manageable for a three-shot commercial campaign. For a wedding gallery of 800 images or a high-volume senior portrait session of 60 images, manual retouching creates an impossible turnaround bottleneck.
Establish a tiered workflow. Use batch automation to polish delivery-grade images across the set, then reserve manual Photoshop layers for top-tier hero frames and album spreads.
Manual vs. AI Hair Retouching: An Objective Comparison
Neither approach is superior in every situation. Professional retouchers choose their tools based on turnaround time, image count, and required output resolution:
| Feature / Consideration | Manual Photoshop Methods | AI Retouching Tools (e.g., Aftershoot) |
| Speed per image | 3 to 15 minutes per photo | 1 to 3 seconds per photo (or instant batch sync) |
| Gallery-wide consistency | Hard to maintain across hundreds of frames | Perfectly uniform across the entire shoot |
| Control level | Absolute pixel-level precision | Slider-based strength with subject-specific control |
| Handling complex backgrounds | Excellent (with skilled Clone Stamp work) | Strong on uniform backgrounds; may need manual touch-ups on brick/foliage |
| Preserving skin pores under hair | Requires Frequency Separation technique | Automatically preserves underlying facial texture |
| Learning curve | Steep (requires advanced layer & mask skills) | Minimal (intuitive sliders and one-click presets) |
| Best suited for | Magazine covers, commercial prints, signature hero frames | Wedding galleries, senior sessions, event coverage, high-volume portraits |
Natural Polish vs. Over-Processed Mistakes
The objective of professional retouching is to leave zero evidence that the photo was touched. Here is how natural hair cleanup compares to over-edited mistakes:
| Evaluation Area | Natural Professional Finish | Over-Processed Mistakes |
| Hairline Transition | Soft, gradual edge with tiny baby hairs intact. | Hard, razor-sharp edge resembling a cutout. |
| Silhouette Volume | Original hair body, height, and flow remain identical. | Shrunken, flattened head shape (“helmet head”). |
| Background Texture | Original film grain or bokeh structure is preserved. | Smudged, blurry patches or repeating clone patterns. |
| Facial Intersections | Natural skin pores and highlights remain beneath removal. | Plastic, waxy patches where skin texture was erased. |
| Motion & Curls | Organic dynamic movement and curl clumps remain intact. | Rigid, static hair that looks unnaturally frozen. |
When to Use Aftershoot vs. When to Open Photoshop
A modern photography business thrives on working efficiently without compromising quality. Here is how to allocate your time between automated retouching and manual refinement:
- Use Aftershoot Retouch for 90% of Your Gallery: Process your full wedding, family, or senior session in batch. Let AI clean up the distracting crown strays, skin blemishes, and neck flyaways across all delivery files simultaneously.
- Use Manual Photoshop for 10% Hero Frames: Reserve manual tools (Frequency Separation, Refine Edge masks, and Clone Stamp) for large wall prints, album covers, composite images, or difficult subjects shot against high-contrast, patterned backgrounds.
A Reliable Checklist for Flyaway Hair Retouching
Use this step-by-step quality control checklist before delivering your final gallery to ensure your hair cleanup looks natural, professional, and consistent across every frame:
- Cull and crop first: Never spend time retouching an image or edge strand that will be culled or cropped out of your final delivery.
- Evaluate at fit-to-screen: Before zooming into 100%, evaluate whether the flyaway actually catches your eye at normal viewing distance. If it doesn’t distract, leave it alone.
- Automate the base pass: Run your gallery through Aftershoot Retouch to handle the bulk of skin and hair polish across the shoot.
- Inspect hero images at 100%: Check the hairlines and skin crossings on your top 5–10 portfolio-worthy images.
- Protect texture above all: Whether using manual brushes or AI sliders, always ensure the final hair has depth, realistic edge variation, and believable volume.
How Can Photographers Prevent Stray Hair In-Camera?
The fastest way to edit flyaway hair is not having to fix it on every single frame in post-production. While you cannot control outdoor gusts or humid reception venues completely, a few low-effort habits on shoot day dramatically cut down your post-processing time.
- Keep an anti-frizz kit in your camera bag: Pack a clean mascara spoolie, a travel-sized bottle of flexible-hold hairspray, clear eyebrow gel, and static-guard sheets. A quick swipe of hairspray on a spoolie tames wisps at the hairline in five seconds without making the client’s hair look greasy or stiff.
- Pay attention to wind direction during posing: When shooting outdoors, position your subject so the wind blows hair back and away from their face rather than across their eyes and mouth. Wind blowing hair across the silhouette looks dynamic; wind blowing hair across facial features requires tedious spot healing.
- Manage backlighting angles: Direct golden-hour backlight acts like a fiber-optic cable for stray hairs, illuminating every single micro-strand. Adjusting your shooting angle by just 15 to 20 degrees or placing the sun slightly behind a tree branch or building edge preserves warm rim light without turning fine frizz into high-contrast glowing wires.
- Do a quick hairline check before hero setups: Take two seconds to check the bride’s veil placement or the groom’s collar before shooting formal portraits or family groupings. Asking a bridesmaid or assistant to tuck a stray strand behind an ear saves you from cloning that same strand out of twenty consecutive frames.
FAQs for How to Edit Flyaway Hair
Q1. How do I remove flyaway hair without making it look like a wig?
The key to avoiding the “wig” or “helmet” look is preserving the soft baby hairs along the forehead and maintaining natural texture around the perimeter. Avoid using hard-edged selection cutouts or heavy blurs across the whole hairline. Instead, remove only individual isolated strands that break far away from the head shape, and keep opacity settings on your retouch layers between 65% and 80%.
Q2. Is it better to fix flyaways in Lightroom or Photoshop?
Lightroom’s Generative Remove and Spot Removal tools work well for a few isolated hairs against uniform backdrops. However, Photoshop provides far superior precision for complex jobs involving skin crossings, detailed backgrounds, and frequency separation. For entire sets of photos, dedicated tools like Aftershoot Retouch provide the speed of Lightroom with the natural, face-aware precision of advanced retouching.
Q3. How do you edit stray hair on curly or afro-textured hair?
With curly and textured hair, individual strands coiling away from the scalp are an essential part of the hair’s volume and character. Only remove loose, broken hairs that visibly cross over the eyes, nose, or mouth, or erratic fuzz that catches bright light outside the silhouette. Do not attempt to smooth curly hair into a uniform perimeter line.
Q4. Can AI retouching remove flyaway hair on RAW files directly?
Yes. Modern AI tools like Aftershoot read native RAW files directly from your camera, detect faces and hair contours, and apply non-destructive retouching adjustments. This allows you to maintain maximum dynamic range and color data when exporting final high-resolution deliverables.
Q5. How do I prevent flyaway hair in-camera before post-processing?
While retouching tools can fix unruly hair in post, taking simple precautions during the shoot saves significant editing time. Keep clear hair mascara, a clean spoolie with hairspray, or anti-frizz styling sheets in your camera bag for quick touch-ups before portrait sessions. On windy outdoor shoot days, position your subjects so the wind blows hair back away from their face rather than across their eyes, and schedule backlit golden-hour portraits in sheltered spots to minimize rim-lit frizz halos.