Editing hundreds (or even thousands) of images from a single shoot or wedding can feel daunting, but Lightroom’s batch editing features can lend a substantial hand. As a professional wedding photographer, I’ve spent years refining my workflow to handle the sheer volume of photos that come with capturing someone’s big day. For a typical wedding, I’ll deliver around 600 images, each carefully edited to reflect the style my clients booked me for.
Batch editing is how I get through that volume without every gallery taking a week. Below is the exact process I use in Lightroom Classic, plus how to do the same thing in Lightroom Desktop and Lightroom Mobile. I’ve also included which settings are safe to sync and the mistakes that quietly ruin a batch. With this guide, I hope you’re fully able to learn how to batch edit in Lightroom.
Quick answer: To batch edit in Lightroom, edit one representative photo, then select it along with the other photos shot in the same light.
- Lightroom Classic: click Sync (Ctrl/Cmd + Shift + S) in the Develop module, choose the settings to apply, and click Synchronize.
- Lightroom Desktop and Mobile: use Copy Edit Settings, then Paste.
Leave white balance, exposure, crop and spot removal unchecked unless the light and framing were identical. Then review each photo.
What is Batch Editing in Lightroom?
At its core, batch editing allows you to apply edits to multiple photos at once. Rather than tweaking each image individually, you can adjust exposure, color, and other settings across an entire set with just a few clicks. It’s an invaluable technique for professional photographers juggling large galleries while maintaining a consistent style.
Lightroom edits are non-destructive, so a batch edit only changes the instructions stored in your catalog. Your RAW files stay untouched, and you can reset any setting later.
Batch Editing Across Lightroom Versions
| Lightroom version | Main batch method | Best for | Watch out for |
|---|---|---|---|
| Lightroom Classic | Sync, Auto Sync, Copy/Paste, presets on import | Weddings, events and large local catalogs | Auto Sync changes every selected photo as you move a slider |
| Lightroom Desktop (cloud) | Copy Edit Settings → Paste Edit Settings | Cloud libraries and cross-device editing | Check which photo the settings were copied from |
| Lightroom Mobile | Copy Settings → select photos → Paste | Small batches on the go | Fewer controls than desktop, and labels vary slightly between iOS and Android |
| Any version | Presets | A reusable base look across shoots | A preset still needs exposure and white balance checks per scene |
Before You Batch Edit: Group Photos by Light
A batch edit is only as good as the group you apply it to. Sunset portraits, reception flash and window-lit getting-ready shots may come from the same wedding, but they shouldn’t share one sync.
- Cull first. There’s no point syncing edits onto blinks and missed focus. Flags or AI culling get the rejects out before you start.
- Split the shoot by lighting. Keep direct sun, shade, window light, tungsten and flash in separate groups. Collections, color labels or sorting by capture time all work.
- Split by ISO where noise differs. A base-ISO portrait and an ISO 6400 dancefloor frame need different noise reduction.
- Build Smart Previews for big shoots. They keep Lightroom responsive when you sync across hundreds of files.
A group of 40 genuinely similar photos will sync cleanly. A group of 400 mixed ones won’t.
How to Batch Edit in Lightroom Classic (Step-by-Step)
Here’s my straightforward method for batch editing photos in Lightroom:
Step 1: Edit One Master Photo per Scene
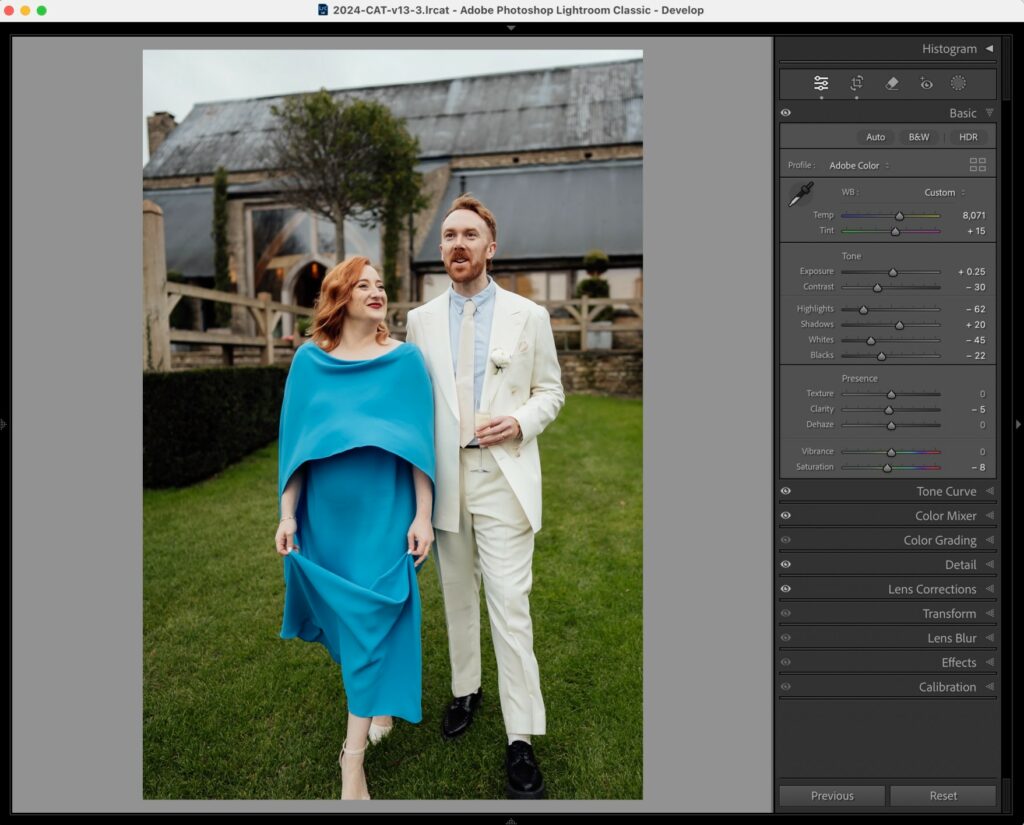
Pick a frame that represents the light and tones of the whole group. Avoid the brightest, darkest or most backlit shot. Edit it fully in the Develop module: profile, white balance, exposure, tone curve, HSL, color grading, lens corrections and detail. If you’re new to the sliders, start with our guide on how to edit photos in Lightroom.
Weddings are shot in constantly changing light, so I’m usually batch editing one part of the day at a time, such as the ceremony, speeches or dancefloor.
Wedding example: For a church ceremony, a good master is a mid-ceremony wide shot with the couple’s faces in even window light. The backlit processional through the doorway is a poor choice, because its exposure won’t match anything else in the set.
Step 2: Select the Rest of the Group
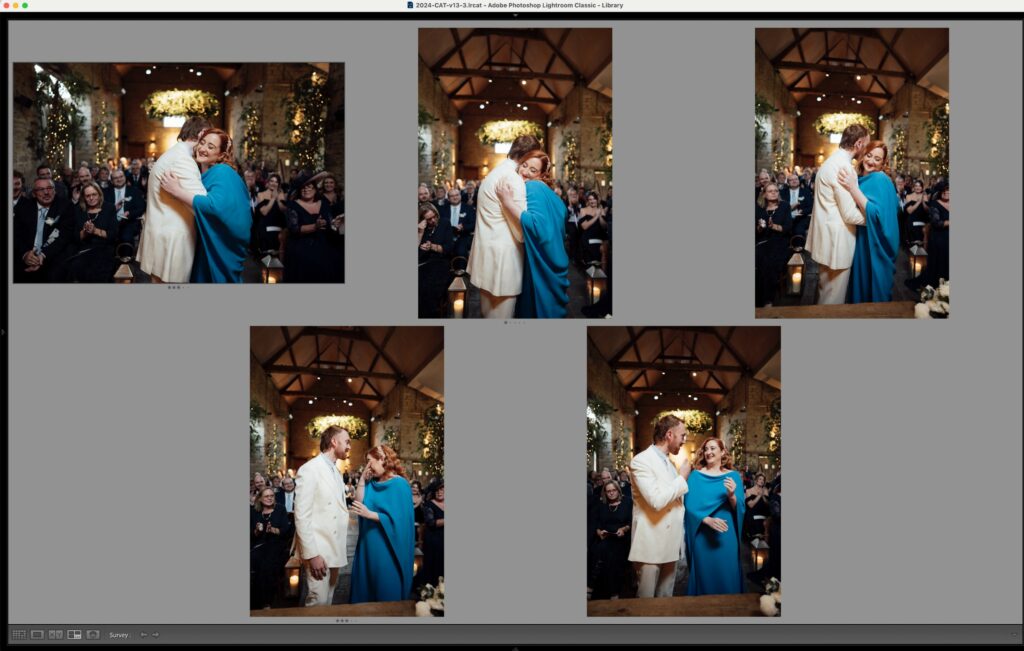
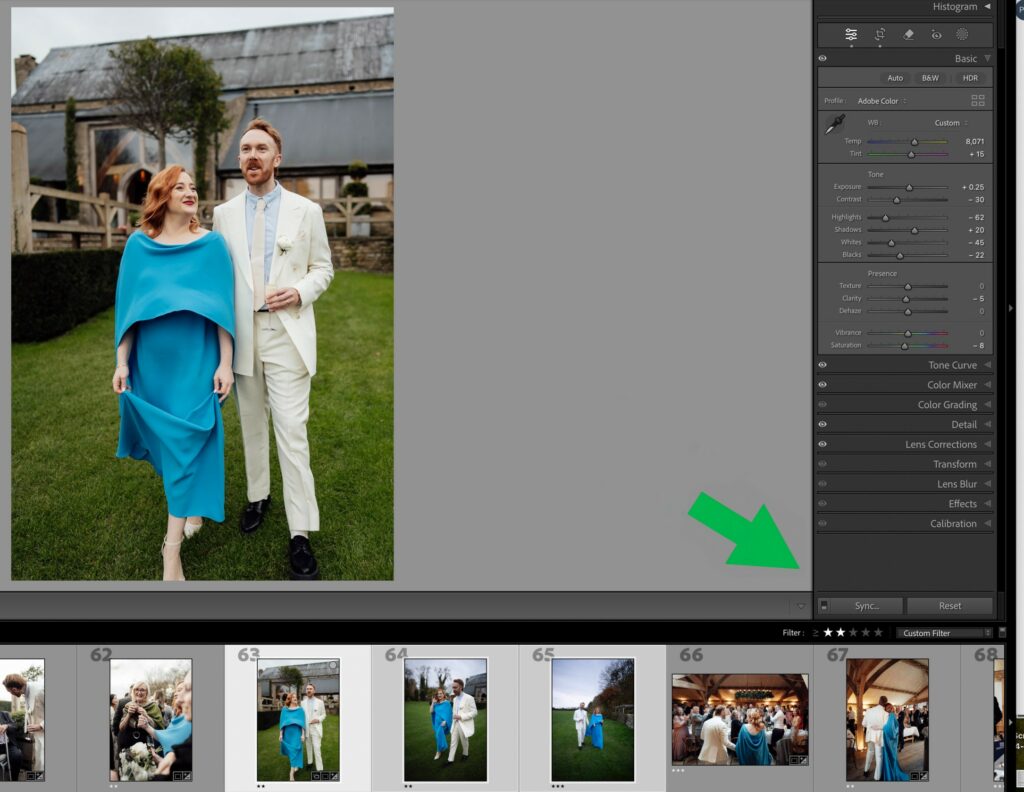
Keep your master selected, then Ctrl-click (Windows) or Cmd-click (Mac) the other photos in the Filmstrip. Shift-click selects a continuous range. The master should have the brightest border, because Lightroom copies settings from the active photo.
Step 3: Sync the Right Settings
Click Sync… at the bottom of the right panel, or press Ctrl/Cmd + Shift + S. In the Synchronize Settings box, click Check None, tick only the settings you want to carry over, then click Synchronize.
Wedding example: For the ceremony, sync Profile, Tone Curve, HSL/Color, Color Grading, Calibration, Lens Corrections and Sharpening. Leave White Balance, Exposure, Crop, Spot Removal and any brush masks unchecked. The light shifts every time a cloud passes the window, and the framing changes with every frame.
Step 4: Match Exposure, Then Review Every Frame
Syncing gets you a consistent look, not finished photos. For sequences shot in the same light where the exposure drifted, keep your corrected master active. Then choose Settings → Match Total Exposures and let Lightroom balance the brightness relative to it.
Next, switch to Grid view (G) and scan the thumbnails side by side. Inconsistent skin tones or brightness jump out much faster in a grid than one image at a time. Finally, open your key frames at 100% to check skin, highlights and noise.
Wedding example: After Match Total Exposures on the vows sequence, check the bride’s dress in the brightest frames. Highlight detail on white fabric is usually the first thing to clip.
Other Ways to Batch Edit in Lightroom Classic
1. Auto Sync
Select your group, then flip the small switch beside Sync (or Ctrl/Cmd-click the button) so it reads Auto Sync. Every slider you move now applies to all selected photos in real time. It works best for studio sets or locked-off scenes. Turn it off before cropping or healing a single frame, or that change lands on every selected photo too.
2. Copy/Paste and Previous
Press Ctrl/Cmd + Shift + C to choose which settings to copy, select your targets, and press Ctrl/Cmd + Shift + V to paste. This suits “copy now, paste later” work, such as adding the same vignette to scattered frames across a gallery.
Previous (Ctrl + Alt + V / Cmd + Option + V) pastes all settings from the last photo you viewed onto the current one. When you select more than one photo, the Previous button changes to Sync.
3. Apply a Preset on Import
In the Import window, open Apply During Import and choose a preset under Develop Settings. Every imported photo starts from your base look. Use a preset that doesn’t force exposure or white balance, because those change from scene to scene.
4. Apply a Preset or Quick Develop in the Library Module
In Library Grid view, select your photos and open Quick Develop. Choose a preset from Saved Preset, or nudge exposure, contrast or white balance. The change applies to every selected photo, and the relative adjustments shift each photo from its current value rather than overwriting it.
How to Batch Edit in Lightroom Desktop
Lightroom Desktop (the cloud-based app, sometimes still called Lightroom CC) doesn’t have a Sync button. It uses copy and paste instead.
- Open and finish your master photo.
- Go to Photo → Choose Edit Settings to Copy (Ctrl + Shift + C on Windows, Cmd + Shift + C on Mac). Choose Modified, then untick anything that shouldn’t carry over, and click Copy.
- Return to the grid and select your target photos.
- Press Ctrl/Cmd + V, or click Paste Edit Settings at the bottom of the grid.
- Let the previews finish updating, then scan the grid for frames that look too warm, too cool or off in brightness.
Ctrl/Cmd + C copies every edit without asking. Use the Choose Settings option until you trust your master.
How to Batch Edit in Lightroom Mobile
- Open your edited photo and tap the three-dot (More) menu.
- Tap Copy Settings, choose which settings to include, and tap the checkmark.
- Go back to the grid, long-press one thumbnail, and tap the other photos to select them.
- Tap Paste (or Paste Settings) in the bottom bar.
Mobile works well for a dozen photos from a session. For full galleries, use Lightroom Classic or Desktop, where it’s easier to check results in a grid. Presets you save in Lightroom sync between Mobile and Desktop, so you can build your base look on either.
Which Settings Should You Sync?
Start from Check None and add settings, rather than starting from Check All and removing them. It’s much harder to accidentally sync a crop that way.
| Setting | Sync it? | Why |
|---|---|---|
| Profile, Tone Curve | Usually yes | These carry your look’s foundation and contrast |
| HSL / Color Mix, Color Grading, Calibration | Usually yes | They keep color relationships consistent across the set |
| Lens Corrections | Yes | Lightroom reads each photo’s lens data, so this is safe across a mixed kit |
| Sharpening, Noise Reduction | Sync within the same ISO range | High-ISO frames need different noise settings |
| Exposure | Only in fixed light | Otherwise use Match Total Exposures or adjust per frame |
| White Balance | Only in fixed light (studio, flash) | Mixed and changing light shifts skin tones |
| Crop, Transform | Rarely | Composition changes from frame to frame |
| Spot Removal / Remove | No | Blemishes, dust and distractions move between frames |
| Brush, Linear and Radial masks | No | They stay in fixed positions and land in the wrong place |
| AI masks (Subject, Sky, People) | Yes, then check | Lightroom recalculates them for each photo (see below) |
How to Batch Edit AI Masks in Lightroom
AI masks like Select Subject, Select Sky and Select People can be synced, because Lightroom re-detects the subject in each photo instead of copying the mask’s shape. That makes them ideal for batch jobs like lifting faces slightly or calming bright skies across a whole set.
- Create the AI mask on your master and make your adjustment.
- Sync or copy settings with Masking ticked.
- If a photo shows a warning that its AI masks need updating, go to Library Grid view. Select the affected photos and choose Photo → Develop Settings → Update AI Settings.
- Toggle the mask overlay on a few frames and check hair, veils, hands and the edges between people.
Brush, radial and linear masks don’t recalculate. Leave them out of the sync and add them per photo.
Lightroom Batch Editing Shortcuts
| Action | Windows | Mac |
|---|---|---|
| Sync settings (opens dialog) | Ctrl + Shift + S | Cmd + Shift + S |
| Copy settings (choose which) | Ctrl + Shift + C | Cmd + Shift + C |
| Paste settings | Ctrl + Shift + V | Cmd + Shift + V |
| Paste settings from previous photo | Ctrl + Alt + V | Cmd + Option + V |
| Toggle Sync → Auto Sync | Ctrl-click Sync | Cmd-click Sync |
| Grid view | G | G |
| Develop module | D | D |
| Export | Ctrl + Shift + E | Cmd + Shift + E |
| Undo | Ctrl + Z | Cmd + Z |
Common Batch Editing Mistakes (and How to Fix Them)
| Problem | Likely cause | Fix |
|---|---|---|
| Only one photo changed | Only one photo was selected, so the button showed Previous, not Sync | Select the targets in the Filmstrip, keeping the master active, then sync again |
| Every photo got the wrong exposure | A fixed Exposure value was synced across changing light | Undo, regroup by light, and use Match Total Exposures |
| Crops jumped to the wrong place | Crop was ticked in the Sync dialog | Reset Crop on the targets, and click Check None next time |
| Skin tones turned orange or green | White Balance was synced across mixed light | Re-set white balance per lighting group |
| A one-off heal appeared on every photo | Auto Sync was left on | Undo, and turn Auto Sync off before local fixes |
| Lightroom slows to a crawl | Large RAWs, AI masks or heavy AI features across hundreds of files | Sync in smaller groups and build Smart Previews first |
| AI masks look blank or wrong | The masks weren’t recalculated after syncing | Run Update AI Settings from Library Grid view |
To undo a batch edit: press Ctrl/Cmd + Z straight away. If you catch it later, select the affected photos and reset only the wrong setting, or step back in the History panel. Because edits are non-destructive, your originals are never touched.
Where AI Batch Editing Fits in a Lightroom Workflow
Lightroom’s Sync copies the same values to every photo. That’s why you have to group by light, and why Match Total Exposures exists. AI editing tools work differently: they apply a style and work out the values for each photo individually.
That changes where your time goes. It doesn’t remove the need for your eye on every image.
Lightroom Sync vs Presets vs AI Batch Editing
| Approach | How edits are applied | Adapts to each photo? | Cost (Sept 2026) | Best for |
|---|---|---|---|---|
| Lightroom Sync / Copy-Paste | Copies the master’s exact slider values | No. AI masks recalculate, but exposure and white balance don’t | Included with Adobe plans. Photography plan (1TB): $19.99/mo, annual commitment | Small groups in consistent light |
| Lightroom presets | Applies saved values | No | Free to create; paid packs vary | A consistent starting look |
| Aftershoot Edit | AI profile trained on your edits, or a preset/Marketplace style, applied per image on your computer | Yes | $30/mo billed annually, unlimited images; 30-day free trial, no card | Full wedding and event galleries in your own style |
| Imagen | Cloud-based AI profile | Yes | Pay-as-you-go (per photo, monthly minimum) or flat-fee Limitless; check imagen-ai.com/pricing | High-volume editors who are comfortable with cloud processing |
What AI takes off your plate, and what stays yours
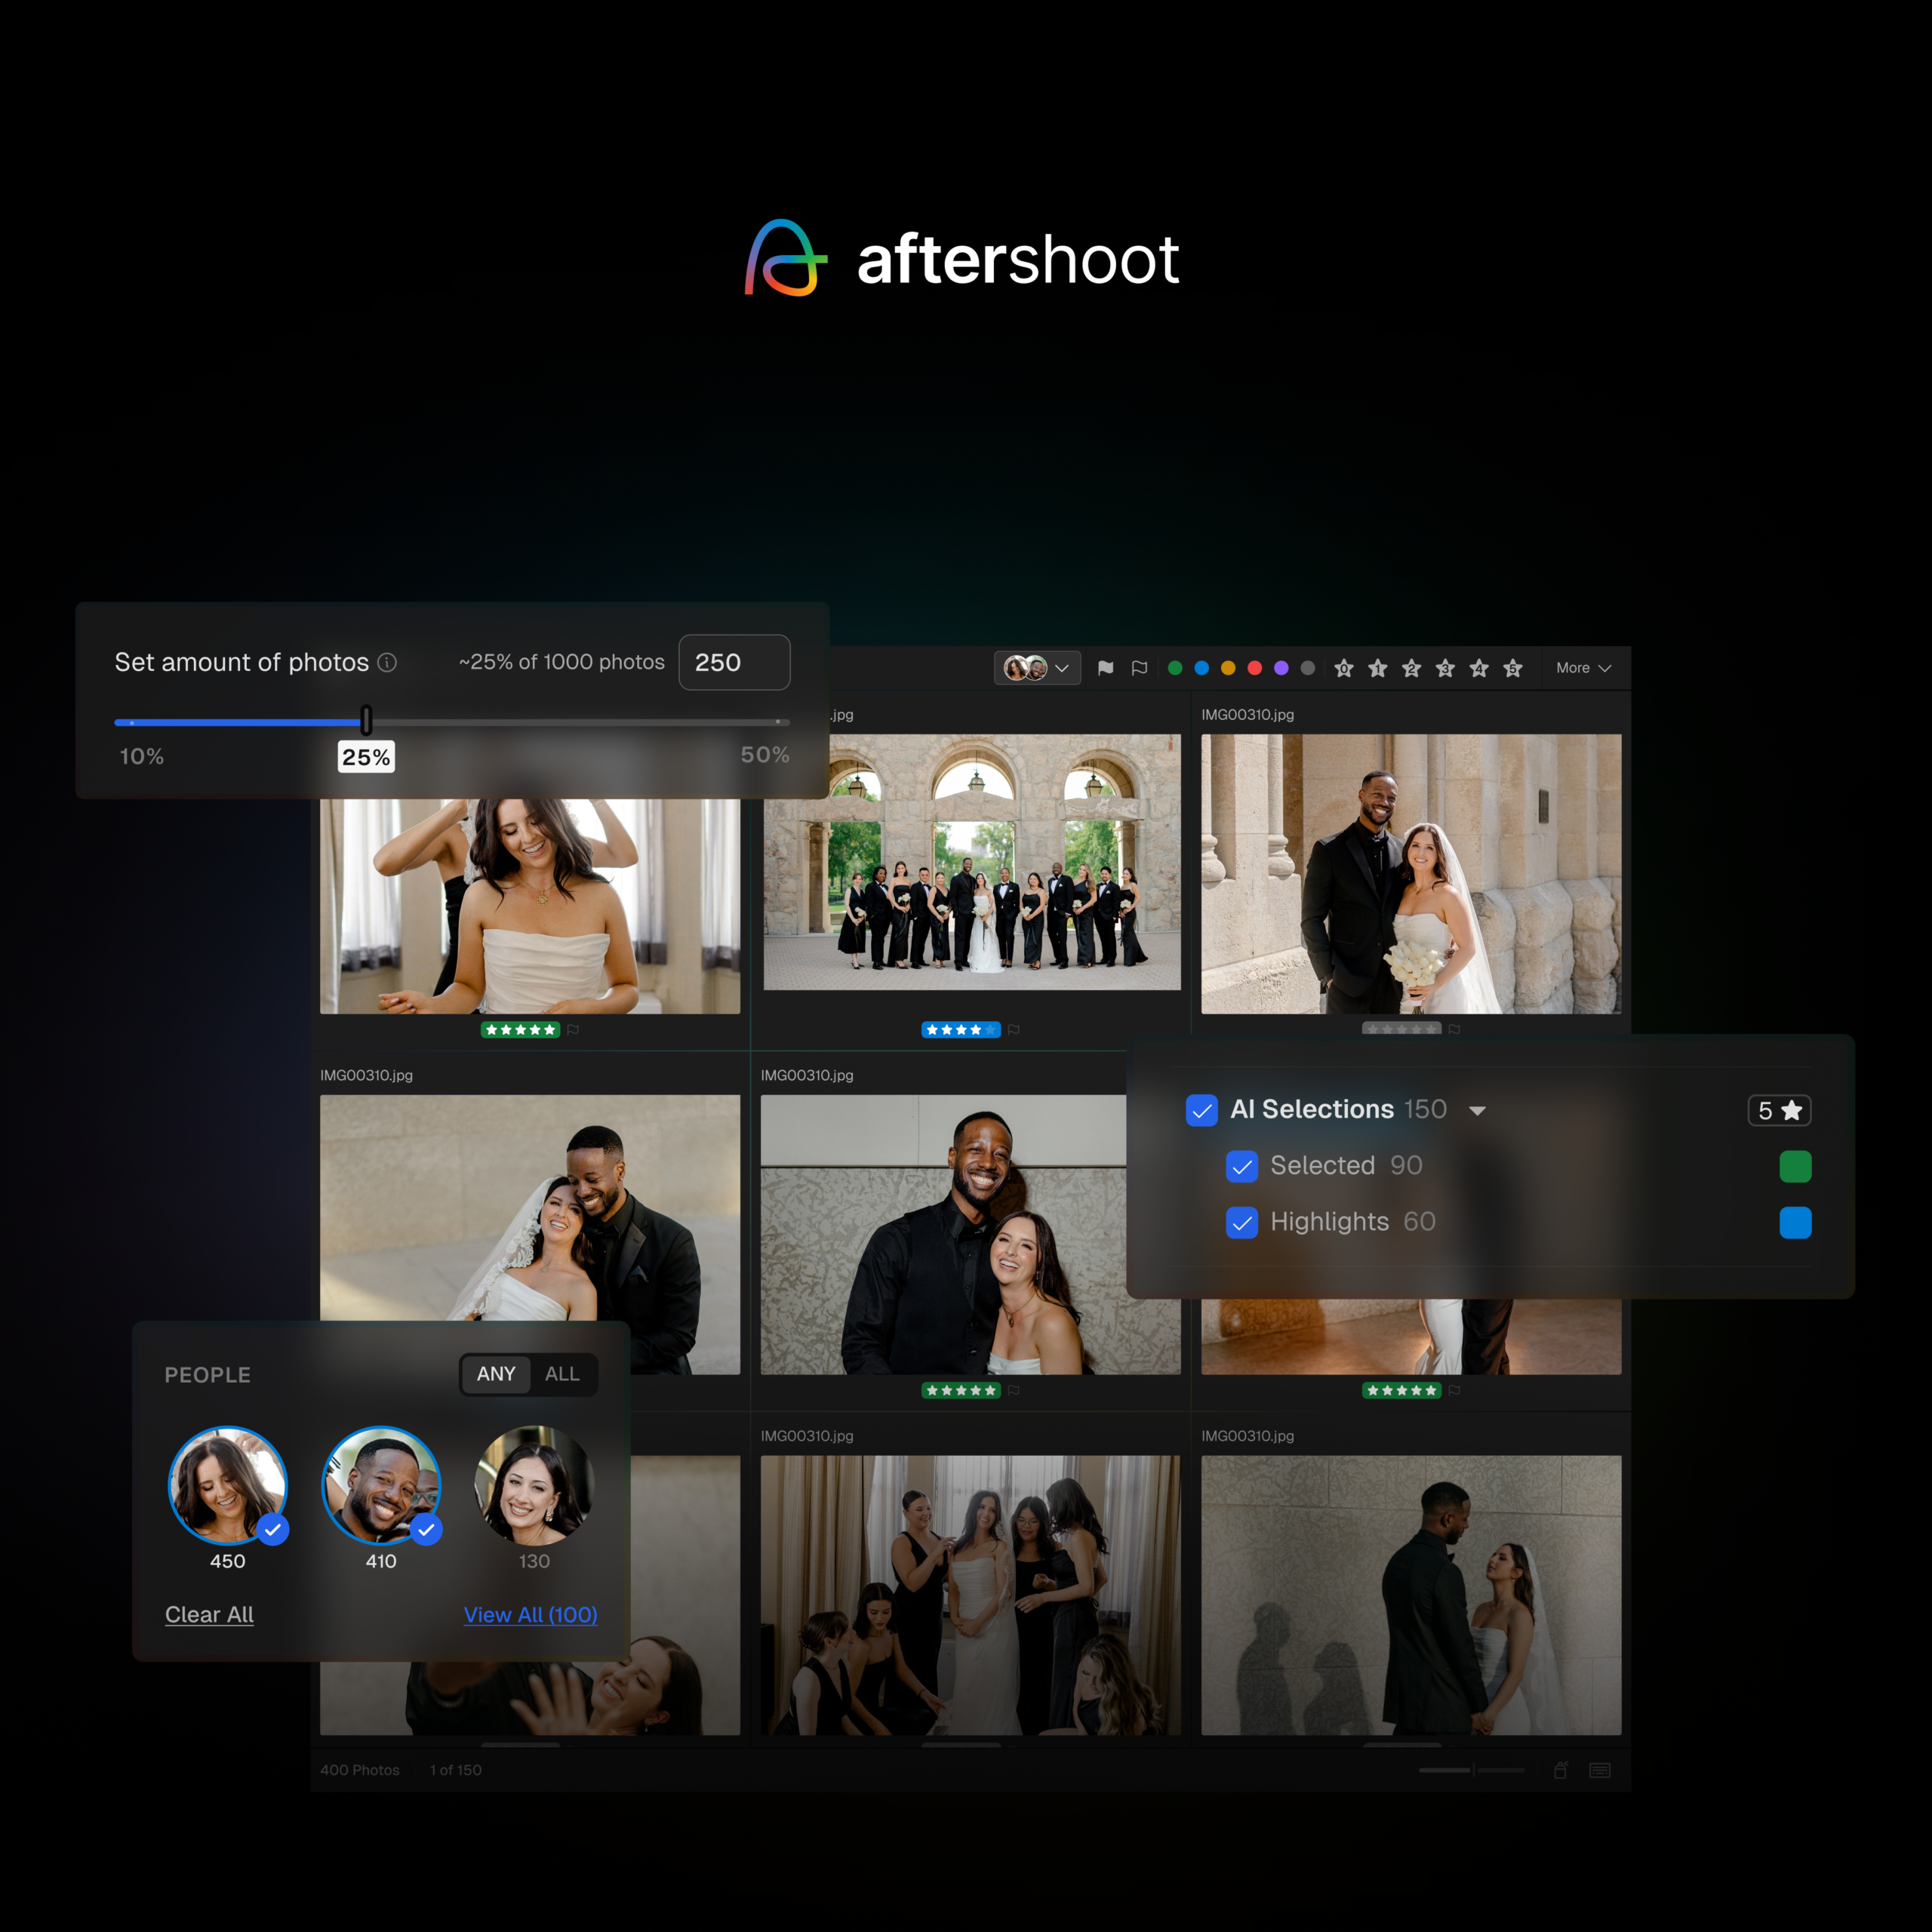
With AI batch editing in Aftershoot, the first pass that you’d otherwise build scene by scene in Lightroom happens across the whole gallery at once. There are three ways to set it up:
- Train a Personal AI Profile from your edited Lightroom Classic or Capture One catalogs. It needs at least 2,500 edited images, and 5,000+ is recommended.
- Convert one of your Lightroom presets into an Instant AI Profile.
- Start from a photographer-made style on the Aftershoot Marketplace.
Because the AI adjusts exposure and white balance per image, you don’t need to split the ceremony into five lighting groups first. Batch cropping (close, medium or wide) and horizon straightening happen in the same pass.
| Task | In Lightroom | With Aftershoot | Still your call |
|---|---|---|---|
| Grouping by light | Manual | Not needed. The AI adapts per image | Checking frames where the light was extreme |
| Base exposure and white balance | Master + Sync + Match Total Exposures | Applied per image in your style | Skin tones and creative intent |
| Crops and straightening | Per photo | Batch crop modes plus auto-straighten | Story crops and album layouts |
| Final look | Your edits | A first pass in your style | Every frame you deliver |
Once the AI pass is done, you can refine photos in Aftershoot’s built-in RAW editor, Develop, which has its own sync and presets. Or you can send the gallery to Lightroom with edits, star ratings and color labels intact, and finish there using everything above. The Aftershoot and Lightroom workflow walks through that handoff.
Either way, the AI removes the repetitive slider work. The decisions about how the photos should look are still yours.
Batch Edit by Scene, Then Finish by Eye
The fastest Lightroom batch edit happens in a fixed order: group photos by light, perfect one master, sync only what should match, then review every frame. Speed comes from the first three steps. Quality comes from the last one.
If you want to see where batch editing sits in the bigger picture, from import to delivery, read my full Lightroom workflow for photographers.
About the Author
This post is written by Paul Waring, a UK-based professional wedding photographer. He specializes in capturing chic countryside weddings with a contemporary approach.
FAQ: Batch Editing in Lightroom
How Do I Edit Multiple Photos at Once in Lightroom?
Edit one photo, select it along with the similar photos, then use Sync (Lightroom Classic) or Copy and Paste Edit Settings (Lightroom Desktop and Mobile). Choose only the settings that should match, then review each photo.
What Is the Difference Between Sync and Auto Sync in Lightroom Classic?
Sync applies a finished edit once, after you choose which settings to copy. Auto Sync applies every adjustment to all selected photos live as you make it. Auto Sync is faster, but it’s riskier if you forget it’s on.
How Do I Apply a Preset to Multiple Photos in Lightroom?
In Lightroom Classic, select the photos in Library Grid view and choose the preset from Quick Develop’s Saved Preset menu. You can also apply it on import. In Lightroom Desktop, select the photos and click the preset.
Can You Batch Edit in Lightroom Mobile?
Yes. Copy Settings from an edited photo using the three-dot menu, select the other photos, and tap Paste. It works best for small sets. Sync and Auto Sync are only in Lightroom Classic.
How Do I Stop Lightroom From Syncing My Crop?
In the Synchronize Settings or Copy Settings dialog, click Check None and leave Crop unticked. Do the same for Spot Removal and brush masks.
Is AI Batch Editing Better Than Lightroom Sync?
They solve different problems. Sync copies identical values, so it’s fast and exact for consistent light. AI editing adapts your style to each photo, which suits large galleries shot in changing light. Many photographers run the AI first pass, then fine-tune in Lightroom.