TL;DR
- A photography workflow has three stages: pre-production, the shoot, and post-production. Most of the time goes into post-production.
- The post-shoot order that holds up: back up → import and organize → cull → edit → retouch → export → deliver and archive.
- Back up before you cull, and cull before you edit. Editing frames you later reject is the most common time sink.
- Use one folder template and one file-naming pattern for every job so any file is findable months later.
- Start every edit from a consistent base (a preset or an AI profile trained on your own edits), then spend manual time on the images that matter.
- Choose tools by stage: Lightroom Classic and Capture One for editing, Photo Mechanic or AI tools (Aftershoot, Narrative, FilterPixel, Imagen) for culling and base edits, and a gallery platform for delivery.
- Review your workflow every quarter and fix the step that caused the most rework.
A photography workflow is the system you repeat on every job, from the moment a card leaves your camera to the moment a client opens their gallery. When it’s working, you know where every file lives, how long each stage takes, and what happens next. When it isn’t, you lose evenings to hunting for files, re-culling, and re-exporting.
These photography workflow tips break post-production into eight steps you can copy, then cover the habits, tools, and common mistakes that decide how quickly (and how safely) you get from import to delivery. They apply whether you edit in Lightroom Classic, Capture One, or an AI-assisted tool, and they’re written for photographers handling weddings, events, portraits, and other high-volume work.
What Is a Photography Workflow?
A photography workflow is the set of steps a photographer repeats on every job, from planning the shoot to backing up, culling, editing, delivering, and archiving the images. A good workflow is consistent (same steps, same order, same folder structure), so nothing gets lost and turnaround times stay predictable.
Every workflow falls into three stages:
| Stage | What Happens | Where Time Gets Lost | What to Standardize |
|---|---|---|---|
| Pre-production | Client brief, shot list, timeline, gear and card prep | Unclear deliverables, missed must-have shots | A client questionnaire and a pre-shoot checklist |
| The shoot | Capture, dual-card recording, on-site backups | Full cards, unsynced camera clocks, mixed file names | Camera settings, card handling, clock sync |
| Post-production | Back up, import, cull, edit, retouch, export, deliver, archive | Culling and editing | Folder template, culling rules, base edit, export presets |
This guide focuses on post-production, because that’s where most hours go, but the first step covers the shoot-day habits that make everything after it easier.
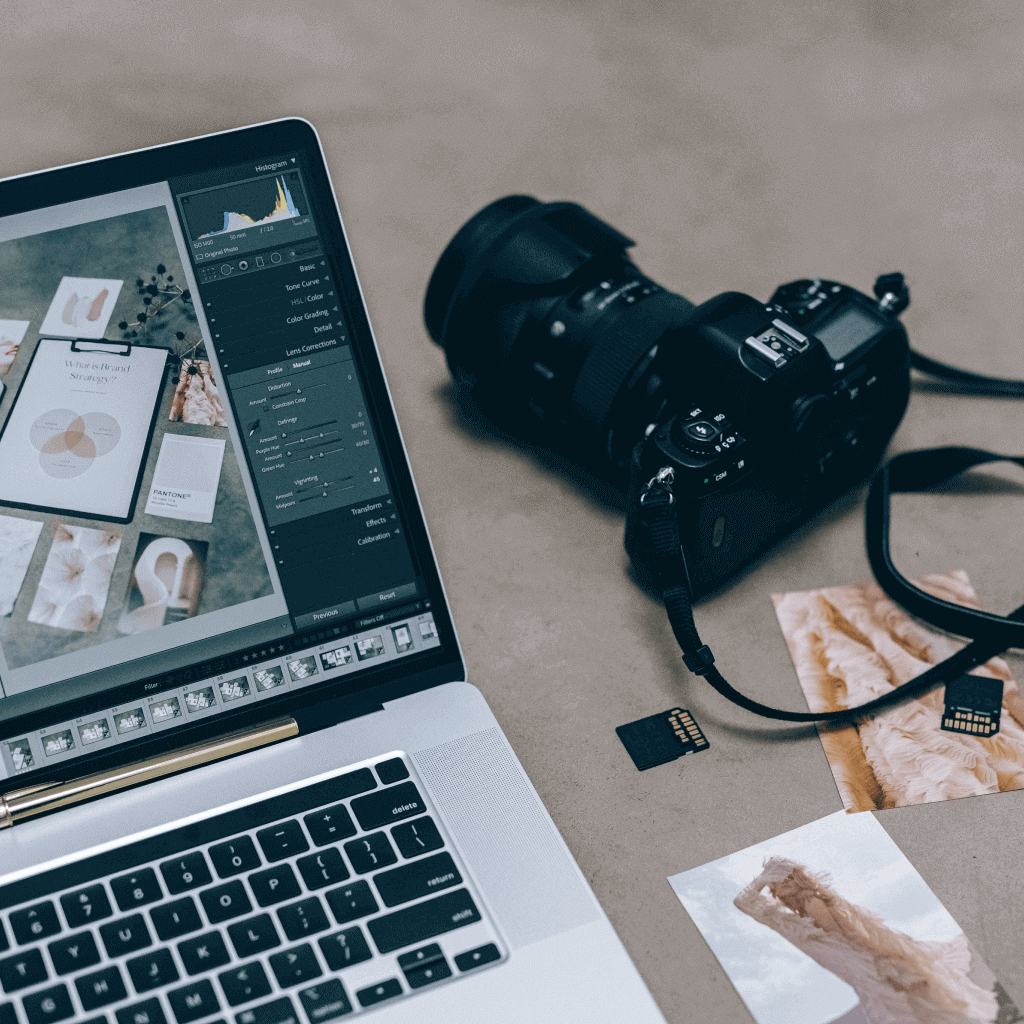
The Photography Workflow, Step by Step (From Memory Card to Client Gallery)
Here’s the order that holds up whether you shoot 200 frames or 6,000. Each step has one job, and each one makes the next step faster.
| Step | Goal | You’re Done When |
|---|---|---|
| 1. Prepare before the shoot | Avoid problems you’d otherwise fix in post | Cards formatted, clocks synced, deliverables agreed |
| 2. Back up | Never have a single copy of client work | Two verified local copies exist, cloud copy started |
| 3. Import and organize | Make every file findable later | Files renamed and sitting in your standard folder template |
| 4. Cull | Edit only the images you’ll deliver | Final selection hits your target count |
| 5. Edit | Get a consistent look across the set | Base edit applied, hero images refined |
| 6. Retouch | Polish only what needs it | Agreed images retouched |
| 7. Export | Produce the right file for each destination | Web, print, and social exports saved from presets |
| 8. Deliver and archive | Close the job cleanly | Gallery sent, archive written, job marked complete |
Step 1: Prepare Before You Shoot
Most post-production problems start on shoot day. Before any job:
- Format cards in-camera, and only after the previous job has two verified backups.
- Record to both card slots if your camera has them, so a single card failure doesn’t cost you the day.
- Sync the clock on every body you’ll use, including your second shooter’s. When you merge the sets later, images will sort in the order they were taken.
- Give each body its own file prefix in the camera menu so two cameras never produce the same filename.
- Agree the deliverables and delivery date in writing: how many images, which ones get retouched, and when the gallery arrives.
Step 2: Back Up Before You Do Anything Else
Copy the cards before you cull, edit, or even browse. A simple 3-2-1 photography backup plan (three copies, two media types, one off-site) is still the safest approach. One copy lives on your working SSD, one mirrors to a NAS or desktop RAID, and one syncs to a cloud service like Backblaze or Dropbox overnight. Automate the mirror rather than relying on manual drag-and-drop.
Check file counts on both local copies before you reformat a single card. If you import through Lightroom Classic, the Make a Second Copy To option in the import dialog writes a backup while it imports.
Step 3: Import and Organize With One Folder Template
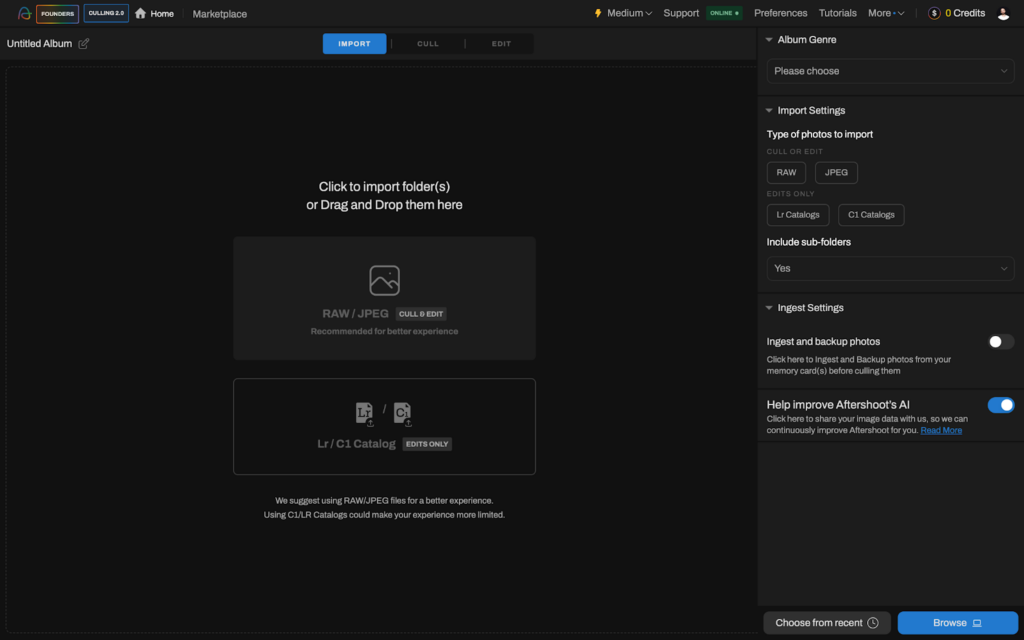
The import stage decides how organized the rest of the job will be. Use the same folder template for every shoot so you never have to think about where something went:
2026/
  2026-10-17_Smith-Wedding/
    01_RAW/
    02_Selects/
    03_Edited/
    04_Exports/
      Web/
      Print/
      Social/
    05_Delivered/
Rename files at import rather than later, using a pattern like 2026-10-17_Smith-Wedding_0001. Renaming after your backups are made means the backup copies no longer match the working files.
Keep your working files on a fast SSD. Import lag and slow previews are usually a storage problem, not a software problem. If you cull or edit in Lightroom Classic, building Smart Previews on import speeds things up on slower machines.
Pro Tip: Put the date first (YYYY-MM-DD) in folder and file names. Every operating system then sorts your jobs chronologically, without a catalog.
Step 4: Cull Before You Edit
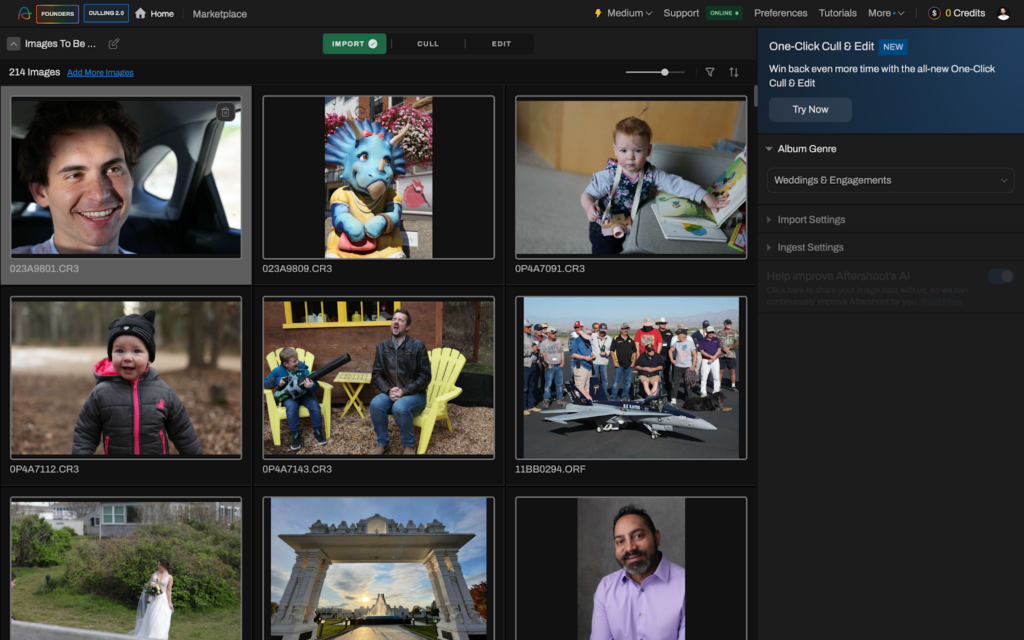
Culling is where most photographers lose hours they can’t bill for. Going frame by frame dulls attention, and that fatigue shows up later in the edit. Every image you edit and then reject is wasted time, so finish the cull before you touch a slider.
A two-pass cull keeps it manageable:
- Technical pass: remove missed focus, motion blur, closed eyes, and near-identical burst frames.
- Story pass: pick the strongest frame from each moment and check that every part of the day or session is covered.
Set a target count before you start (say, 500 images for an eight-hour wedding) so you know when you’re done.
Your tool choice depends on how much of this you want to do by hand. Photo Mechanic is the fast, fully manual option. Lightroom Classic now has a built-in Assisted Culling feature that scores faces for open eyes and sharpness. Dedicated AI culling tools like Aftershoot Select can run the first pass for you: it groups duplicates, flags blur and closed eyes, and lets you set a target count up front with Cull to Target. You can let it pick the selects (AI-Automated) or keep every decision yourself while it groups and scores images (AI-Assisted).
Either way, the point isn’t to let software decide for you. It’s to remove the noise that hides good work. Skim the rejects before you lock the selection; intentionally soft or unusual frames are exactly what automated rules miss. For a full walkthrough, see our photo culling workflow guide.
Once the selection is locked, keep ratings and color labels consistent so they carry into your editor.
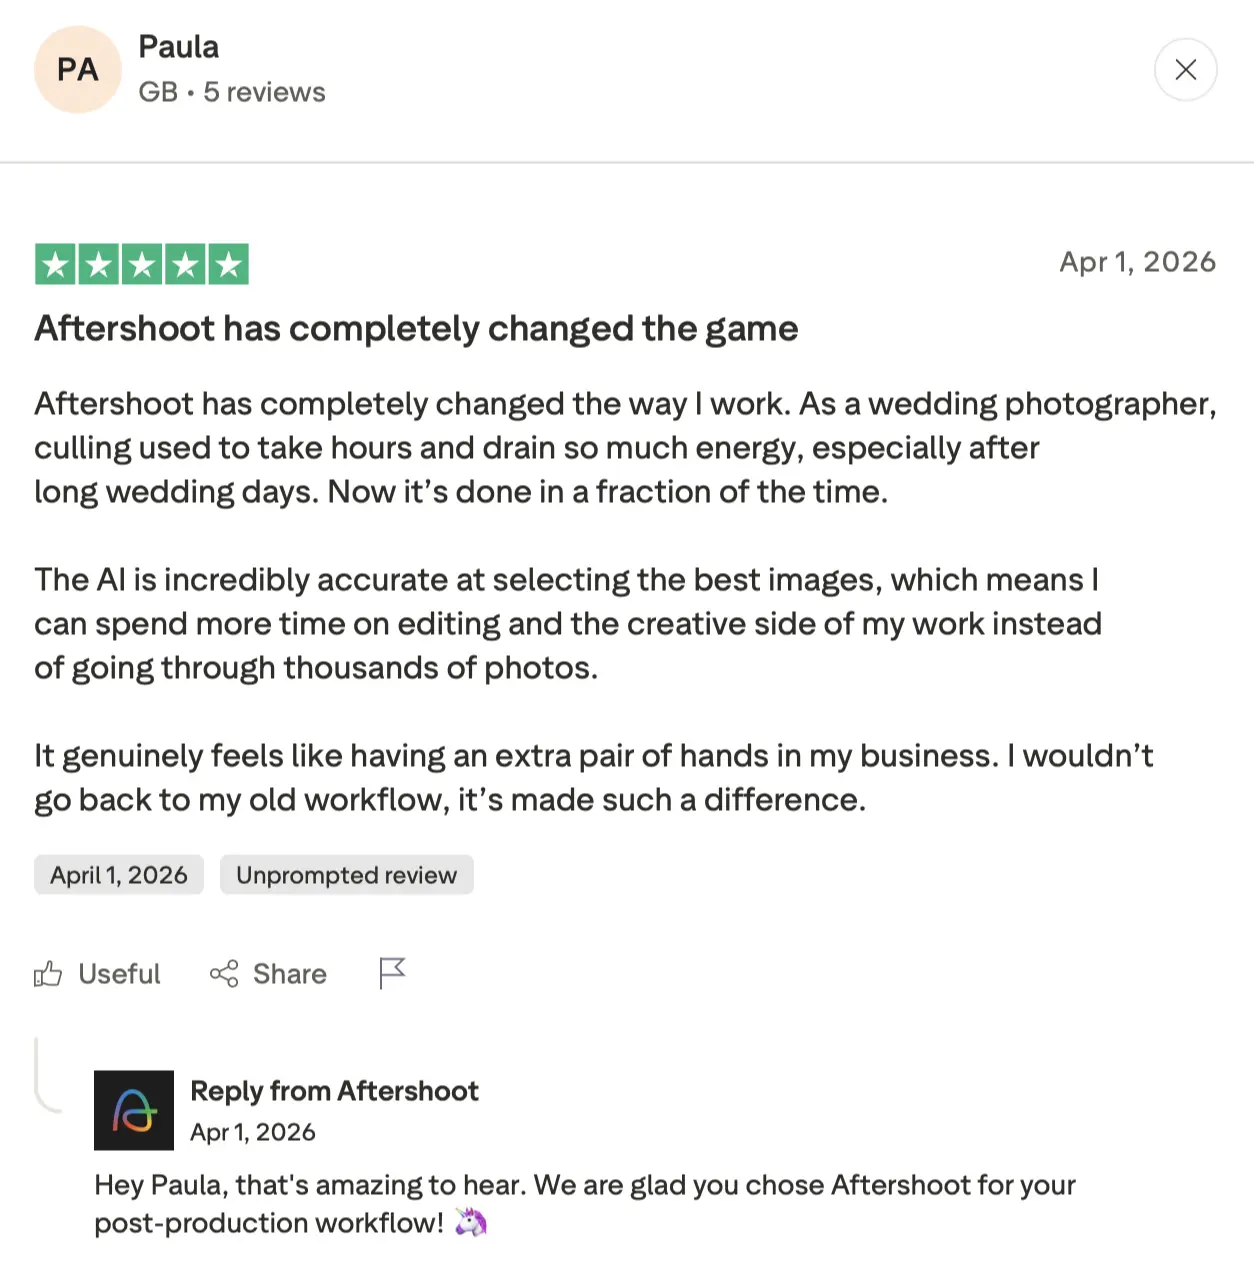
Just so you know, a bunch of photographers are also using Aftershoot, and here’s what they have to say:
Step 5: Edit a Consistent Base, Then Refine
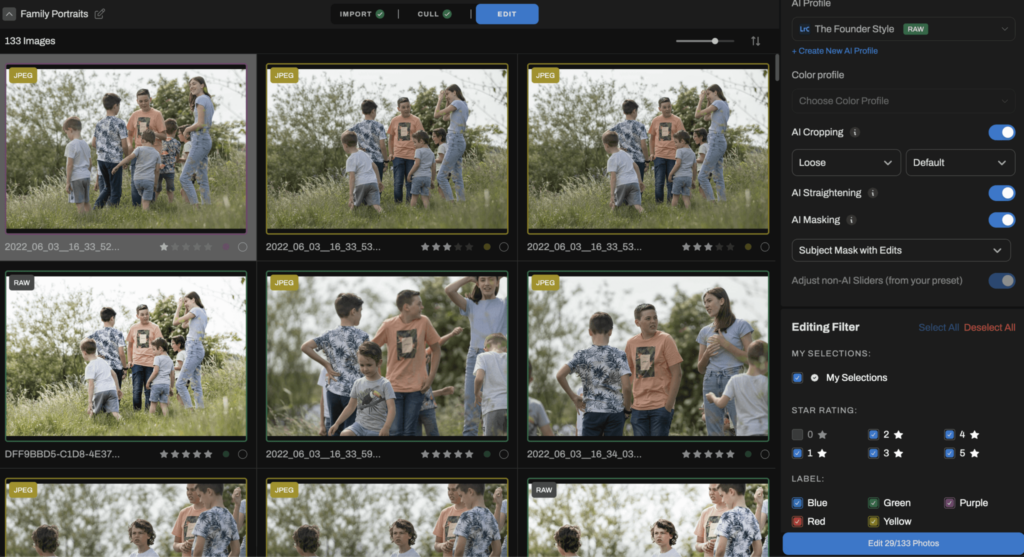
Don’t edit image by image. Apply a base look to the whole set first, then spend your manual time where it counts:
- Apply your base edit (a preset, or an AI profile trained on your own edits).
- Group images by scene and lighting, correct one image per group, and sync the adjustments across it.
- Refine hero images (album picks, portfolio frames) individually.
If you use AI editing, the quality of the base depends on what you train it on. Aftershoot builds a personal AI Profile from your own edited Lightroom Classic or Capture One catalog (2,500 images minimum, 5,000 recommended), can turn a Lightroom preset into an Instant AI Profile, or lets you start from one of 30+ creator styles on the Aftershoot Marketplace. You then refine in its built-in RAW editor, Aftershoot Develop, or send the images to Lightroom Classic, Capture One, or Photoshop.
Lightroom Classic’s own AI tools (Generative Remove, Distraction Removal for reflections and people, Lens Blur, and Denoise) now cover a lot of finishing work that used to require Photoshop.
Step 6: Retouch Only the Images That Need It
Retouching scope should be agreed before the shoot (Step 1), not decided image by image at midnight. A common split is light cleanup on the whole gallery and full retouching on portraits and album picks.
Batch where you can: retouch one image from a session, then sync those settings across the rest. AI retouching tools, including Aftershoot Retouch, handle skin, blemishes, stray hairs, and glass glare on RAW files and sync them across a set. Keep Photoshop for composites and complex fixes. Subtle, consistent corrections age better than heavy-handed ones.
Step 7: Export With Saved Presets
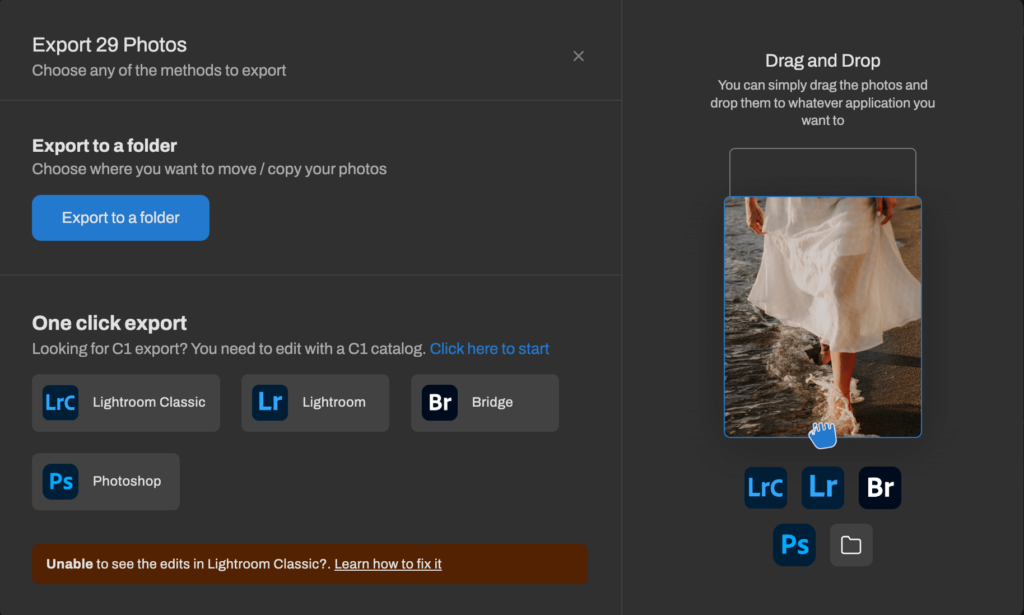
Save one export preset per destination and never export with ad-hoc settings:
| Destination | Format | Color Space | Size |
|---|---|---|---|
| Online gallery | JPEG, quality ~80 | sRGB | 2048–3000 px long edge |
| Print lab | Full-resolution JPEG or TIFF | As your lab specifies | Full resolution |
| Social | JPEG | sRGB | Platform size (e.g., 1080 px wide) |
Export into the matching subfolder of your job template (04_Exports/Web, /Print, /Social). If upload speed is a bottleneck, a compressor like JPEGmini reduces JPEG file sizes before gallery upload.
Step 8: Deliver, Archive, and Close the Job
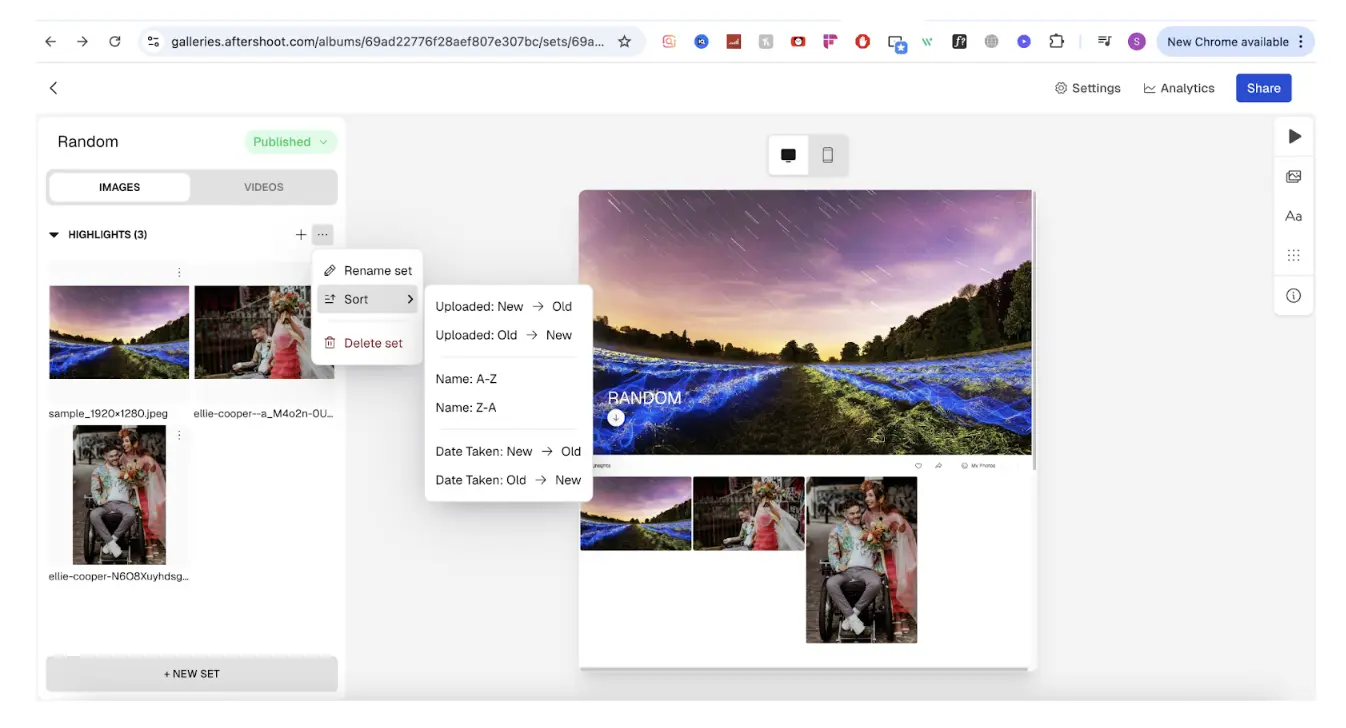
Deliver through a client gallery rather than a download link, so clients can favorite, download, share, and order prints in one place. If you’re weighing platforms, our guide to choosing a client gallery compares storage, commissions, and proofing tools.
Then close the job:
- Archive the RAW files, final exports, and catalog together, following your 3-2-1 plan.
- Decide how long you keep RAW files, and put that retention period in your contract.
- Send the final invoice and a review request (ideally automated through your CRM).
- Note anything that slowed this job down. That list drives your quarterly review (Tip 10).
10 Photography Workflow Tips That Save the Most Time
1. Shoot RAW (and Know When JPEG Is Fine)
A RAW file keeps everything the sensor captured: full tonal range, color depth, and shadow detail. That’s what lets you pull back a blown sky or fix white balance under mixed venue lighting, and it’s what editing software and AI profiles need to make accurate color and exposure decisions. JPEGs discard data in skin tones and gradients that no algorithm can rebuild.
JPEG is like the overly enthusiastic intern who summarizes your report into three bullet points and throws away the original: it bakes in sharpening, saturation, and a white balance you might regret. It still has a place for high-speed bursts or same-day social previews. For anything you’ll deliver, shoot RAW.
RAW files also keep your archive useful as tools improve, since newer editing features can reprocess older work with the same precision as new images.
2. Keep Working Files on a Fast Drive
Previews, imports, and exports all wait on storage. Work from an internal or external SSD, keep your Lightroom Classic catalog on an internal drive, and move finished jobs to slower archive drives or a NAS. If your editing software feels sluggish, check free space on the working drive before you blame the computer.
3. Write Your Culling Rules Down Before You Start
Decide your target count, must-have moments, and deal-breakers (closed eyes in group shots, missed focus on the couple) before you open the set. Written rules turn culling from a series of judgment calls into a checklist, and they’re what you’ll hand to a second shooter or editor later.
4. Edit by Scene, Not by Image
Sort the selection by capture time, then edit the first image of each lighting setup (ceremony, golden hour, reception) and sync those settings to the rest of that group. You make a handful of real decisions instead of hundreds of near-identical ones.
5. Train Your Base Edit on Your Own Finished Work
A preset built on one hero image rarely survives a full wedding. A base edit trained on hundreds or thousands of your finished images, whether that’s a refined preset library or an AI profile, adapts better across lighting and cameras. Update it when your style changes, and feed your corrections back in.
6. Learn the Shortcuts You Use Every Day
In Lightroom Classic, P (pick), X (reject), U (unflag), and 1–5 (star ratings) cover most of a cull, and Caps Lock turns on auto-advance so the next image loads after each rating. Ten or fifteen shortcuts you use daily beat a full cheat sheet you never open.
7. Keep Catalogs Lean and Backed Up
A single catalog holding ten years of work gets slow and becomes a single point of failure. Many photographers use one catalog per year or per job type. Whatever you choose, set your editor to back up the catalog on a schedule, because the catalog holds your edits and metadata, not just the RAW files.
8. Put Client Admin on Autopilot
A CRM for photographers keeps contracts, invoices, questionnaires, and reminders in one place and sends them automatically at the right stage of the job. HoneyBook, Studio Ninja, Dubsado, and Táve are the names you’ll see most often. Every email you don’t write by hand is time back for the edit.
9. Promise a Delivery Date You Can Beat
Put the delivery window in the contract and plan your workload backwards from it. Sending a small sneak-peek set within a day or two buys goodwill while the full gallery is in progress, and delivering ahead of a promised date lands better than delivering “fast” against no date at all.
10. Track Turnaround and Review Every Quarter
Workflows age the same way software does. Log how long each job takes from shoot to delivery, then once a quarter look for the step that caused the most rework: import lag, export queues, missing backups, re-culls. Fix that one thing before the next busy season.
Photography Workflow Software by Stage (2026 Pricing)
You don’t need a tool for every step, but you do need to know which stage each tool covers. Prices below were checked on vendor sites in September 2026 and change often, so confirm before you buy.
| Stage | Tool | Starting Price | What It’s Best For |
|---|---|---|---|
| Ingest and manual culling | Photo Mechanic | $14.99/mo, $149/yr, $299 perpetual; Photo Mechanic Plus no longer sold (Mar 2026) | Very fast ingest, metadata, and manual culling (no AI) |
| AI culling | Aftershoot Select | $10/mo billed annually ($15 monthly) | Unlimited AI culling, duplicate grouping, Cull to Target |
| AI culling | Narrative Select | Lite $10/mo annual ($15 monthly); Standard $20; Premium $40; Ultra $60 | Face close-ups and scene grouping while you make each call |
| AI culling | FilterPixel | Standard $14.99/mo billed annually ($180/yr), 20 DeepCull shoots/yr; Pro $34.99 | Genre-specific culling; includes 20 DeepCull shoots/year |
| Editing | Adobe Lightroom plan | $11.99/mo (annual plan, billed monthly) | Lightroom + Lightroom Classic, cataloging, 1 TB cloud |
| Editing + retouching | Adobe Photography plan | $19.99/mo (annual plan, billed monthly) | Adds Photoshop to Lightroom and Lightroom Classic |
| Editing | Capture One Pro | About $18/mo annual after 6% increase from June 2026 | Color control and tethered studio work |
| AI editing | Aftershoot Edit | $30/mo billed annually ($35 monthly) | Unlimited edits from your own AI profile |
| AI editing | Imagen | $0.05/photo + $7 monthly minimum; flat-fee plans vary by region | Cloud editing billed per image |
| AI retouching | Aftershoot Retouch | $20/mo billed annually ($25 monthly) | Batch skin, blemish, hair, and glare retouching |
| Culling + editing + retouching | Aftershoot Complete | $45/mo billed annually ($55 monthly) | All three stages in one app |
| Delivery | Aftershoot Galleries | Free Starter plan (10 GB photo, 1 GB video) | Galleries connected to your edit, face search, print store |
| Delivery | Pixieset | Free 3 GB; Basic $8/mo annual ($10 monthly); Pro $24/mo annual | Popular all-round gallery and print store |
| Business admin | HoneyBook, Studio Ninja, Dubsado, Táve | Varies by plan | Contracts, invoices, automations |
Start with your biggest bottleneck. If culling eats your week, a culling tool pays off first. If you already cull quickly but spend days on color, prioritize editing. For a deeper side-by-side, see our guide to comparing photography workflow software.
Where Aftershoot Fits in the Workflow
Aftershoot covers Steps 4 to 6 (culling, editing, and retouching) in one desktop app that processes images locally on your computer, so files aren’t uploaded to Aftershoot’s servers to be culled or edited. Galleries then handles delivery. You can use it for one stage, like culling before a Lightroom Classic edit, or run the whole post-production workflow in it; ratings, labels, and edits export to Lightroom Classic or Capture One when you need them.
The AI does the first pass; you still review, adjust, and make the final call. In Aftershoot’s 2025 survey of more than 1,000 photographers using AI in their workflow, 81% said they had reclaimed their work-life balance.
Get a free copy of the report here ↓
“With 20 weddings and hundreds of sessions this year, it’s given me my work/life balance back.”
– Ashlee Weaver, wedding photographer
To see how wedding photographer Esteban Gil sets up each stage, read about his same-day edit and overnight cull workflow.
Common Photography Workflow Mistakes (and How to Fix Them)
Most workflow problems aren’t dramatic. They’re small habits that cost a few minutes on every job, or one careless moment that costs an entire shoot.
| Mistake | What It Costs You | How to Fix It |
|---|---|---|
| Formatting cards before backups are verified | A lost job you can’t reshoot | Format in-camera only after two local copies pass a file-count check |
| Relying on one backup drive “for now” | Total loss when that drive fails | Follow 3-2-1 and automate the cloud copy so it runs without you |
| Editing before culling | Hours spent on images you’ll reject | Cull to a target count first; edit only the final selection |
| A new folder structure for every job | Files you can’t find six months later | Use one folder template and date-first naming for every shoot |
| Renaming files after the backup is made | Backups that no longer match the working files | Rename at import, before any copies are made |
| Unsynced clocks with a second shooter | Merged sets out of order and slow to cull | Sync clocks before the shoot; fix mismatches in bulk with Lightroom Classic’s Edit Capture Time |
| Editing every image individually | Inconsistent looks and lost days | Apply a base edit, then sync corrections by scene |
| Accepting AI picks without a review | Missed candid or intentionally soft moments | Skim the rejects and swap frames before you lock the selection |
| Exporting with one-off settings | Wrong color space, wrong sizes, re-exports | Save presets for web, print, and social, and always export from them |
| Working from a slow or nearly full drive | Lagging previews and exports | Move active jobs to an SSD; archive finished ones |
| No written delivery date | Client follow-ups and pressure at the end | Put the delivery window in the contract and send a sneak peek early |
| Never reviewing the workflow | The same bottleneck every season | Log turnaround per job and fix one step every quarter |
Example: A Wedding Photography Workflow Timeline
Here’s how the eight steps might map onto a single wedding with a four-week delivery promise. Adjust the windows to your own contract.
| When | What Happens |
|---|---|
| Week before | Confirm timeline and shot list, format cards, sync camera clocks with your second shooter |
| Wedding night | Copy cards to working SSD and backup drive, verify counts, start cloud upload |
| Day 1–2 | Import, rename, cull to target count, send a sneak-peek set |
| Week 1 | Apply base edit, sync by scene, refine hero images |
| Week 2 | Retouch portraits and album picks, export from presets |
| Week 3 | Final QA pass, build and deliver the gallery |
| After delivery | Archive the job, send invoice and review request, note what slowed you down |
For the editing stage specifically, see our wedding photography editing workflow.
Build a Workflow You Can Repeat
A good photography workflow isn’t always the one with the most tools. It’s the one you can run the same way on a Tuesday and at the end of a three-wedding weekend: back up first, cull before you edit, start every edit from a consistent base, export from presets, and review what slowed you down.
Start with the step that costs you the most time right now. For most photographers that’s culling or base editing. If you want to see how AI handles those stages on your own images, you can try Aftershoot free for 30 days, no credit card required.
Next, walk through a full photo editing workflow in Aftershoot, step by step.
In the end, it’s about creating a seamless workflow that empowers you to excel in your passion and profession.
If you’re interested in more photography tips, from shooting and business to post production and creativity, take a look at our list of top photography podcasts.
Happy shooting!
FAQs for Photography Workflow Tips
Q1. How do professional photographers organize their photos?
Most use one folder template for every job, usually a year folder containing date-first job folders (for example, 2026-10-17_Smith-Wedding) with subfolders for RAW files, selects, edits, and exports. Files are renamed at import with the date and job name so they sort correctly anywhere.
Q2. What is the best software for a photography workflow?
It depends on the stage. Lightroom Classic and Capture One remain the standard editors, Photo Mechanic is the fastest manual culling tool, and AI tools like Aftershoot, Narrative, FilterPixel, and Imagen automate culling and base edits. Many photographers combine an AI tool for culling and editing with a separate client gallery platform for delivery.
Q3. How can I speed up my photography post-processing workflow?
Cull before you edit, apply a base edit to the whole set and sync corrections by scene, learn the keyboard shortcuts you use daily, and export from saved presets. The biggest single gain for high-volume photographers usually comes from automating the first culling pass and the base edit.
Q4. Should you cull or edit first?
Cull first. Editing images you later reject wastes time, and culling to a target count gives you a fixed, smaller set to edit consistently.
Q5. What Is the 3-2-1 backup rule for photographers?
Keep three copies of your files, on two different types of storage, with one copy off-site. In practice that’s usually a working SSD, a NAS or RAID mirror, and a cloud backup.
Q6. Which parts of the workflow should stay manual?
Anything that shapes the story and the look: the final selection, hero-image edits, and color decisions on key moments. Let software handle repetitive first passes, then review its choices before anything reaches the client.
Q7. Do clients notice when photographers use AI Editing?
Rarely, when the photographer reviews and refines the results. In Aftershoot’s 2025 survey of more than 1,000 photographers using AI, only 1% reported client concerns about authenticity, while 30% said clients gave positive feedback on faster, more consistent delivery.
Q8. Does Aftershoot work with Lightroom and Capture One?
Yes. Aftershoot exports culled and edited images to Lightroom Classic or Capture One with star ratings, color labels, and flags intact, and it trains personal AI editing profiles from your existing Lightroom Classic or Capture One catalog.