Welcome to the fascinating world of photography lighting techniques, where the debate of hard light vs soft light takes center stage.
Whether you’re capturing portraits, landscapes, or still life, understanding the nuances and harnessing these lighting methods is your ticket to elevating your craft.
In this article, we’ll delve into hard vs soft light, explore their unique characteristics, and give you a few pointers for using these photography lighting techniques. Before we begin, here’s an in-depth video on how to use hard light and soft light in photography (also check out Part 2 to view the final results)
What is Hard Light?
Let’s start with hard light, the bold and unapologetic counterpart to soft light.
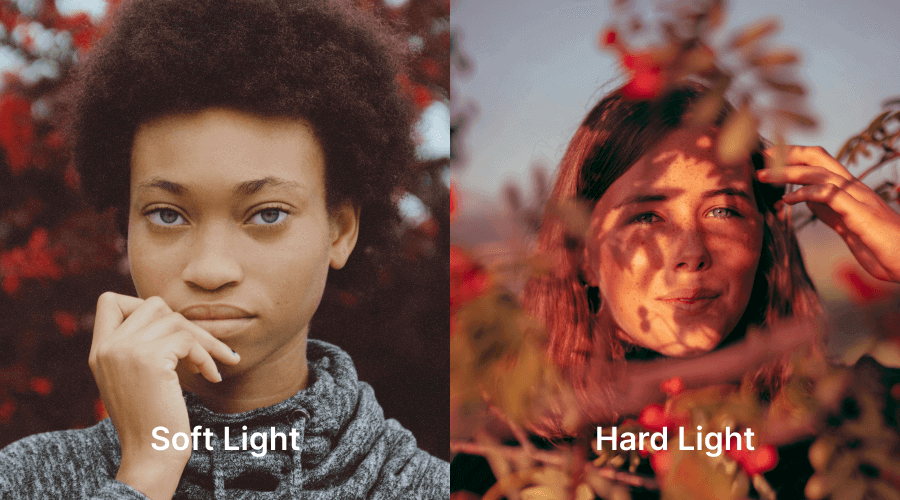
Hard light is characterized by its intense, focused beams that create sharp, well-defined shadows and highlights. It typically comes from a small, concentrated light source like the sun on a clear day, a spotlight, or a small lightbulb.
The reason comes down to size and distance: the smaller a light source appears relative to your subject, the harder the light. That’s why direct midday sun (despite being enormous) acts like a tiny point source from 93 million miles away, casting the same crisp-edged shadows as a bare flash or a small spotlight held close to a subject.
When cast onto a subject, hard light accentuates textures, contours, and intricate details, resulting in images with a sense of drama and depth. It creates high contrast, with bright highlights and dark shadows, which is why it’s popular in fashion, editorial, and certain artistic photography styles.
What is Soft Light?
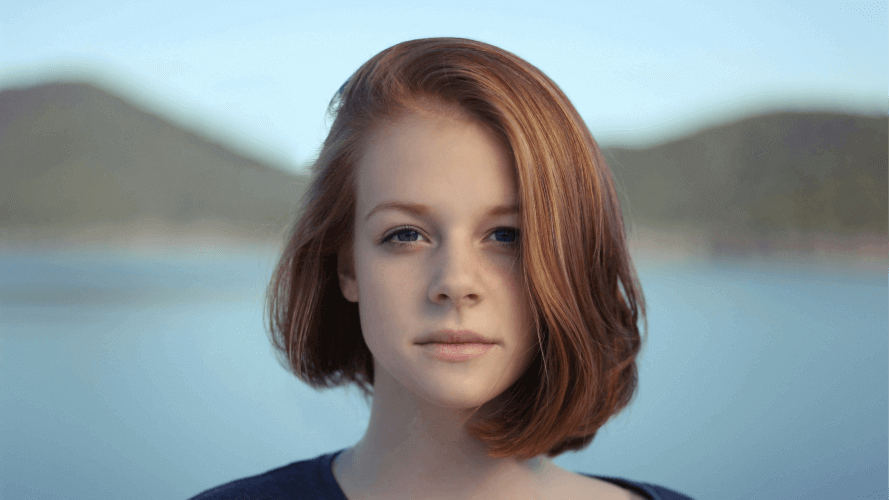
In contrast to the boldness of hard light, soft light exudes a gentle, diffused glow that bathes your subjects in flattering illumination.
This happens because a large light source relative to your subject wraps around it from many angles at once, filling in shadows instead of carving a single hard edge. An overcast sky works this way, the clouds turn the entire sky into one giant diffuser, which is why cloudy days are so forgiving for portraits. A softbox or a large window with sheer curtains does the same thing on a smaller scale.
Soft light minimizes harsh shadows, resulting in smoother transitions between light and dark areas, and creating a soft, ethereal quality that enhances the overall mood of your photographs. It’s commonly used in portrait photography because it minimizes harsh shadows, reduces the appearance of wrinkles and texture, and creates a more pleasing, natural look.
Hard Light vs Soft Light at a Glance
| Aspect | Hard Light | Soft Light |
| Light source size (relative to subject) | Small or concentrated | Large or diffused |
| Shadow edges | Sharp, well-defined | Gradual, soft-edged |
| Contrast | High | Low to moderate |
| Best for | Fashion, editorial, architecture, street, drama | Portraits, weddings, newborns, product, food |
| Common sources | Direct sun, bare flash, spotlight, gridspot | Overcast sky, softbox, umbrella, large window |
| Mood | Bold, dramatic, gritty | Flattering, calm, intimate |
Hard vs Soft: Which Type of Light is Better?
There’s no definitive answer to which type of light is better, as it ultimately depends on the desired effect and the context of the photograph. Both hard and soft light have their strengths and are suited to different scenarios. If you want strong contrast and dramatic effects, such as in fashion, editorial, or conceptual photography, then hard light is better to use. And if you want flattering portraits, especially for skin tones and faces, then soft light should be your choice
When Should You Use Hard Light?
Hard light can be used effectively in several situations where you want to create dramatic effects or emphasize certain aspects of a subject. Choose hard light when you want to:
- Outdoor Daytime Photography for dramatic, high-energy photos, especially in direct sunlight, where hard light naturally occurs.
- Create drama and high-contrast images to produce bold shadows and highlights that add intensity to the scene.
- Highlight Texture and Detail to emphasize the subject’s surface features, making textures stand out sharply.
- Add definitions to subjects to create a more three-dimensional look with strong contrasts and well-defined shapes.
- Create high-contrast, bold effects to achieve a stark, graphic look that makes the subject pop with sharp edges and defined shadows.
Applications of Hard Light Photography
Hard light is ideal for subjects that demand a dynamic visual impact, such as:
- Architectural photography
- Street photography, and
- Fashion shoots
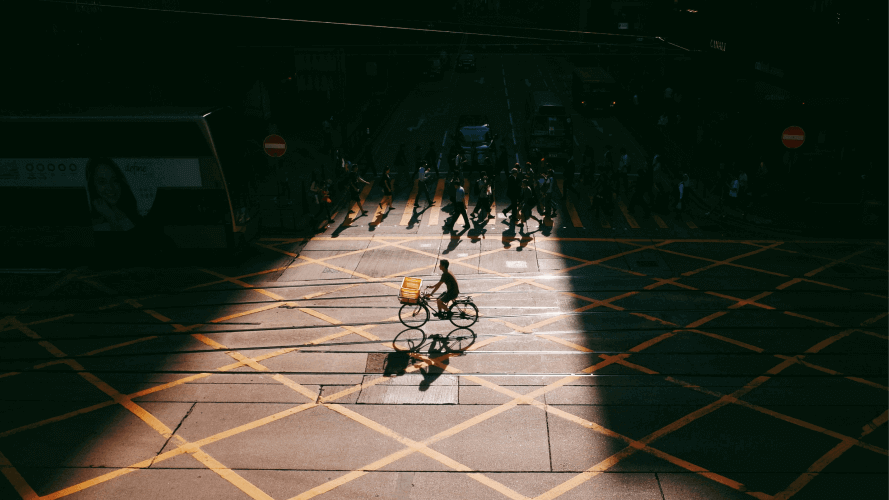
Hard light also works creatively to evoke mood and atmosphere, lending a cinematic quality to your compositions, think film noir, editorial fashion, and moody street photography.
How to Use Hard Light Effectively
Imagine capturing a dramatic portrait against an urban backdrop, with harsh sunlight casting deep shadows and illuminating the subject’s features with striking clarity.
By embracing hard light, you can infuse your image with intensity and energy, capturing a moment that resonates with raw emotion and authenticity.
To maximize the impact of hard light, consider the angle and intensity of your light source. Experiment with positioning your light to create dramatic shadows and highlights, emphasizing texture and dimension.
You can also manipulate hard light by using modifiers such as snoots or grids to control its direction and focus.
When Should You Use Soft Light?
Soft light works best when you want a gentle, flattering effect or need to smooth out harsh features. Reach for it when you want to:
- Create flattering portraits – reducing harsh shadows and softening facial features, ideal for close-up shots.
- Smooth out skin and imperfections – giving the subject a more even, natural look, especially in beauty or fashion photography.
- Achieve a gentle, dreamy mood – for a calm, serene atmosphere, often used in lifestyle or fine art photography.
- Create even lighting in studio settings – so light wraps around the subject and provides consistent exposure across the frame.
Soft light is synonymous with portrait photography – in weddings, newborns, and family sessions alike — where its flattering qualities enhance the natural beauty of your subjects and make them appear approachable and inviting. It’s equally well-suited to still life, food, and product photography, anywhere you want a sense of softness and even, non-reflective illumination.
Also Read: Photo Editing Workflow: Integrating AI Tools for Faster, Smarter Edits
How to Use Soft Light Effectively
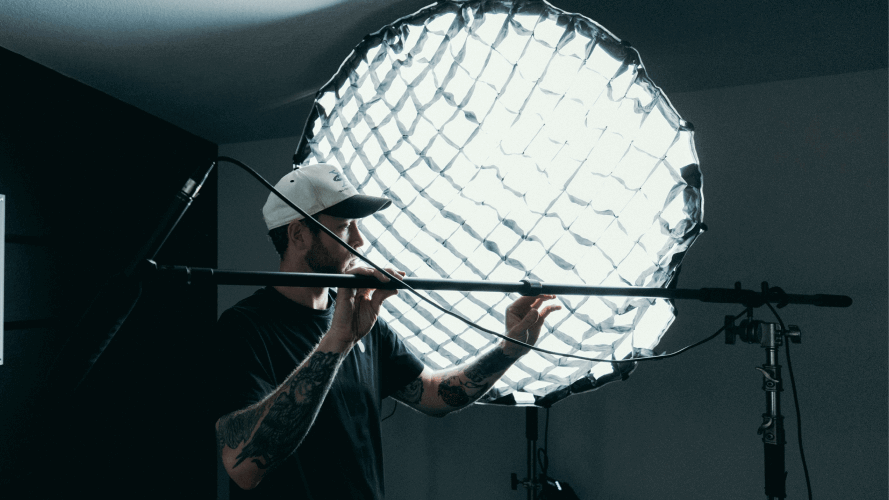
To achieve soft light, consider using modifiers such as umbrellas, softboxes, or diffusers to scatter and soften the intensity of your light source.
By feathering the light or adjusting its distance from your subject, you can further refine the quality of your soft light, creating a flattering glow that enhances skin tones and minimizes imperfections.
Applications of Soft Light Photography
Soft light is synonymous with portrait photography, where its flattering qualities can enhance the natural beauty of your subjects.
Whether you’re shooting in a studio or outdoors, soft light creates a sense of intimacy and warmth, making your subjects appear approachable and inviting.
It’s also well-suited for still life, food photography, and any situation where you want to convey a sense of softness and serenity.

So… Hard Light Vs Soft Light? It’s For You To Decide
The choice of hard vs soft light ultimately depends on the mood, atmosphere, and aesthetic you want to convey in your photographs.
Experiment with different lighting techniques, modifiers, and environments to discover what works best for your unique style and vision.
Whether you’re drawn to the bold drama of hard light or the muted elegance of soft light, embrace the versatility of these photography lighting techniques and let your creativity shine!
Final Thoughts on Hard Light vs Soft Light in Photography
Remember, there are no hard and fast rules in photography, so don’t be afraid to push the boundaries of your creativity using different lighting methods.
In a nutshell, the difference between hard light and soft light is like comparing a bold espresso shot to a smooth latte.
Hard light brings the drama with sharp shadows and intense highlights, perfect for scenes that need a punch.
Soft light, on the other hand, wraps your subjects in a cozy blanket of gentle glow, making everyone look like they just stepped out of a spa day.
So, whether you’re all about that edgy vibe or prefer your shots to feel like a warm hug, don’t be afraid to play around with hard and soft light.
After all, it’s all about finding your unique style and letting your creativity shine, one click at a time!
P.S. If you’re just starting your photography business, here are 8 tips you’ll find super helpful. And if you are looking for a tool that helps you cull and edit all those images you shot using that perfect lighting, Aftershoot is here to help. Start your free 30-day trial today!

FAQs for Hard Light vs Soft Light
Q1. What is the main difference between hard light and soft light?
The main difference lies in the contrast and transition to shadows. Hard light creates dark, sharp, well-defined shadows with high contrast. Soft light creates a smooth, subtle transition between highlights and shadows, wrapping the subject in a gentle glow.
Q2. What causes hard light vs. soft light?
The size of the light source relative to the subject determines the light quality:
1. Hard Light: Created by a small or distant concentrated light source (e.g., the sun on a clear day, bare lightbulbs, spotlights).
2. Soft Light: Created by a large or diffused light source (e.g., an overcast sky, large softboxes, light passed through diffusers or curtains).
Q3. When should I use hard light in photography?
Use hard light when you want to create drama, high contrast, bold shapes, and strong textures. It works great for:
1. Architectural and street photography
2. Edgy fashion and editorial shoots
3. Dramatic outdoor daytime photography in direct sun
Q4. When should I use soft light in photography?
Use soft light when you want a gentle, flattering look that smooths out features. It is ideal for:
1. Close-up portraits and beauty shots (smooths skin and reduces wrinkles)
2. Product photography (reduces harsh reflections and dark shadows)
3. Creating a calm, dreamy, or serene mood
Q5. How can I modify a hard light source to make it soft?
You can soften hard light by using light modifiers like softboxes, umbrellas, or diffusion panels, or by bouncing the light off a larger reflective surface (like a white wall or ceiling).
Q6. Which type of light is better?
Neither is universally better. Choose hard light if you want strong contrast and dramatic visual impact. Choose soft light if you want flattering, even illumination, especially for faces and skin tones.