Retouching portraits used to take forever. All that cloning, healing, smoothing, and fine-tuning, just to get one image looking right. It was a serious time commitment.
Thankfully, things have changed. With AI tools stepping in, you can skip the repetitive parts of portrait retouching and spend more time experimenting with your editing or maybe just have a fun weekend with friends.
In our previous article, we took you through how to edit photos using AI. In this ultimate guide, we’ll delve deep into professional portrait retouching.
We will break down what portrait retouching looks like today. We’ll talk about what makes an image look “perfectly retouched,” how AI is changing the game, and what tools photographers are using (yep, we’ll show you how Aftershoot fits in too). Let’s get into it.
Summary
We know you don’t need help spotting flaws; you need help fixing them faster, without your subjects looking like “Annabelle dolls.” Most tools smooth skin so aggressively that they strip away personality, leaving behind plastic-looking images that barely resemble your subject. On top of that, they often compromise image quality in the process.
You’re stuck making a thousand tiny decisions across hundreds of images. It’s exhausting. What should be a creative process becomes a time sink, and it shows in your workflow (and your energy levels).
Imagine if you could batch retouch your photos with the style consistency you desire. All you had to do was zoom in and polish for creative finesse. That’s the kind of workflow that feels like a win.
That’s why we built Aftershoot’s AI Retouching tool to help you achieve natural, consistent edits instantly. We will dive more into the details of how to use Aftershoot for your beautiful portraits in this article.
If you’d rather watch a video instead, check out our quick guide on how to retouch with Aftershoot
Now let’s get back to the basics….
What is AI Portrait Retouching?
You might have heard the buzz around AI in photography, but what does “AI portrait retouching” actually mean? Simply put, it refers to using artificial intelligence algorithms to automate or assist in the common tasks involved in retouching portraits.
Instead of manually cloning out every stray hair, frequency separating skin tones pixel by pixel, or masking eyes for enhancement, AI tools analyze your images and apply intelligent adjustments based on your requirements. They can detect facial features, identify skin imperfections, recognize textures, and apply edits that look natural and consistent across an entire gallery.
Think of it as having a highly skilled, tireless assistant who handles the foundational, time-intensive cleanup work. This frees you up to apply your creative vision — the color grading, the mood-setting, the final artistic touches that truly elevate a photograph.
AI portrait retouching is the answer to automating the repetitive groundwork, allowing you to reclaim hours previously spent on tedious edits.
AI + Manual Retouching: What’s the Right Mix?
Traditionally, professional portrait retouching was an entirely manual process performed in software like Photoshop or Lightroom. This involved:
Manual Blemish Removal: Using healing brushes, clone stamps, and patch tools to remove every spot.
Frequency Separation: Separating color and texture layers to smooth skin texture and even out skin tone independently — a powerful but complex technique.
Dodging and Burning: Manually painting in light and shadow to enhance contours and smooth transitions.
Manual Masking: Creating precise masks to selectively apply adjustments to specific areas like eyes, lips, or hair.
This manual approach offers ultimate control. You decide exactly where and how every pixel is affected. However, this process is time-consuming and leads to fatigue. More often than not, photographers struggle to achieve consistency across their gallery. Uncle Joe ends up looking waxy while the baby nephew looks like a creepy doll.
This is where AI portrait retouching steps in. AI tools are trained on vast datasets of images to recognize common portrait imperfections and apply intelligent corrections automatically.
Automated Detection: AI can instantly detect faces, identify skin blemishes, wrinkles, and other areas needing attention.
Intelligent Application: Instead of just copying pixels, AI can “understand” the underlying skin texture and regenerate areas naturally after removing imperfections.
Batch Processing: AI is exceptionally good at applying consistent edits to large volumes of images simultaneously.
So the real question isn’t whether to use AI — it’s how to strike the right balance between AI and manual retouching.
It’s Not Either/Or. It’s You + AI
What is the Key Difference Between AI and Manual Portrait Retouching?
The key difference lies in automation and efficiency. While manual methods offer granular control over every single edit, requiring significant time and effort per image, AI automates the detection and application of common retouching tasks across many images quickly and consistently.
This doesn’t mean AI replaces manual work entirely. Many photographers find the most powerful approach is a hybrid one: using AI for the initial cleanup and foundational work, and then using manual tools in their editor for final artistic touches and specific, nuanced adjustments that require a human eye.
4 Steps to Retouch Your Photos with AI (and How to Finish Strong in Lr/C1)
Adopting AI for portrait retouching doesn’t mean overhauling your entire post-production process. Instead, it integrates smoothly into your existing workflow, typically sitting comfortably between your initial cull/selection process and your final creative edits in Lightroom or Capture One.
Here’s a step-by-step guide to incorporating Aftershoot’s AI Retouching into your process:
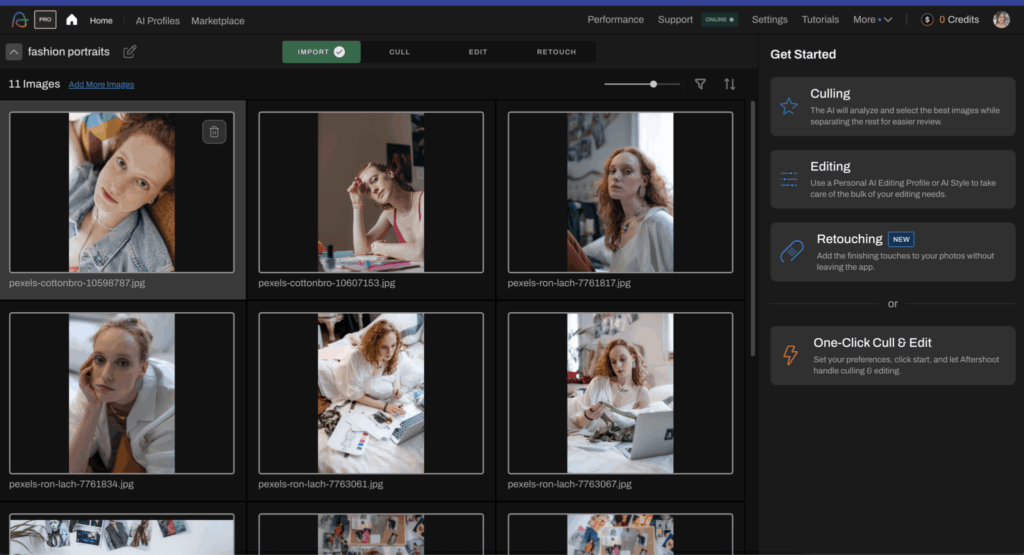
Step 1: Import Your Photos into Aftershoot
The first step is getting your images into Aftershoot. This is designed to be quick and intuitive.
Option 1: If you’re already culling and editing within Aftershoot, then you will currently need to export the edited images and import the edited JPEGs into a new album.
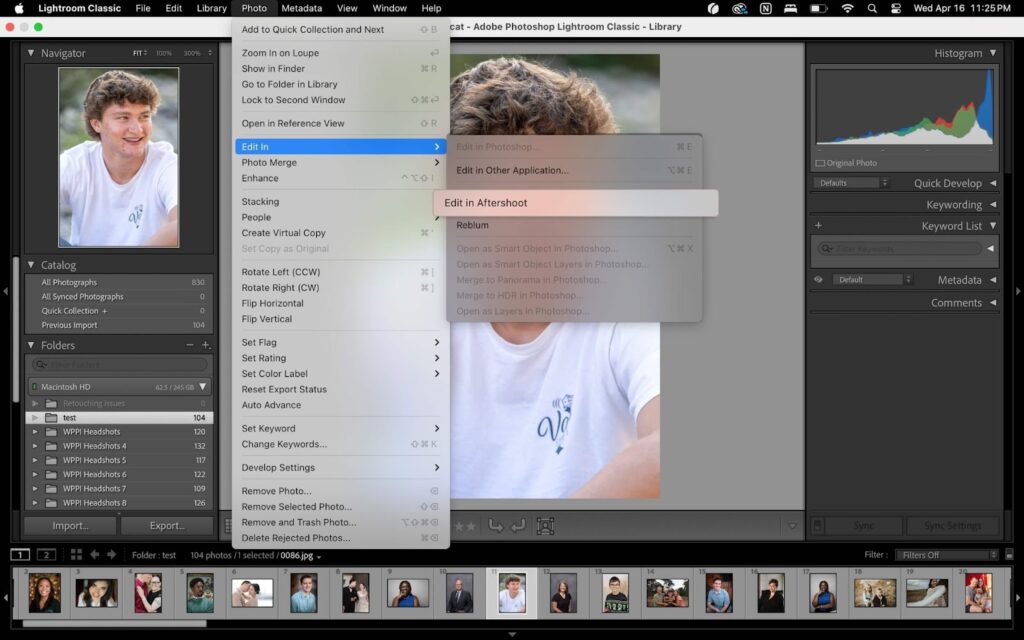
Option 2: If you’re using Lightroom Classic, then you can use our integration to select the images you want to retouch with AI, right-click, and hit “Edit in Aftershoot” to open them up in Aftershoot.
Step 2: Use AI Retouching Tools to Refine Your Images
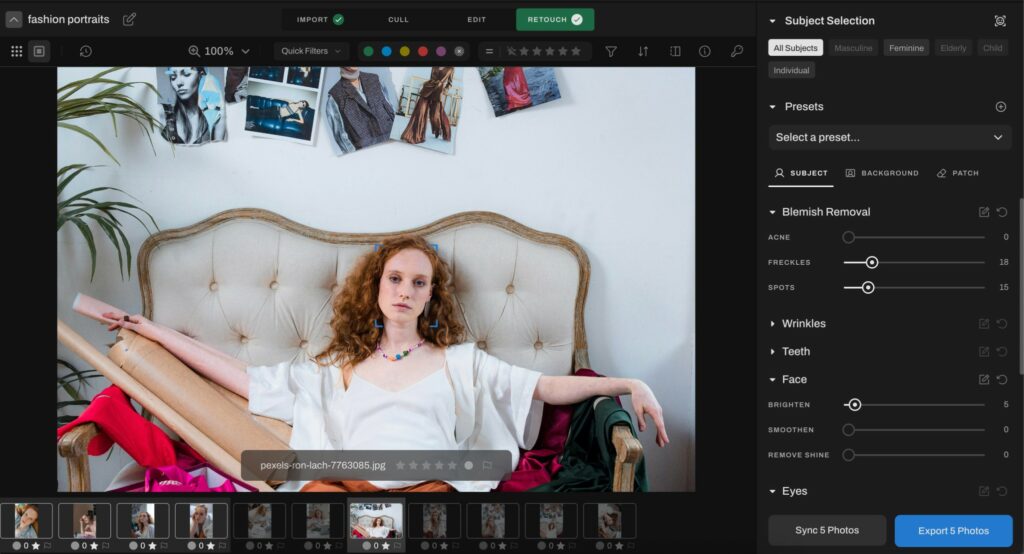
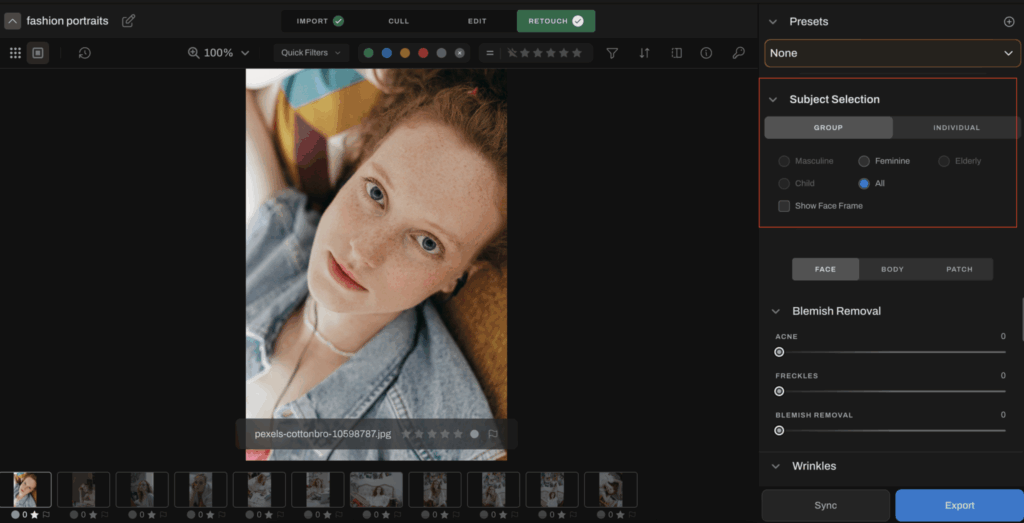
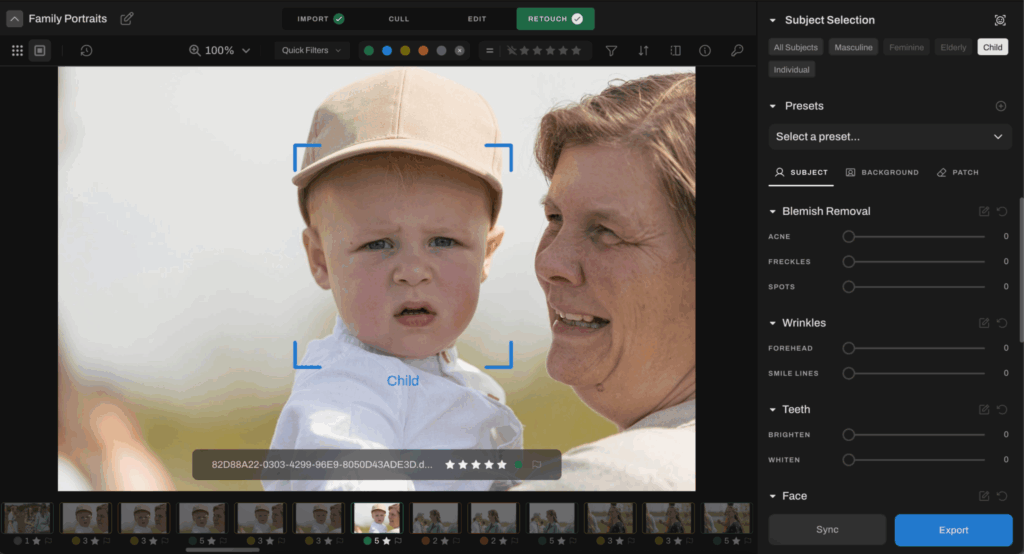
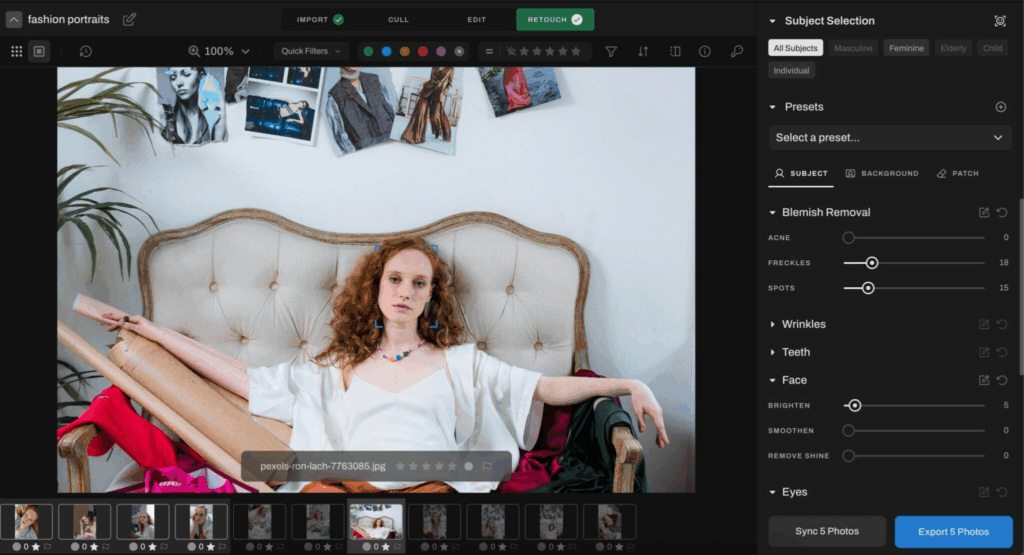
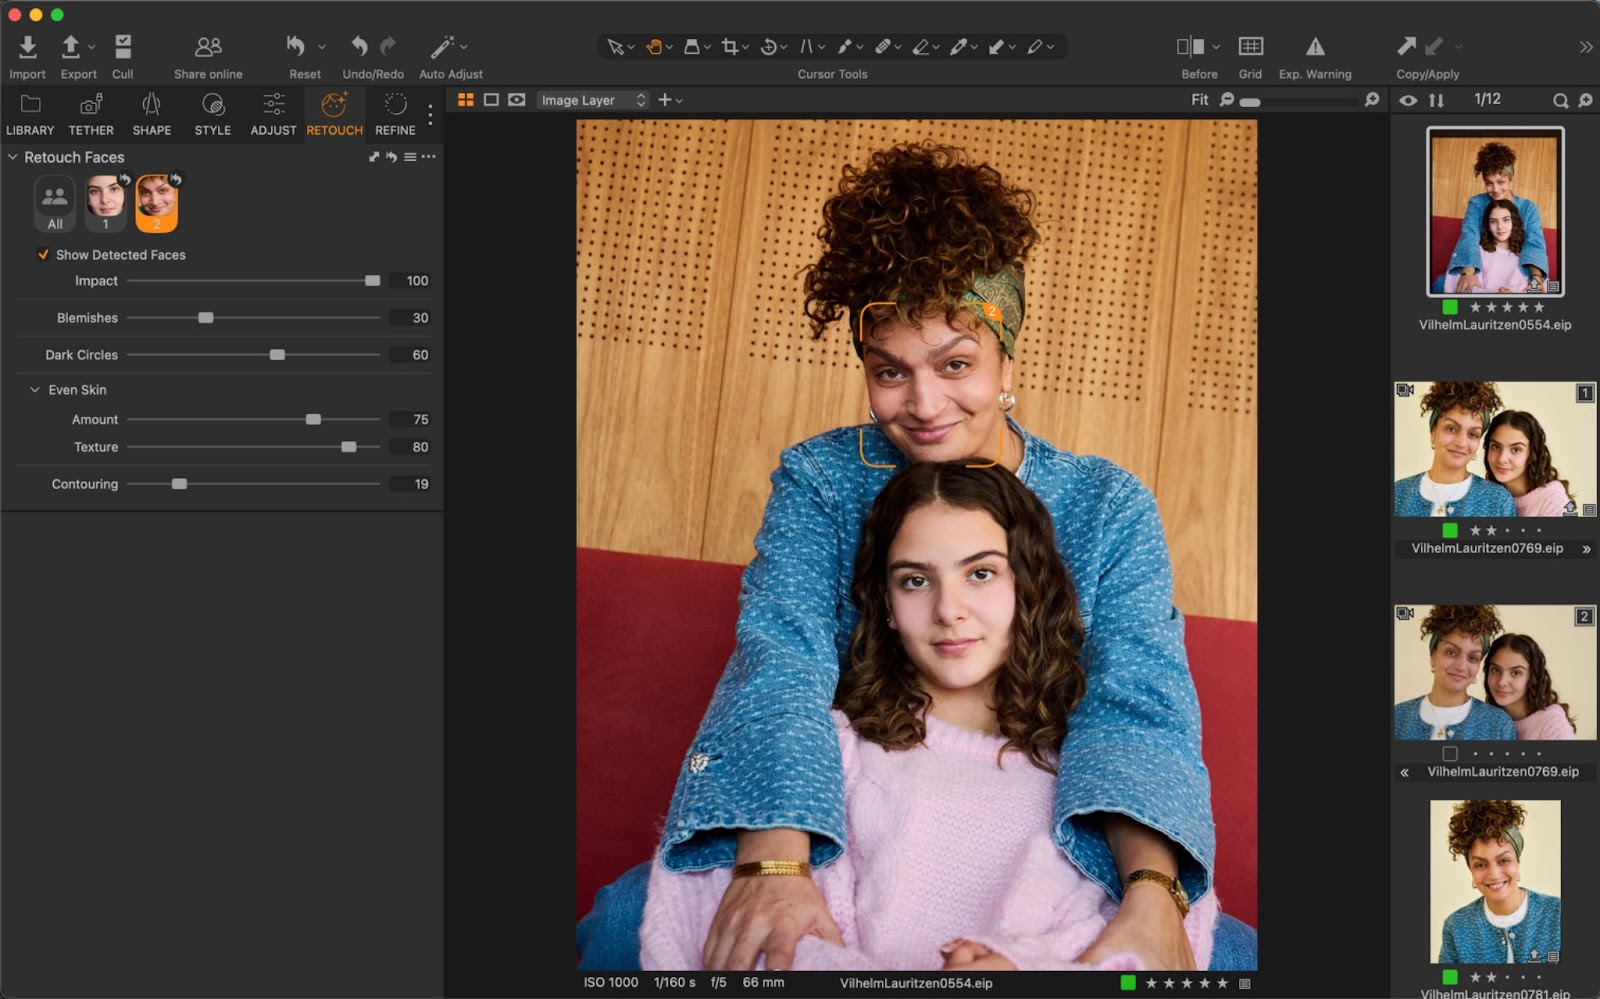
Once you’ve imported your images, it’s now time to start retouching them under the “Retouch” tab.
Aftershoot offers a multitude of AI retouching options, from blemish removal and wrinkle reduction to eye and teeth enhancement and skin smoothening, in the form of sliders. These will allow you to control the kind of retouches you would like to make as well as how much you want to touch up your images.
Currently, there are 9 types of edits/sliders available under the Retouching feature:
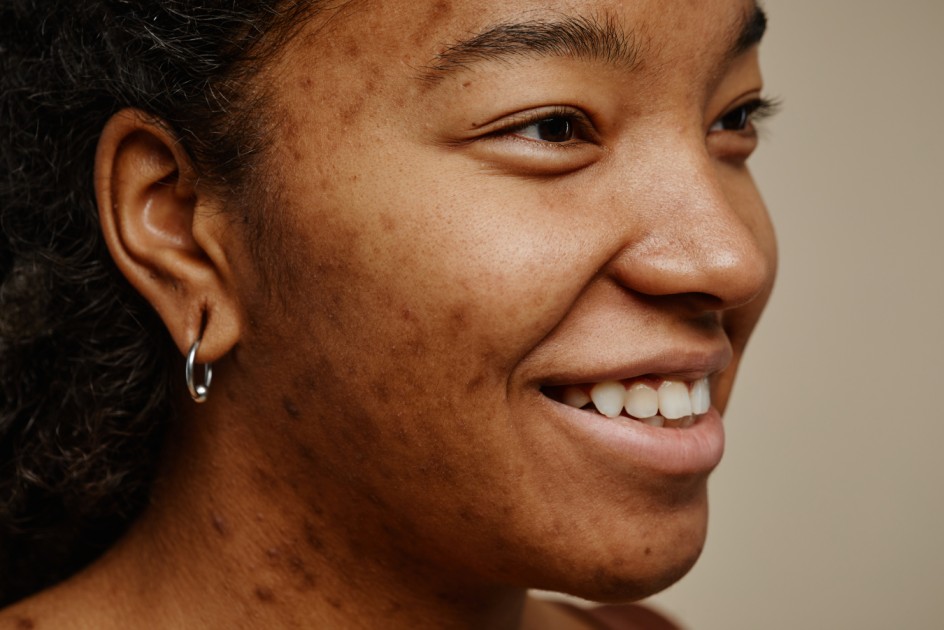
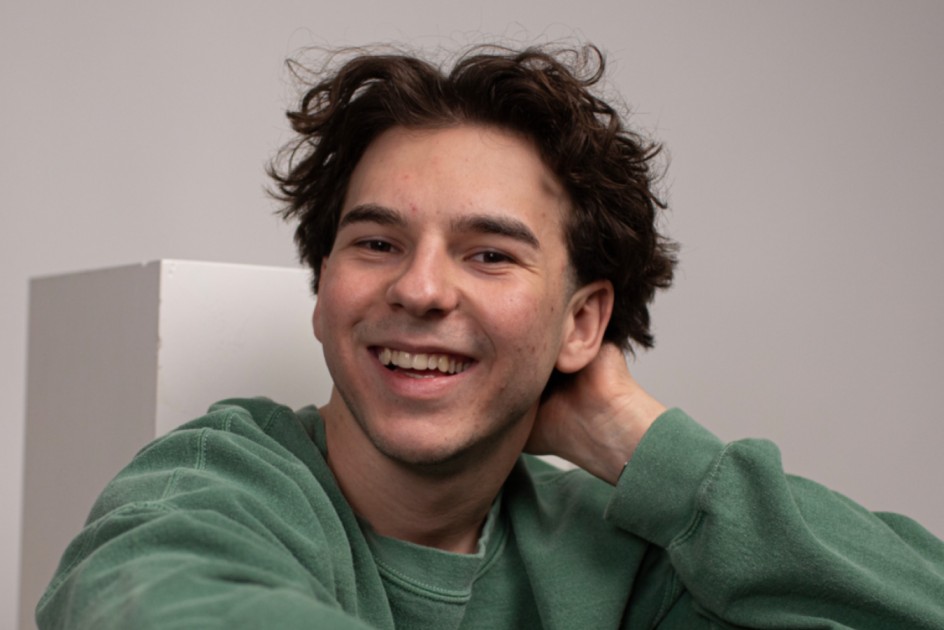
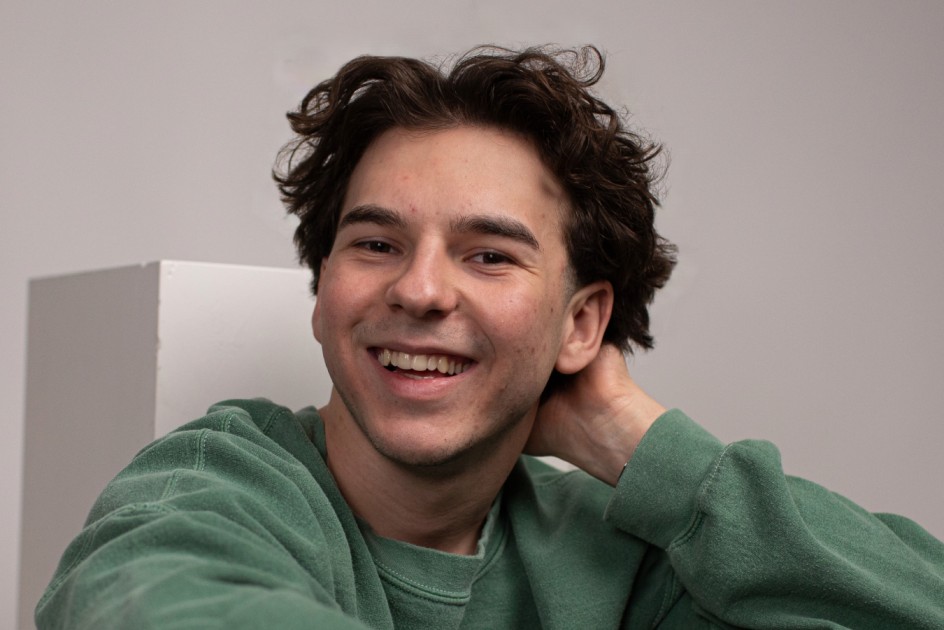
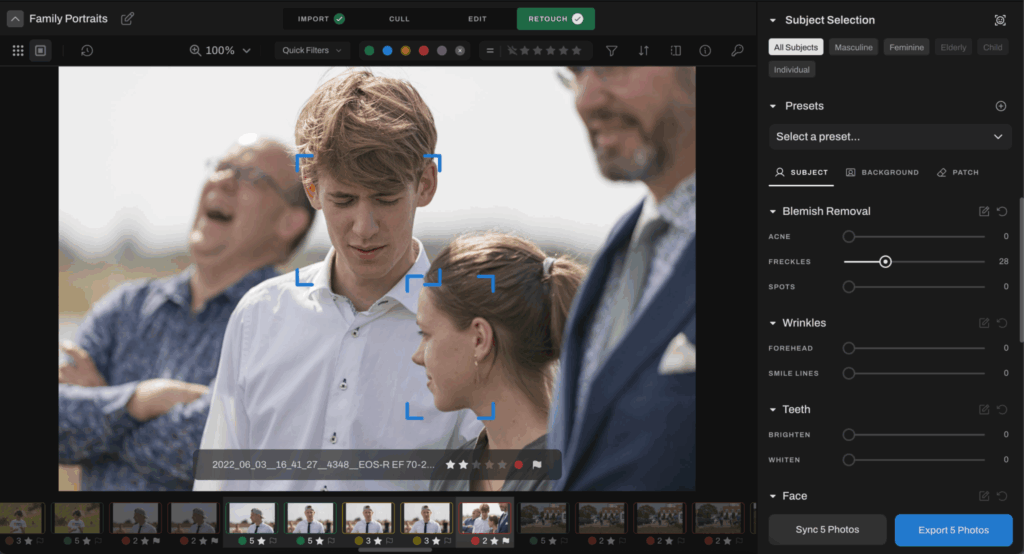
1. Blemish Removal
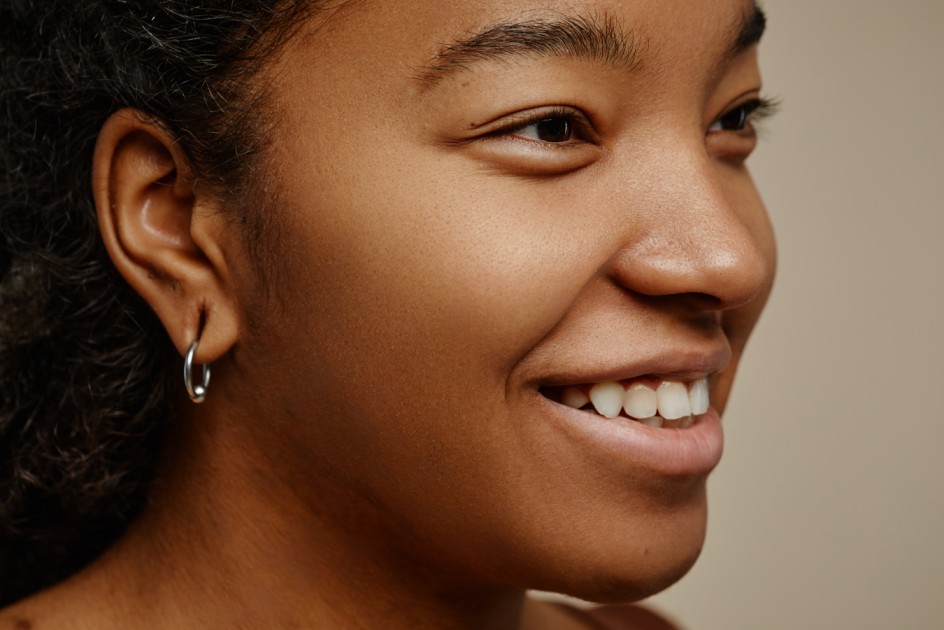
For identifying and removing acne, freckles, pigmentation, and other blemishes and using AI to regenerate those areas according to skin tone and texture.
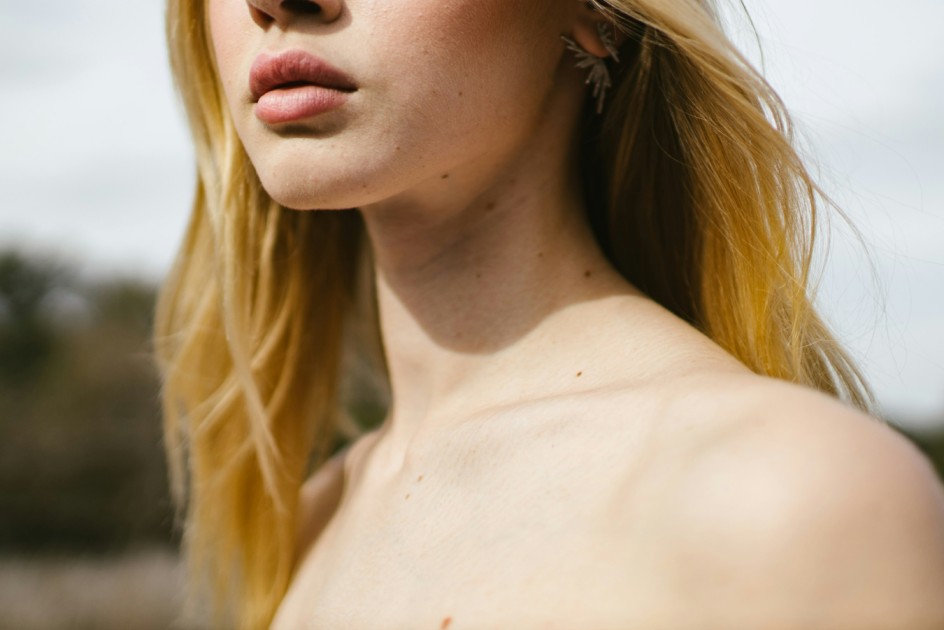
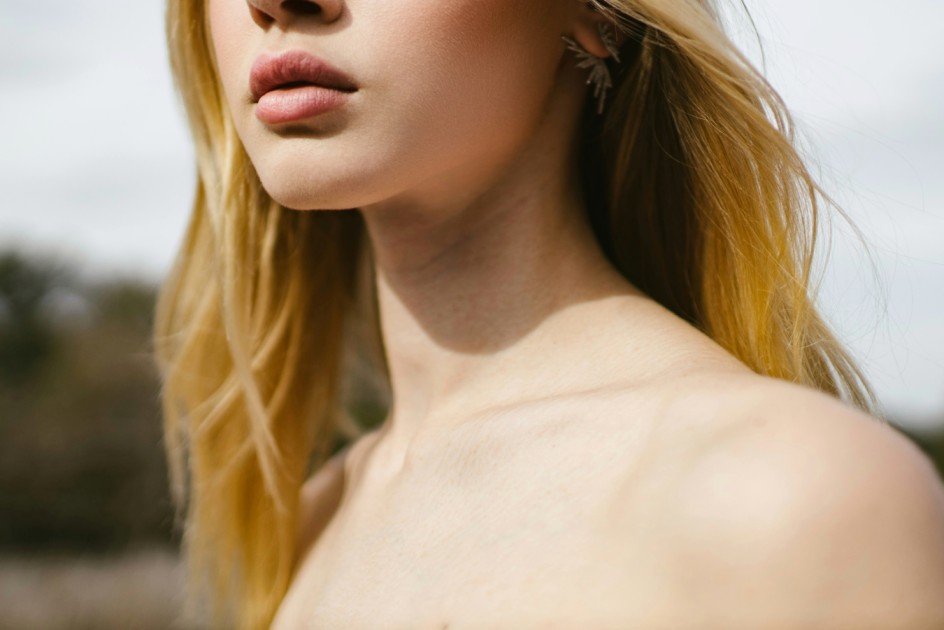
Before
After
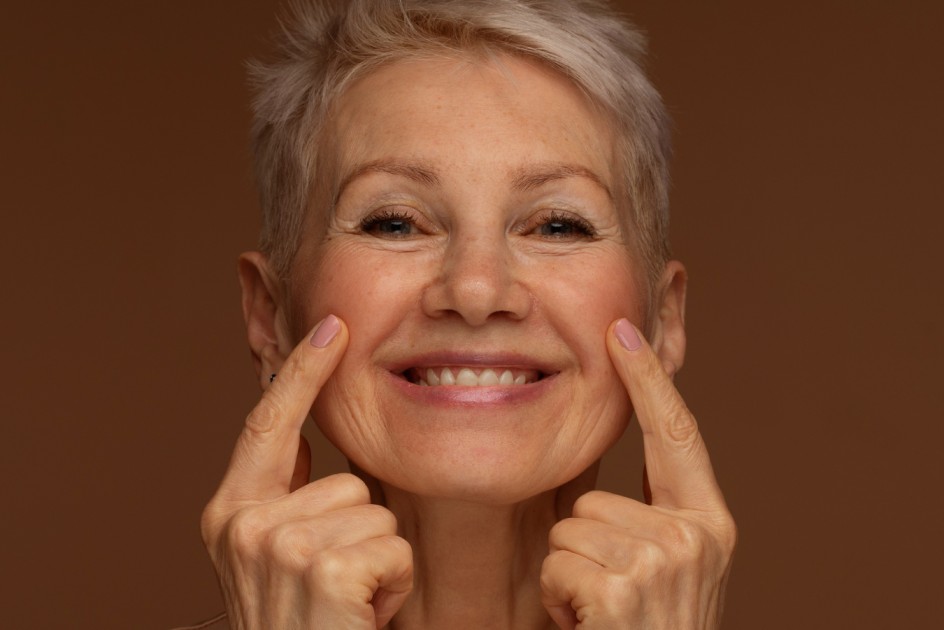
2. Wrinkles
For identifying and removing forehead wrinkles, eye bags, and smile lines, and regenerating those areas using AI.
Before
After
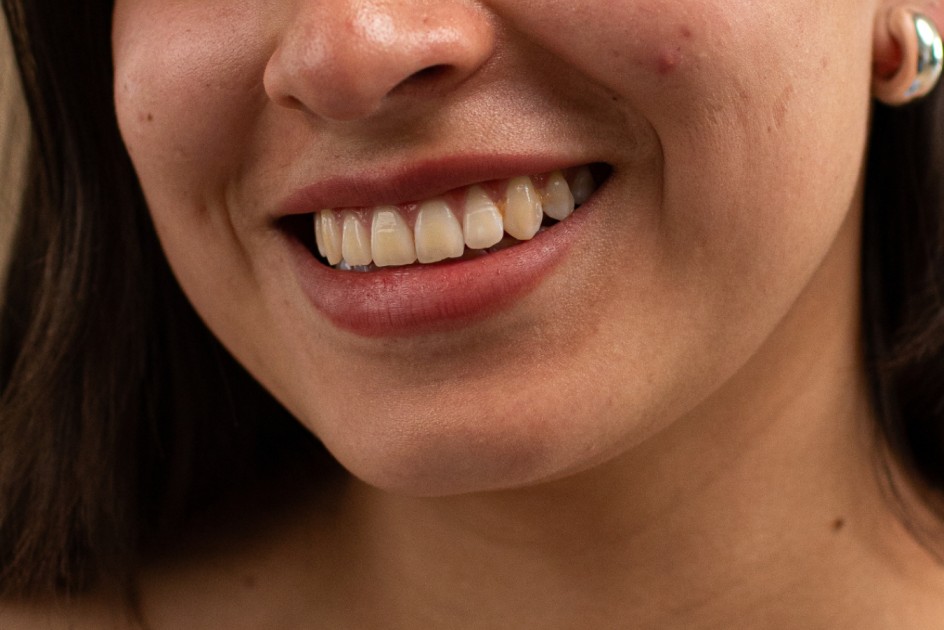
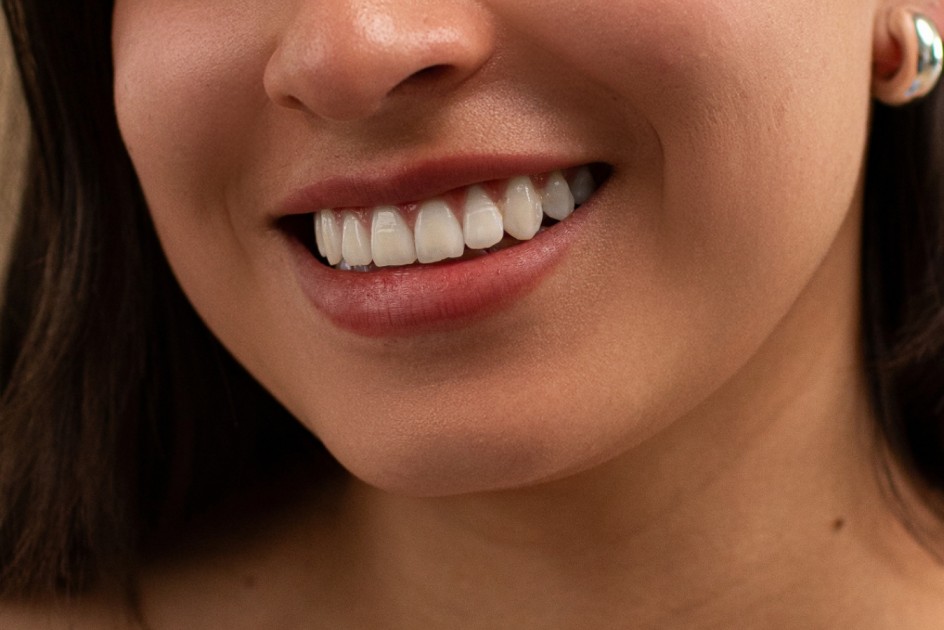
3. Teeth
For brightening and whitening teeth.
Before
After
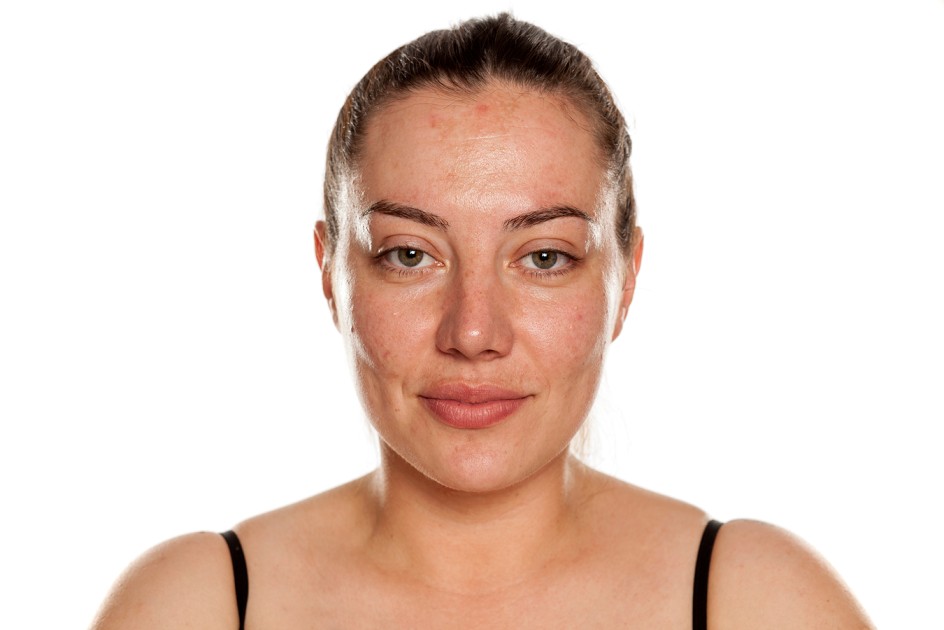
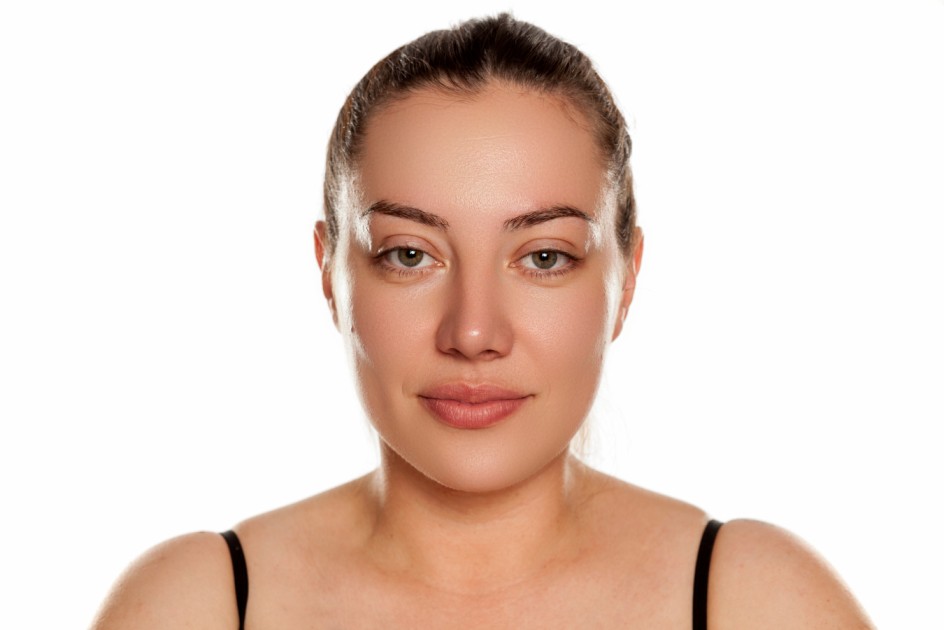
4. Face
For brightening and smoothening the face, as well as brightening the eyes, to create a bright and even look.
Before
After
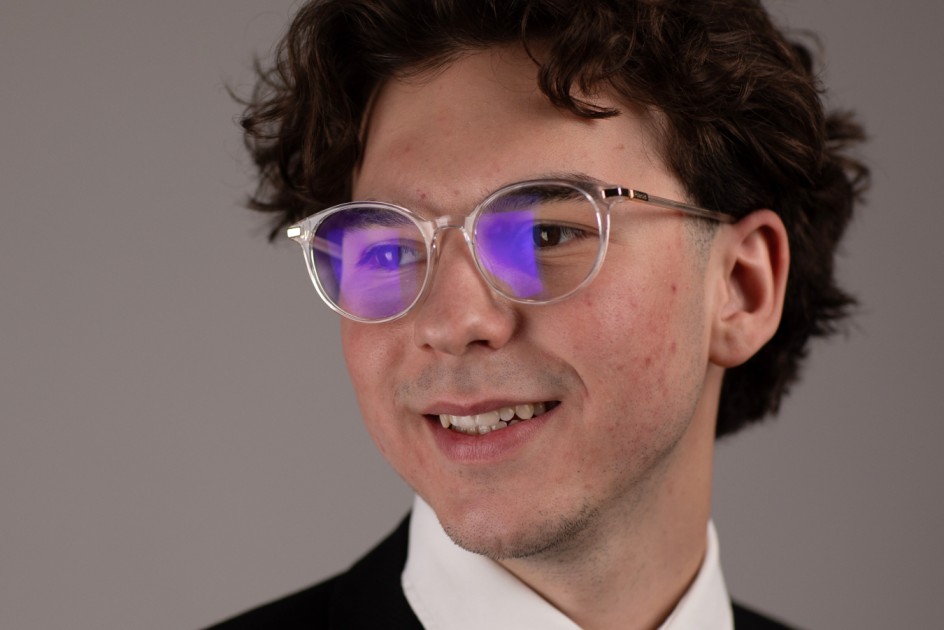
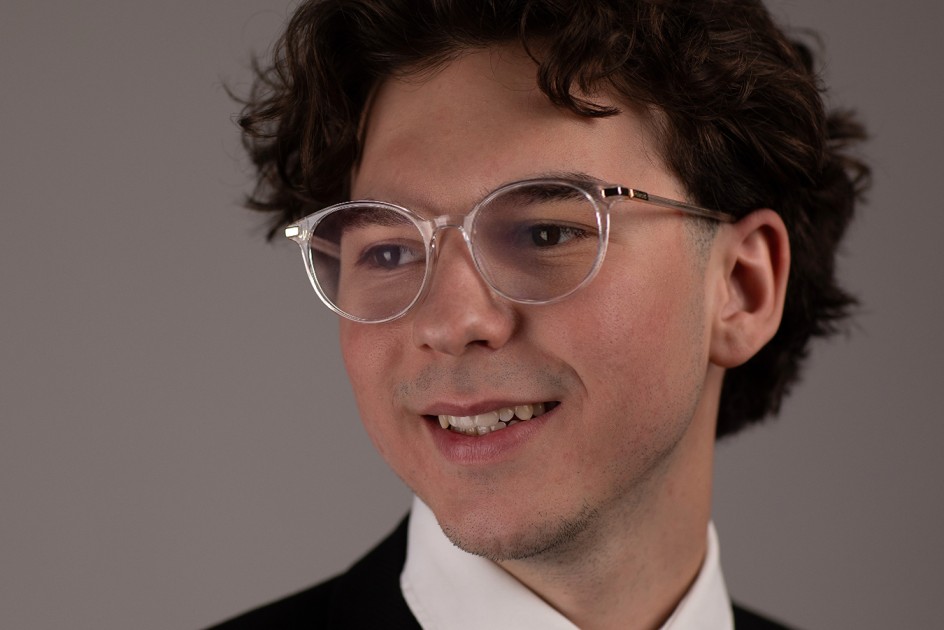
5. Glare
For identifying glares from glasses, then regenerating those areas to reduce or completely remove the glare and show the natural skin underneath.
Before
After
6. Hair
For darkening the hair color for a more vibrant look as well as detecting and removing stray hairs.
Before
After
7. Skin Smoothening
Available under the “Body” sliders, this allows you to balance the skin tone across the whole body. This is currently a work-in-progress feature and we expect it to be released soon.
Before
After
8. Cloth Smoothening
Also available under the “Body” sliders, this allows you to remove clothing wrinkles and make outfits look fresh. This is currently a work-in-progress feature and we expect it to be released soon.
9. Object Removal
Available under the “Patch” tab, this allows you to remove entire objects from an image using a brush tool.
Based on these sliders, Aftershoot offers AI retouching for both portraits of individuals as well as group photos. Under Group Portrait Retouching, you have the option to apply your edits to Masculine, Feminine, Elderly, and Child subjects, or all of them.
Once you’re happy with your portrait touch-ups, you can sync them to a batch of images by simply selecting the images in the carousel while pressing the CMD/CTRL key and hitting “Sync”. You can also use the keyboard shortcuts CMD+C/CTRL+C to copy your slider settings, CMD+A/CTRL+A to select all images, and CMD+V/CTRL+V to apply the edits.
Compare Before & After: Aftershoot allows you to easily toggle between the original image and the retouched version to adjust your changes in real time.
Step 3: Export Your Images
Once you’ve perfected your retouches, all you need to do is select the ones you want to export — you can again use the CMD/CTRL key or simply CMD+A/CTRL+A to do so, then hit “Export”.
Select your desired export location and file format, and Aftershoot will quickly render the retouched images to your specified location.
Step 4: Finishing Touches in Lightroom or Capture One
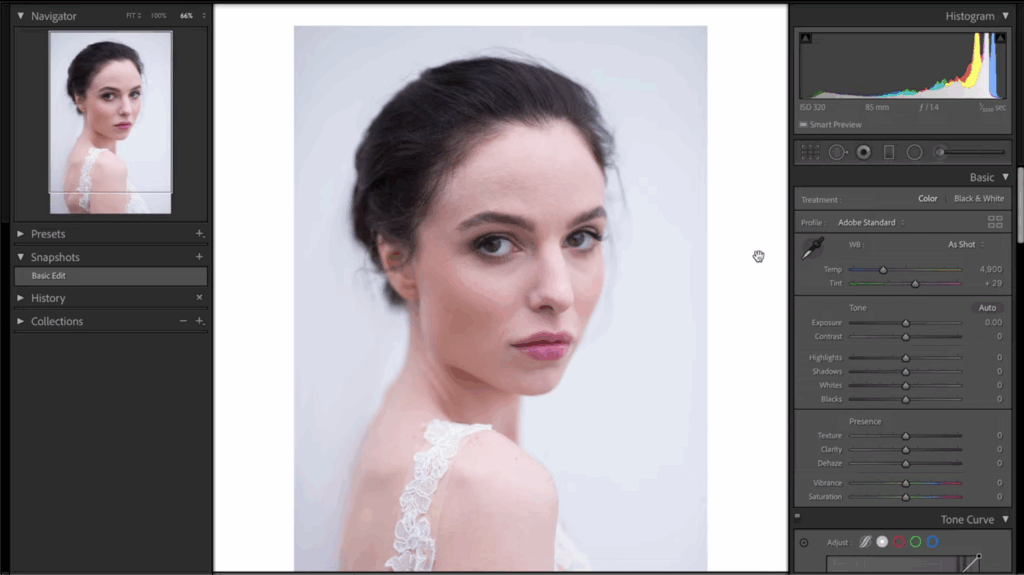
Want to apply even more creative edits? Here’s where your workflow continues seamlessly. After Aftershoot has handled the skin cleanup, blemish removal, and initial detail enhancements, you are perfectly positioned to apply your signature style. Take your exported, beautifully retouched images and import them into Adobe Lightroom, Capture One, or your editor of choice.
Here, you’ll focus on:
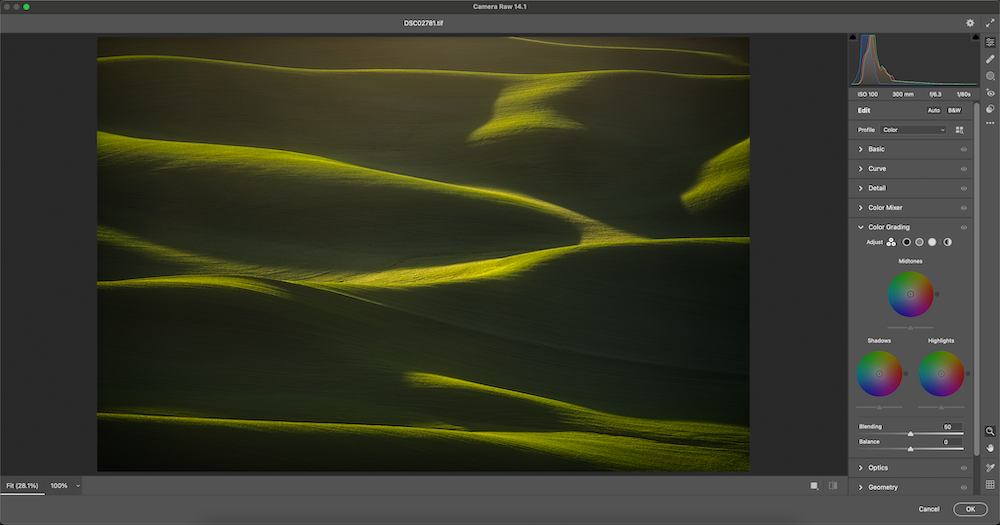
Color Grading
Applying your unique color palettes, split toning, and HSL adjustments to set the mood and style.
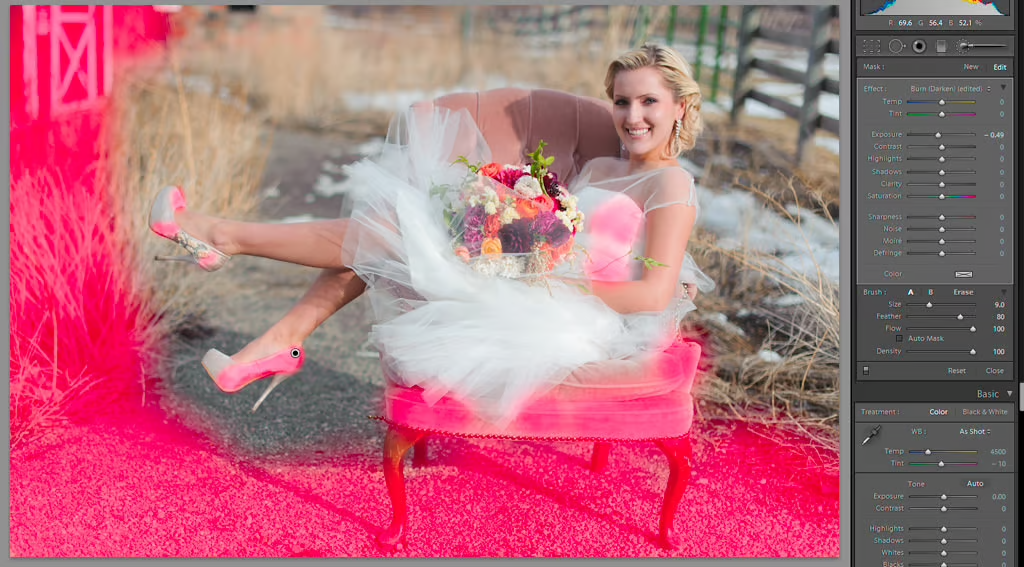
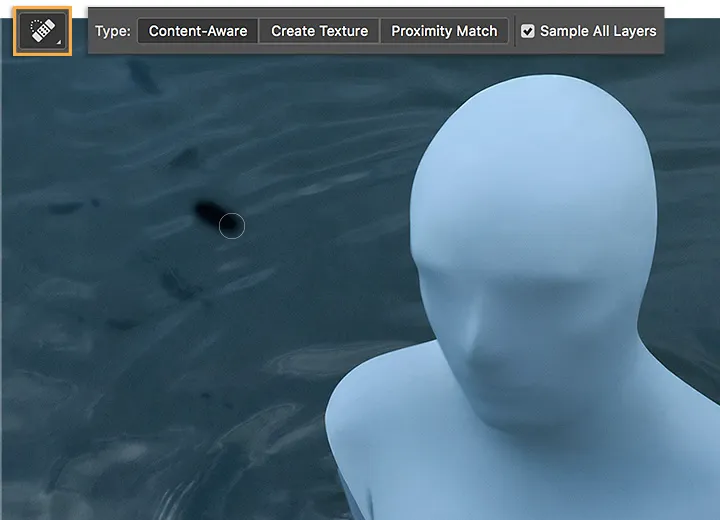
Dodging and Burning
Creatively shaping light and shadow to add depth and dimension.
Image source: Photography Life
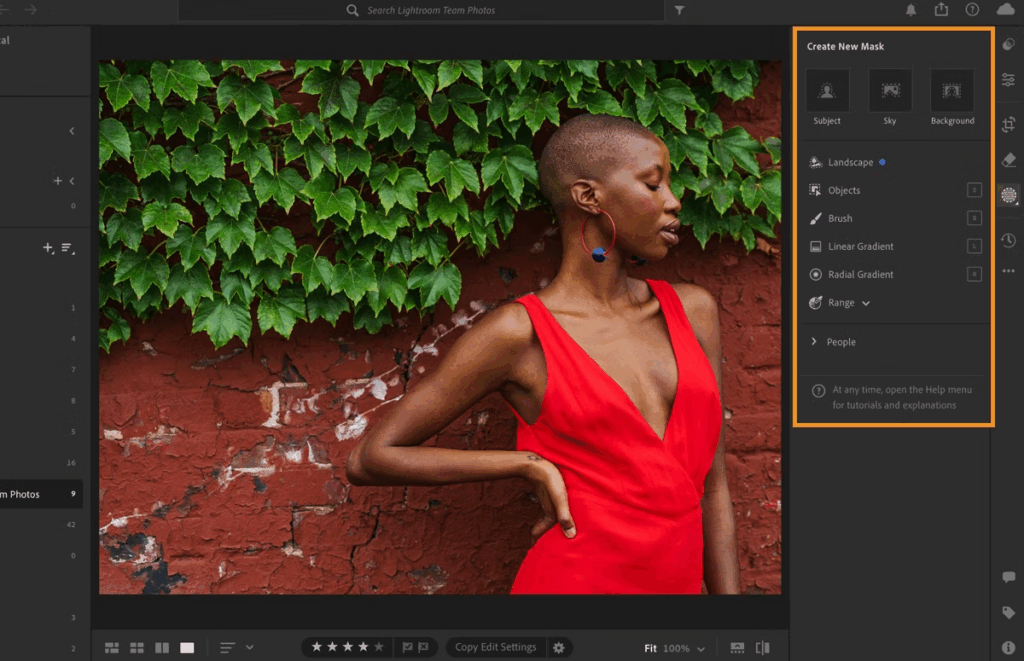
Local Adjustments
Making specific adjustments to areas like the background, clothing, or specific facial features that weren’t covered by the initial retouching.
Image source: Adobe
Overall Style Application
Applying your favorite presets or making global adjustments to contrast, clarity, presence, etc.
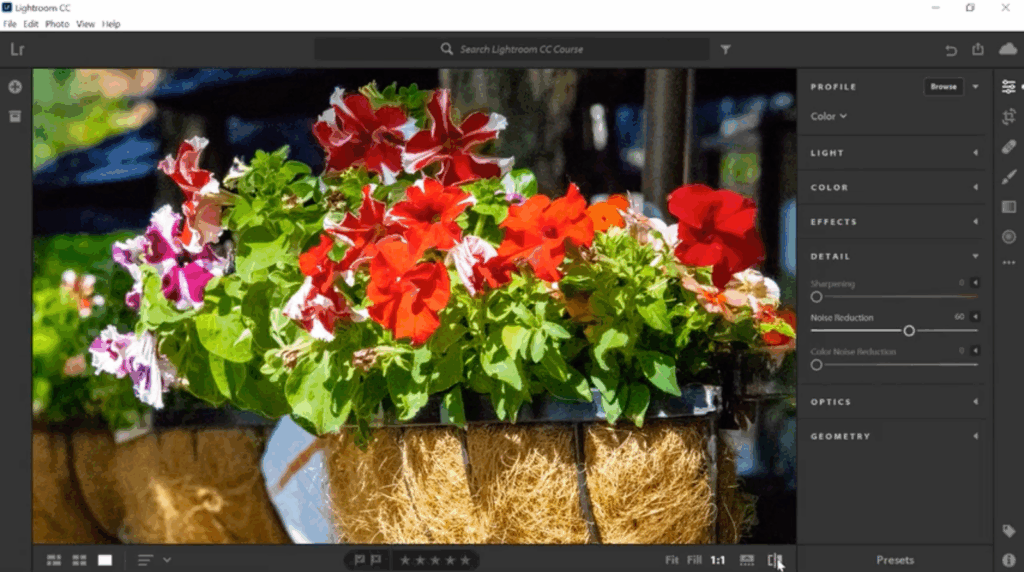
Sharpening and Noise Reduction
Finalizing these details based on your output needs.
Image source: Adobe
When you separate your workflow, letting Aftershoot handle the fast, consistent foundational retouching and using your primary editor for creative, artistic adjustments, you gain efficiency without sacrificing creative control.
What Makes a Portrait Perfectly Retouched?
A perfectly retouched photo depends heavily on the context of your photoshoot and client expectations, but some key principles apply:
1. Understanding the Client Brief and Use Case
The intended use of the image is crucial. A headshot for a corporate website requires a different approach than a beauty shot for a magazine cover or a casual family photo for a social media post. Always clarify your client’s expectations and the final output format (print, web, etc.).
2. Natural vs. Stylized Retouching
Natural: Aims to enhance reality subtly, removing temporary imperfections but preserving skin texture and likeness. The goal is often “they look like themselves on their best day.” This is common for family portraits, corporate headshots, and documentary-style photography.
Stylized: More dramatic edits that might significantly alter skin texture, shape, or color. This is often seen in high-fashion, beauty, or artistic conceptual portraits where a specific aesthetic is desired.
3.Retouching Styles by Genre
Beauty/Fashion: Often involves extensive, high-level retouching, including detailed skin work, shaping, and color manipulation.
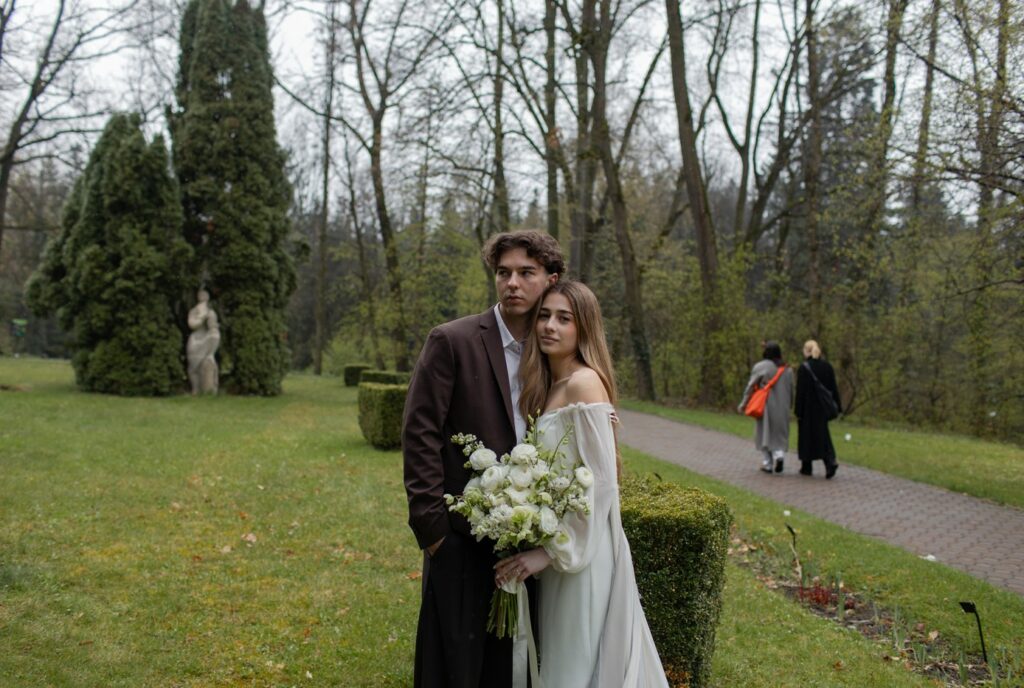
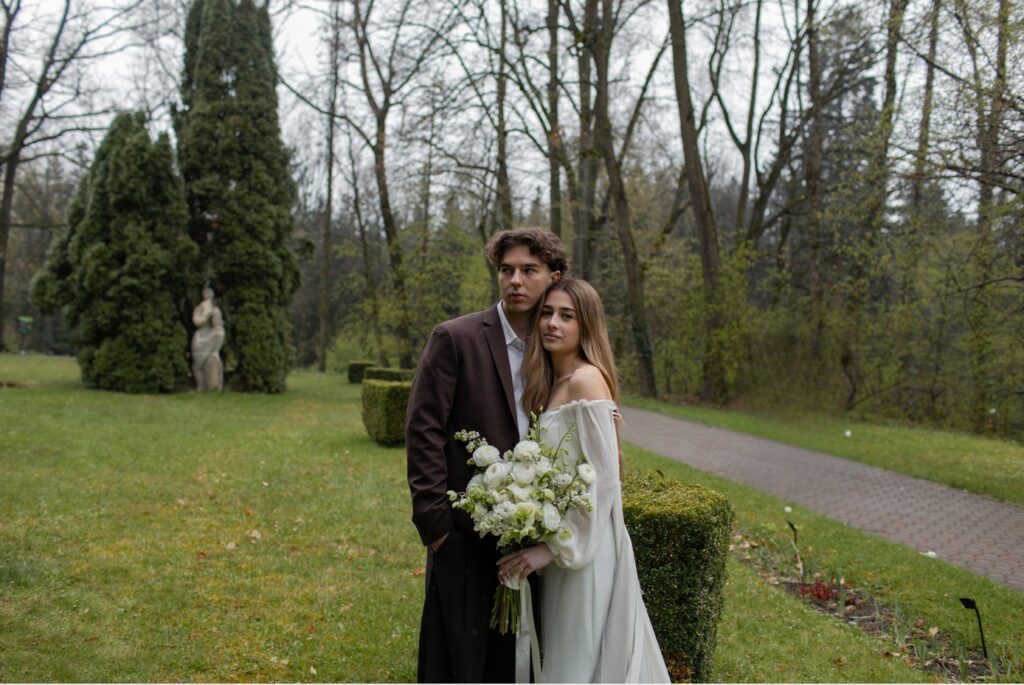
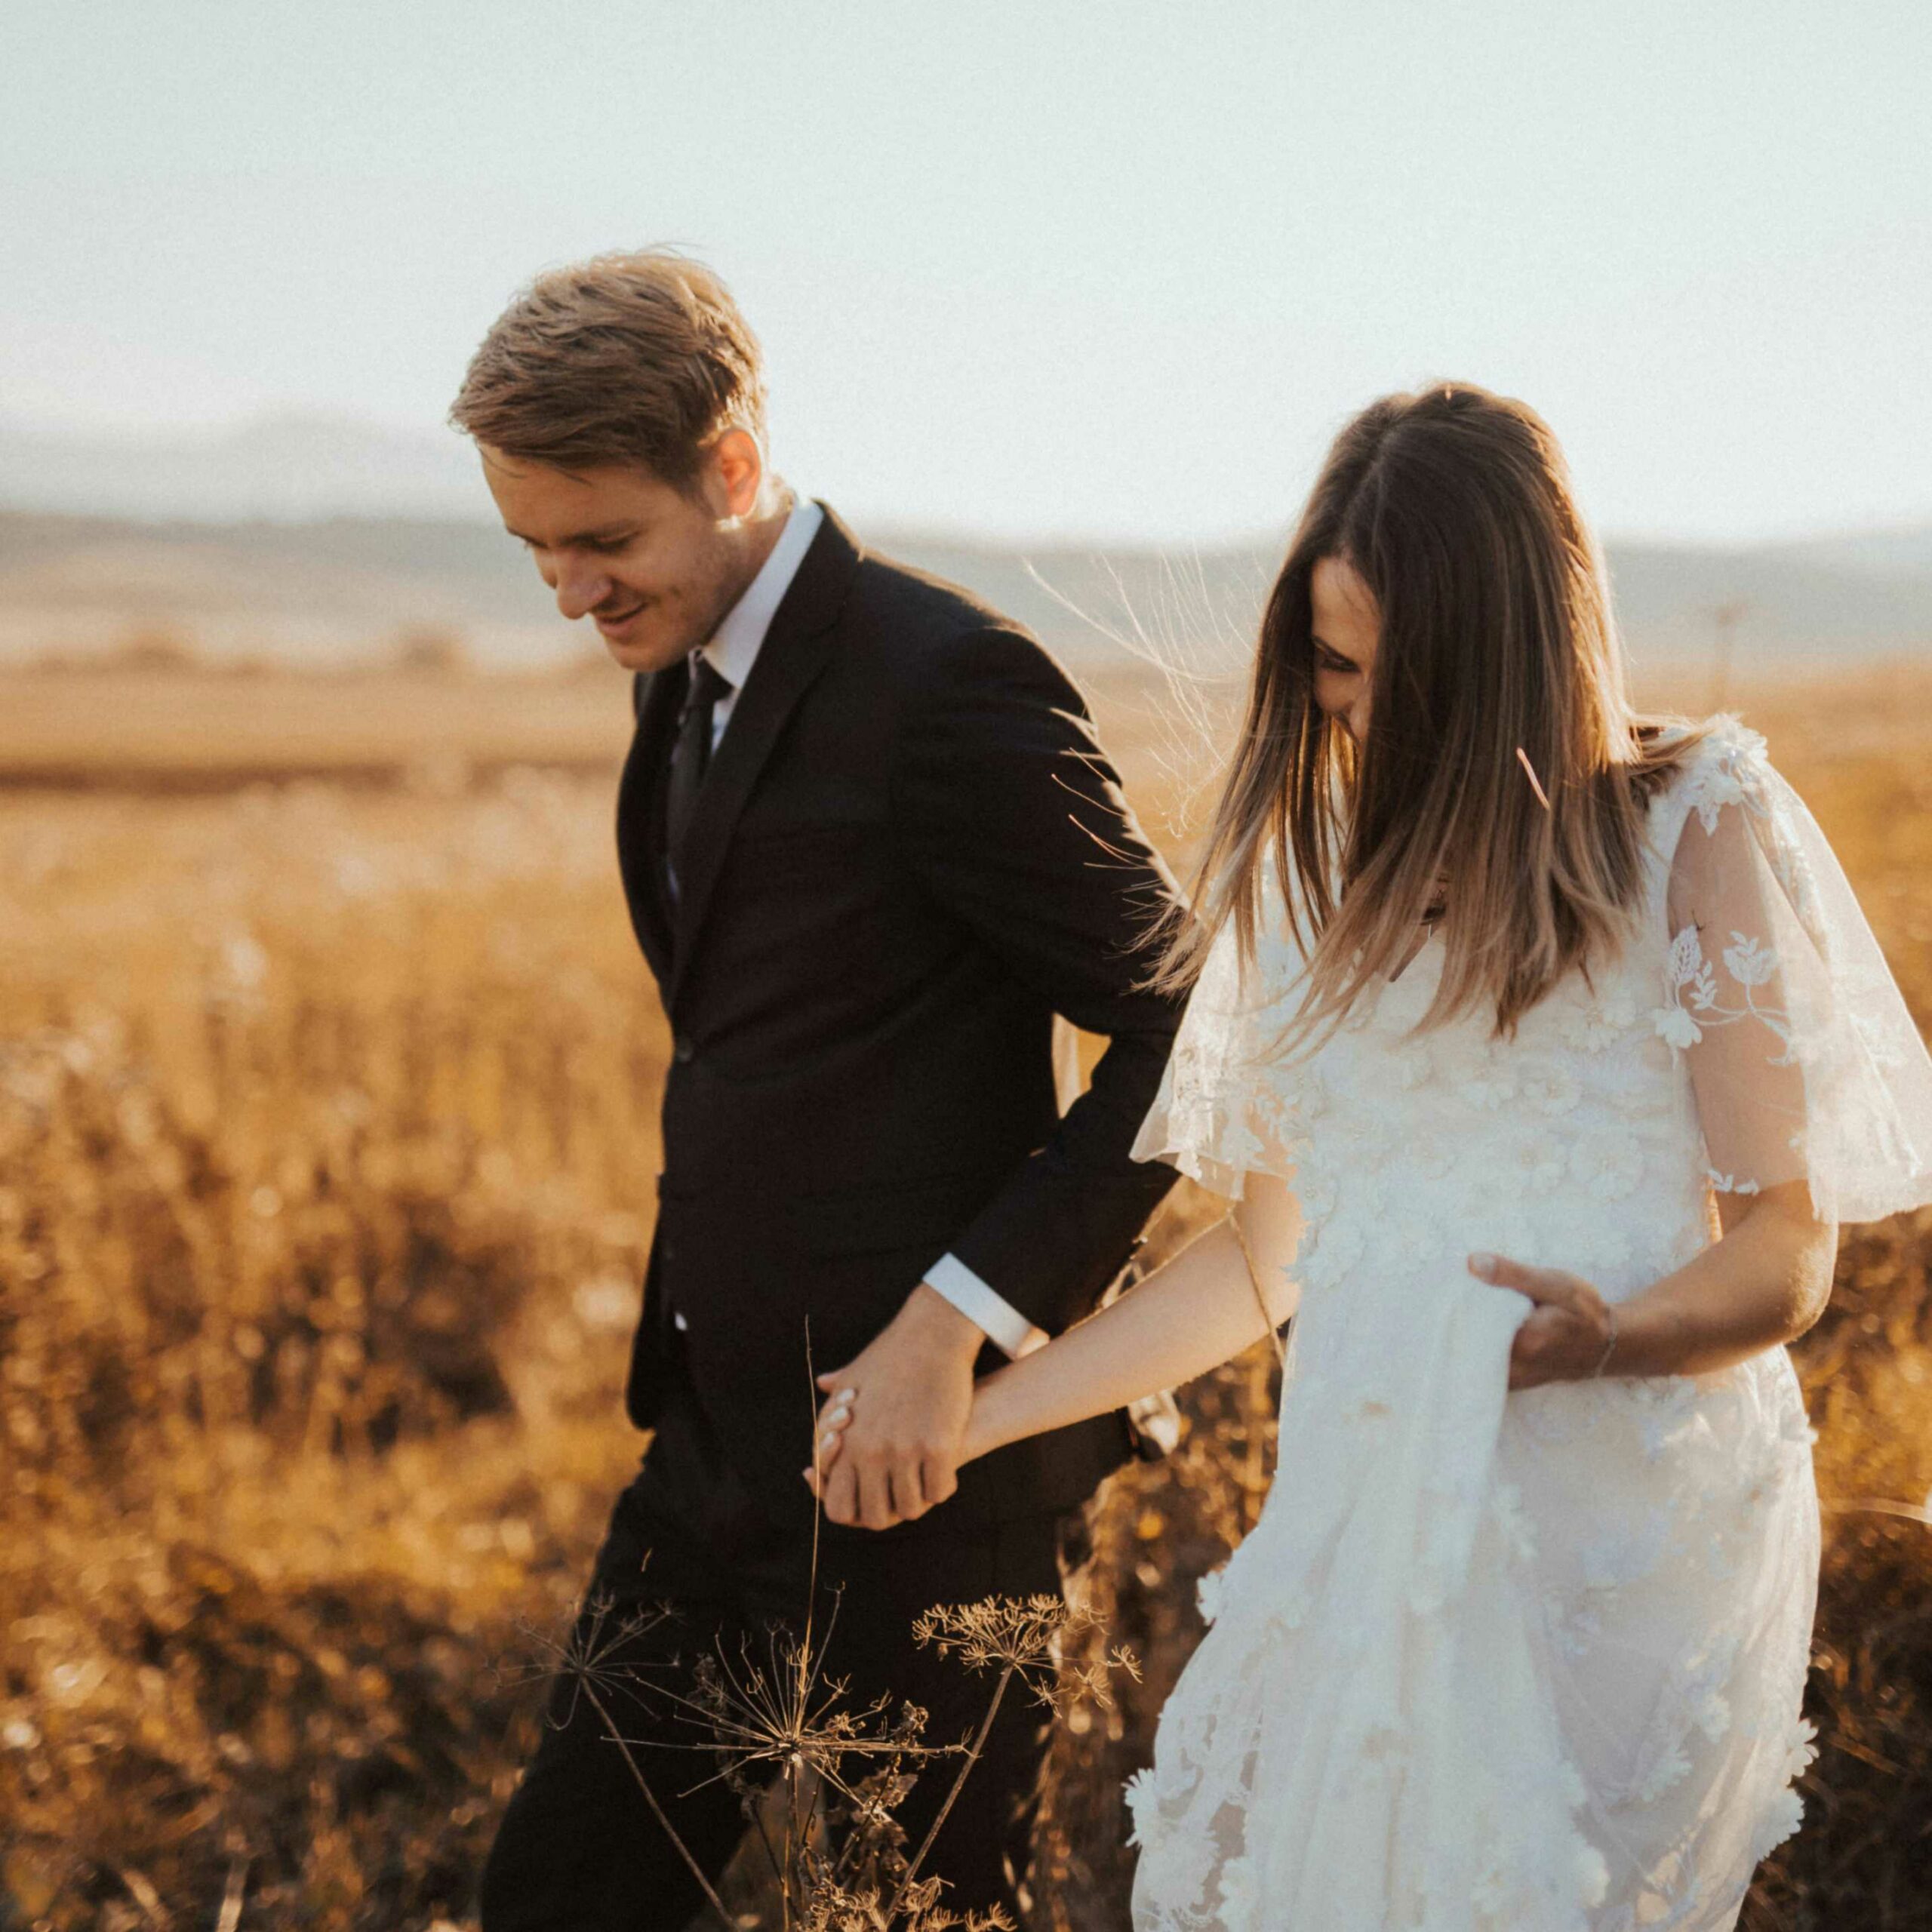
Wedding & Engagement: Revolves around the theme and look the bride and groom are going for, and may often involve skin and teeth brightening, object removal, and other natural highlights that make the subjects feel empowered on their special day.
Corporate Headshots: Focus on clean skin, professional appearance, and natural look; less dramatic than beauty retouching.
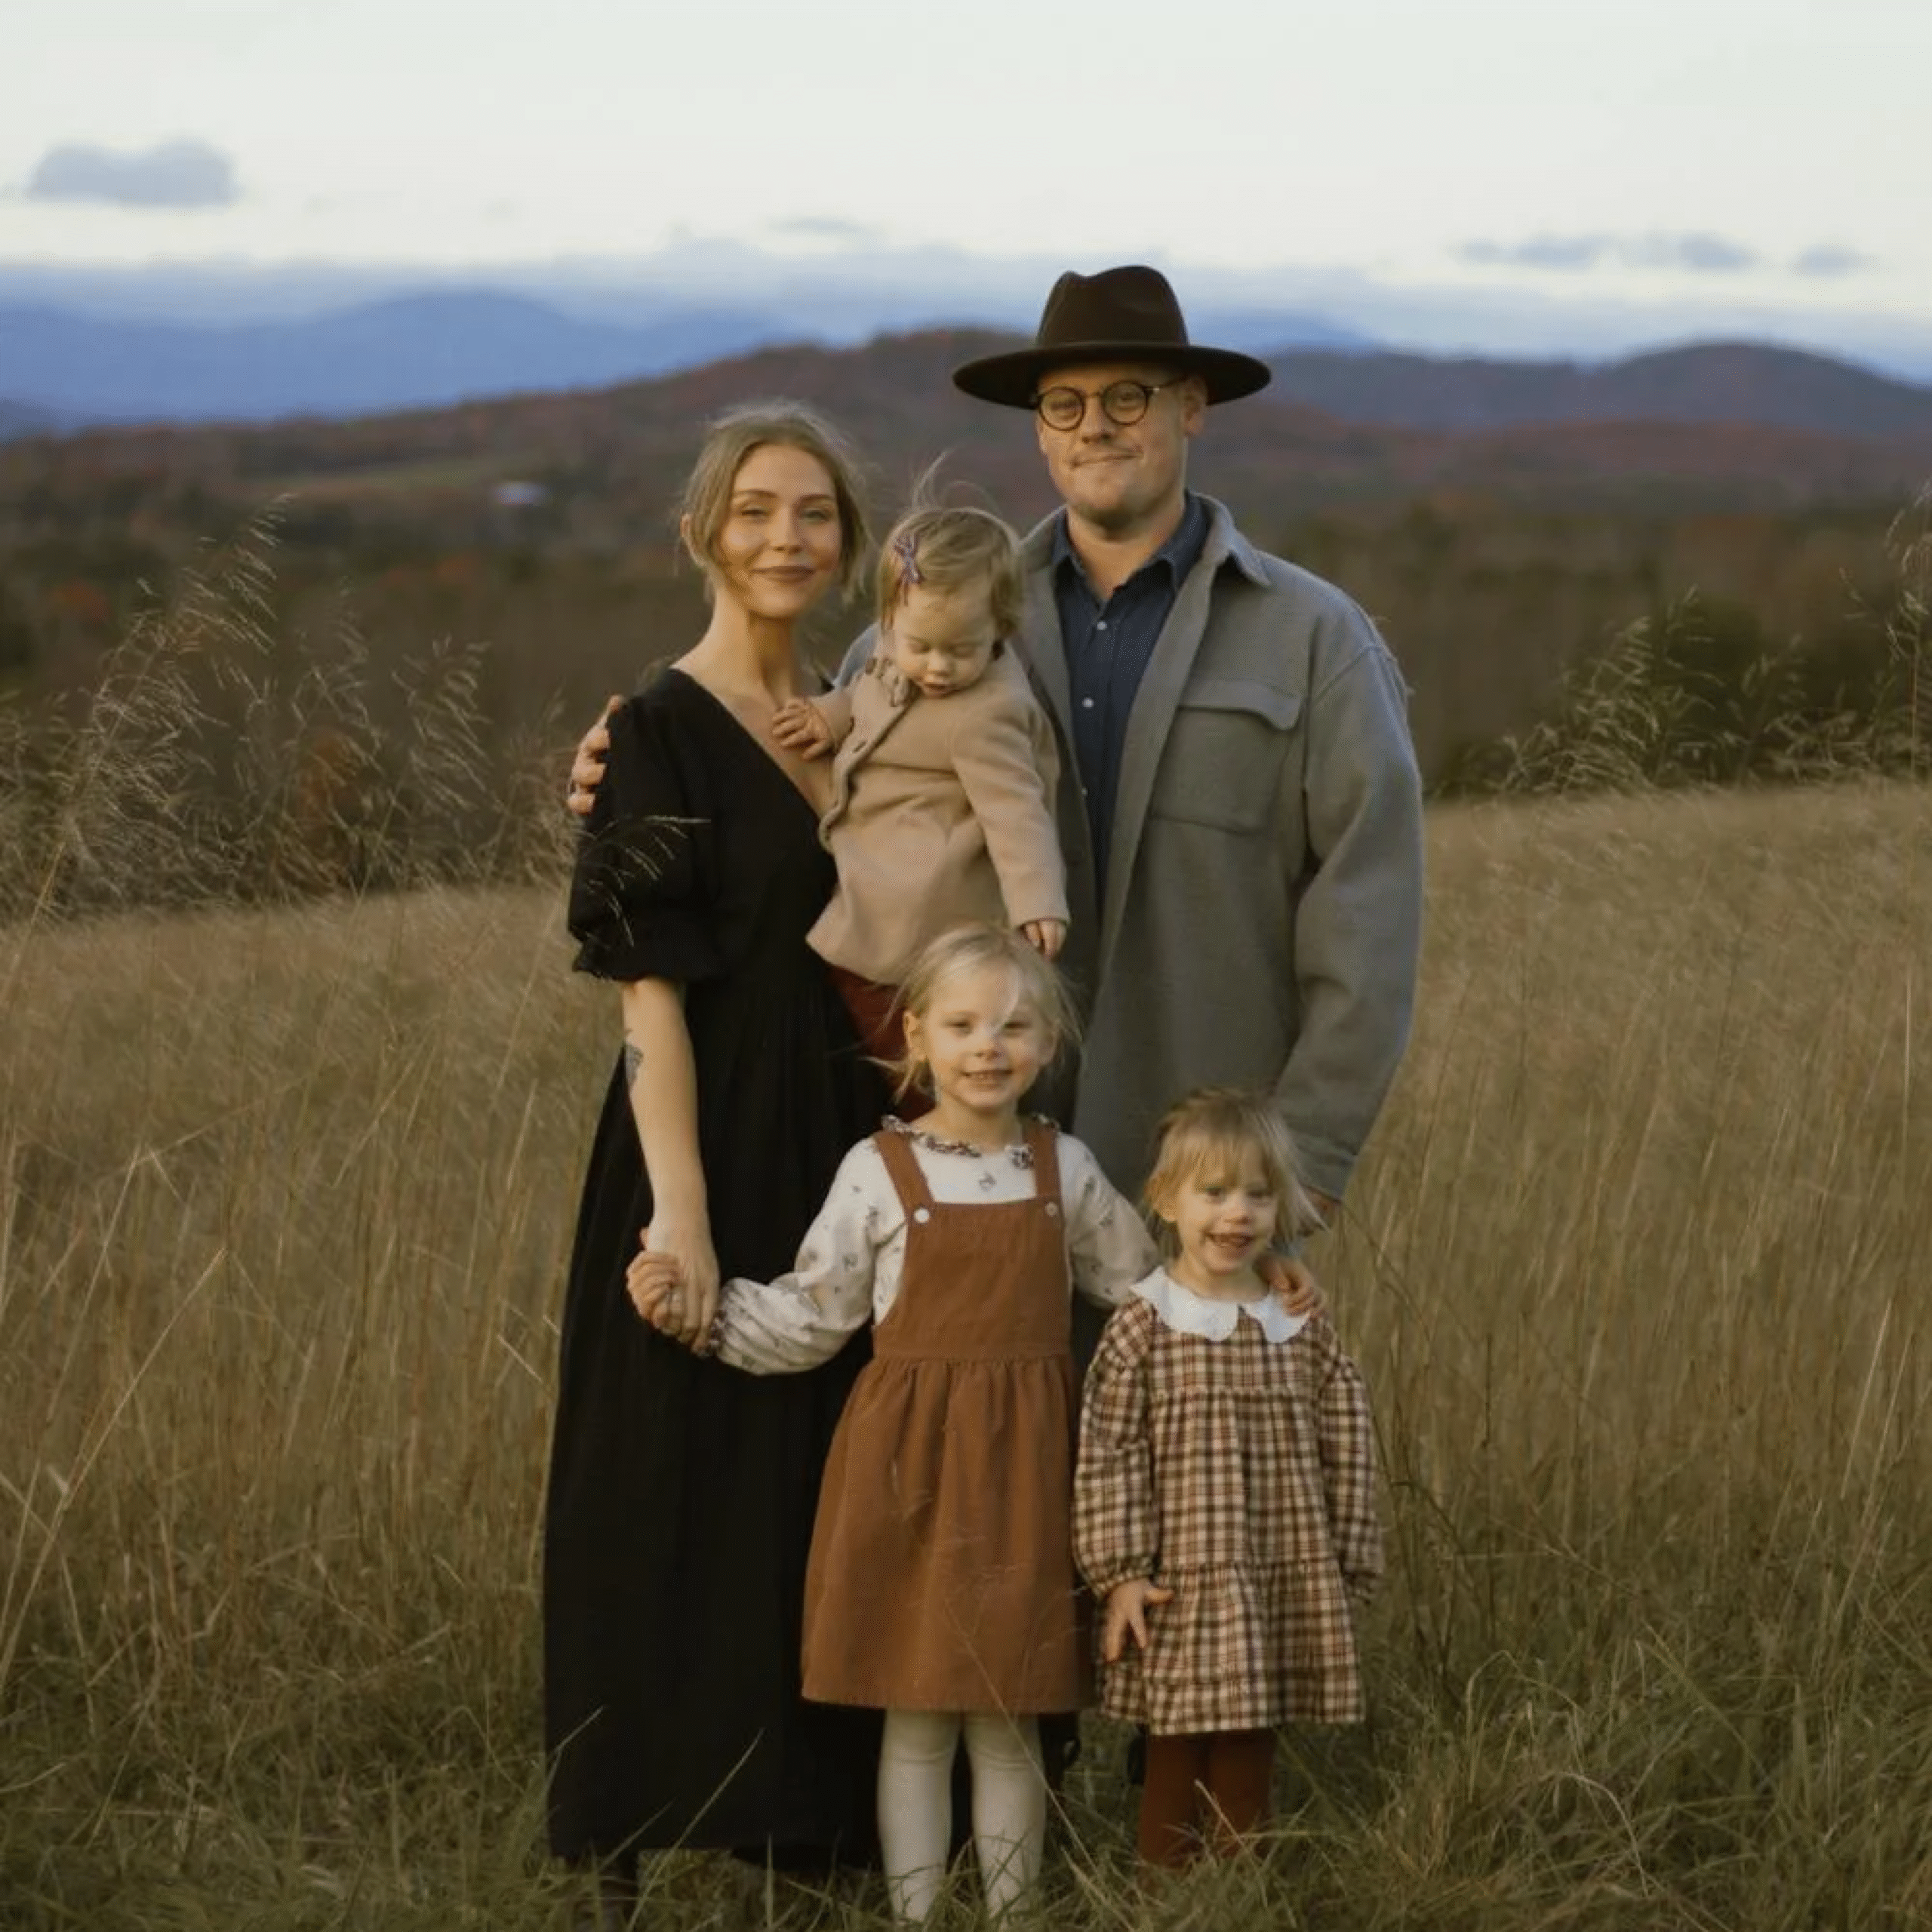
Family/Lifestyle: Prioritize naturalness and authenticity; typically involves light cleanup like blemish removal and subtle enhancements.
Boudoir: Often involves smooth skin, flattering shaping, and mood-setting color work, balancing polish with authenticity.
4. Balancing Realism and Perfection
The art of great retouching lies in finding the balance. You want to address flaws that distract, but avoid making the subject look artificial or unrecognizable. Preserving natural skin texture is key to realistic results.
A perfectly retouched portrait feels polished and elevated without looking overly processed or fake. It enhances the subject’s features and removes distractions, allowing the viewer to connect with the image and the person within it.
What Software Do Portrait Photographers Use for Retouching?
Professional photographers use a variety of software tools in their retouching workflow. The choice often depends on the photographer’s specific needs, budget, and preferred workflow style. Some of the most popular portrait retouching software options include:
Aftershoot
The photography industry’s best-in-class all-in-one AI culling, editing, and retouching software that allows photographers both the speed and efficiency to power through thousands of photos in minutes and the control to do things the manual way when you need it.
The industry standard for pixel-level editing. Offers the most control for complex, manual retouching techniques like frequency separation, masking, and advanced manipulation.
Image source: Adobe
Adobe Lightroom
Primarily known for its organizational and raw processing capabilities, Lightroom also includes powerful brushes and tools for local adjustments, blemish removal, and basic skin softening, making it suitable for lighter retouching needs.
Image source: Fstoppers
These traditional tools provide immense power, but as we’ve discussed, the manual effort required can be significant. This is why many photographers are now turning to dedicated AI portrait retouching software to complement their existing tools, which brings us to:
Capture One
Another robust raw processor favored by many professionals, offering excellent color control and layering capabilities that facilitate retouching workflows. It also recently released AI retouching capabilities, helping photographers speed up their workflows.
5 Portrait Retouching Tips to Make Your Life Easier
Developing an efficient and effective portrait retouching workflow is key to delivering high-quality images consistently and managing your time effectively. Here are some essential tips for streamlining your process:
Establish a Consistent Order of Operations
Whether you prefer manual or AI-assisted methods, follow the same steps for every image or shoot. A common order might be: Culling > Basic Adjustments (Exposure, White Balance) > Retouching (Cleanup, Skin, Details) > Creative Edits (Color Grade, Dodge/Burn) > Export. This consistency helps you work faster and ensures you don’t miss steps.
Calibrate Your Monitor
This is fundamental but often overlooked. Retouching skin tones and colors accurately requires a properly calibrated monitor. What looks right on an uncalibrated screen might look completely different (and wrong!) on another device or in print.
Don’t Over-Retouch
As discussed earlier, the goal is often natural enhancement. Zooming out regularly to see the image at a normal viewing size helps you avoid over-smoothing skin or making features look unnatural. Get feedback from trusted peers if unsure.
Leverage Batch Retouching and Workflow Automation
This is where AI truly shines in terms of efficiency.
For photographers shooting high volumes, like wedding photographers, corporate headshot specialists, or event photographers, individually retouching hundreds or thousands of images is simply unsustainable.
While traditional tools offer some batch processing (like applying the same preset), they lack the intelligence to adapt based on each specific face’s unique imperfections. An action might smooth skin, but it won’t intelligently remove a blemish on one face while leaving a beauty mark on another, or adjust smoothing based on skin texture variations.
Dedicated AI portrait retouching software like Aftershoot is built for scale and batch retouching. You can refine the AI settings on a few key images and then sync those settings across a large batch or even the entire gallery instantly. The AI then applies those intelligent adjustments — finding and fixing blemishes, softening wrinkles, enhancing eyes uniquely to each face detected in every photo, maintaining consistency based on your chosen parameters.
Use Presets for Speed and Consistency
Use the Presets available in Aftershoot and any editing or retouching tools you use to leverage saved settings for common looks or retouching styles dramatically speeds up your process and ensures a consistent aesthetic across a series of images or across different shoots of the same type.
Aftershoot even comes with a few predefined slider values, such as “Anti Aging”, “Hair Clean Up”, or “Face Pop”, and you can create your own custom presets to save frequently used slider settings for the future.
Implementing these tips can significantly improve the quality and speed of your portrait retouching and allow you to deliver faster.
Streamline Your Portrait Retouching Workflow Today
Portrait retouching is an essential part of delivering high-quality images, but it doesn’t have to consume endless hours of your valuable time. By integrating Aftershoot’s AI Retouching into your workflow, you can automate the tedious, repetitive tasks of skin cleanup and detail enhancement, achieving consistent, natural-looking results across your entire gallery in minutes, not hours.
“I recently got to try out the retouching, and OH MA,N you guys are going to flip out. I am currently editing a shoot that had garbage lighting. I’d been having nightmares about editing this shoot. I had been trying out all the other softwares for portrait editing, watching YouTube videos that were WAY below my level. None of them helped and it was a huge waste of time.
Then I remembered that I’d been sent the beta retouch, so I pulled it up and decided to try it. And guess what? It fixed the problem I had with my images in literally seconds. I’m so relieved, and grateful. Thank you guys, so so much.”
Professional photographers around the world are already leveraging AI to transform their post-production. Don’t get left behind. Explore how Aftershoot can become the go-to tool for your portrait retouching today.
Here are answers to some frequently asked questions about portrait retouching:
What is portrait retouching?
At its core, portrait retouching is the process of enhancing a portrait photograph using post-processing techniques. The primary goal is typically to present the subject in their best possible light, addressing imperfections that distract from the image’s impact while maintaining a natural and realistic look.
This can include a range of tasks such as skin smoothing, blemish removal, eye enhancement, teeth whitening, shaping, and contouring, and more.
What is a marker of good photo retouching technique?
Effective portrait photo retouching is about enhancing reality, not creating a completely artificial image. It requires a keen eye for detail and an understanding of how edits impact the overall look and feel of a photograph.
What is a marker of good photo retouching technique?
Effective portrait photo retouching is about enhancing reality, not creating a completely artificial image. It requires a keen eye for detail and an understanding of how edits impact the overall look and feel of a photograph.
What tools are used in retouching?
Traditional tools include software features like healing brushes, clone stamps, patch tools, frequency separation, dodging and burning brushes, and masking tools found in editors like Photoshop and Lightroom. AI retouching tools use algorithms to automate the detection and application of these types of edits.
Which software is best for photo retouching?
The “best” photo retouching software depends on your needs. For ultimate manual control, Photoshop is often considered the standard. For integrating AI for efficiency, dedicated AI portrait retouching softwarelike Aftershoot is ideal, often used in conjunction with editors like Lightroom or Capture One for creative finishing.
How to make portrait photos look better?
Beyond capturing a great image initially (lighting, pose, expression), making portrait photos look better in post-production involves tasks like color correction, exposure adjustments, cropping, and, crucially, portrait photo retouching to clean up distractions and enhance the subject’s features naturally.
Can AI touch up photos?
Yes, absolutely. AI technology is now capable of performing sophisticated retouching tasks such as automated blemish removal, wrinkle reduction, skin smoothing, and feature enhancement quickly and consistently across multiple images.
How long should a retouch take?
Manually retouching a single portrait in Photoshop can take anywhere from 15 minutes to several hours, depending on the level of detail required. Using AI portrait retouching software can reduce the time for the initial cleanup phase to mere seconds or minutes per image, significantly speeding up the overall process.
What’s a reasonable turnaround time for clients?
Turnaround time varies greatly based on the type and volume of the shoot, your workflow efficiency, and your client agreement. However, faster retouching through AI allows for significantly quicker delivery, which can be a major competitive advantage. Photographers using AI often report cutting their post-production time by 50% or more.
What’s the best AI tool for portrait retouching?
While several tools incorporate AI, Aftershoot specializes in combining culling, editing, and AI portrait retouching, offering a seamless workflow and powerful, customizable AI controls specifically designed for photographers, making it a leading contender for professional use.
How much should I charge for portrait retouching?
Pricing for retouching varies based on your skill level, the complexity of the job, the intended use of the image, and your market. Some photographers include a standard level of retouching in their package price, while others charge per image for advanced retouching or offer different tiers.
Subscribe to the Aftershoot Digest
Get exclusive insights on levelling up your photography game right in your inbox.