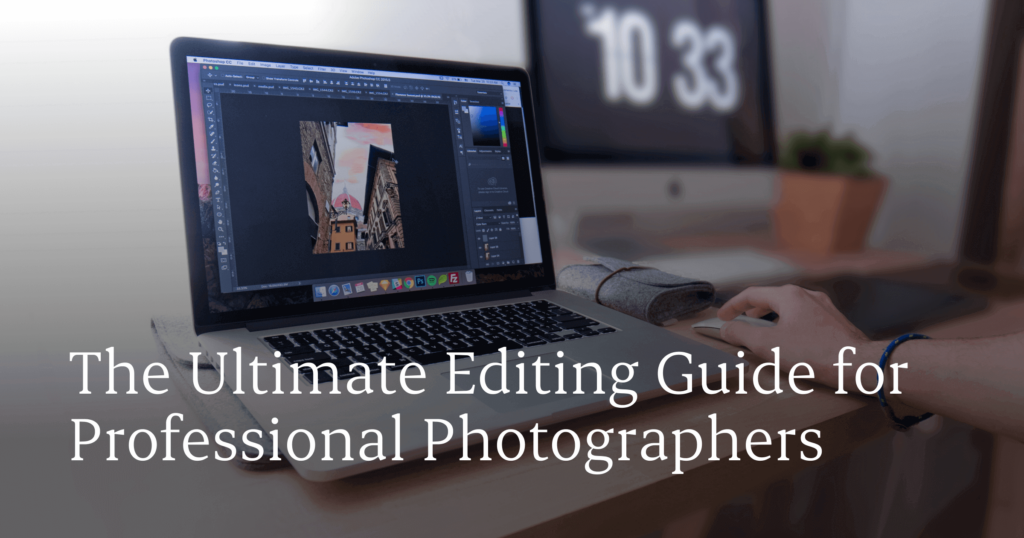
Professional photo editing is not about using heavy filters or making every image look dramatically different from the original. The best edits usually feel intentional, polished, and natural.
To edit photos like a pro, start with a strong base image, correct exposure and white balance, crop with purpose, control highlights and shadows, guide attention with selective adjustments, remove distractions, refine color, sharpen carefully, and export for the final use.
The goal is simple: make the photo look like the best version of itself.
Hi! I’m Paul Waring, a UK-based wedding photographer. I’ve been a professional wedding photographer for close to eight years now, and something I learned very early on is that the ‘perfect photograph’ in-camera is still not a completed image.
Editing is where you refine the story. It is where you correct color, shape the light, guide the viewer’s eye, clean up distractions, and create a consistent look across a full gallery.
In this guide, I’ll walk you through the workflow I use to turn flat RAW files into polished, client-ready photographs. We’ll cover the fundamentals first, then look at how Lightroom, presets, Photoshop, phone apps, free tools, AI, and Aftershoot can fit into a modern professional workflow.
For one photo, you can make these decisions manually. For a full wedding gallery with thousands of images, the challenge is doing it consistently, efficiently, and without losing your creative eye.”
How to Edit Photos Like a Professional Photographer: The Workflow at a Glance
Before we get into the full process, here’s the simple version.
To edit photos like a professional, follow this order:
- Start with the strongest possible image
- Shoot and edit in RAW when possible
- Back up and organize your files
- Cull the images you actually want to edit
- Crop and straighten the photo
- Correct exposure, highlights, and shadows
- Set white balance and natural color
- Use masks and local adjustments to guide the eye
- Remove distractions and refine the final look
- Sharpen, reduce noise, and export for the final use
You do not need to follow this perfectly for every single image. But having a repeatable workflow stops you from editing randomly.
That is one of the biggest differences between beginner editing and professional editing. A beginner often asks, “Which preset should I use?” A professional asks, “What does this image need?”
What Makes a Photo Look Professionally Edited?
A professional edit usually feels polished without feeling overdone.
When I look at an image, I’m thinking about a few things before I touch the sliders:
- Is the subject clear?
- Does the light feel natural?
- Are the skin tones believable?
- Is the crop intentional?
- Are the highlights controlled?
- Are the shadows adding depth, or hiding important detail?
- Does this image match the rest of the gallery?
The best edits usually have restraint. They do not scream “edited.” They simply feel finished.
For wedding and portrait work especially, natural skin tone is one of the biggest signs of a professional edit. You can have a beautiful preset, dramatic contrast, and a trendy color grade, but if the skin looks too orange, green, gray, or overly smooth, the image will not feel right.
Consistency matters too. A single image can look great on its own, but a professional gallery needs to feel cohesive from start to finish. That does not mean every photo should look identical. It means the color, contrast, mood, and skin tones should feel like they belong to the same story.
Before You Edit: How I Prepare a Professional Gallery
The actual edit starts before Lightroom.
If you are editing one photo for yourself, you can jump straight into cropping, exposure, color, and local adjustments. But if you are editing professional work, especially weddings, portraits, or commercial galleries, preparation is part of the workflow.
Before I start editing, I want to know three things:
- My files are safe.
- My strongest images have been selected.
- My folder structure is clear enough that I can find everything later.
That might not sound creative, but it protects the work. It also makes the editing process much smoother once you sit down to make the images look finished.
1. Back up Your Images
When it comes to dealing with what is perhaps the biggest day of our clients’ lives, the stakes are high, and we need to ensure we’re prepared with a solid backup solution. For me, this is absolutely non-negotiable. Losing client photos could potentially destroy a wedding photographer’s reputation or even career.
From the moment you click the shutter, you need to think about how safe your files are. My photographs are always written to two memory cards in the camera. When I’m at my computer, my goal is to then have three copies of the files: my working files, one backup drive, and one stored off-site. In my case, the off-site backup is in the cloud.
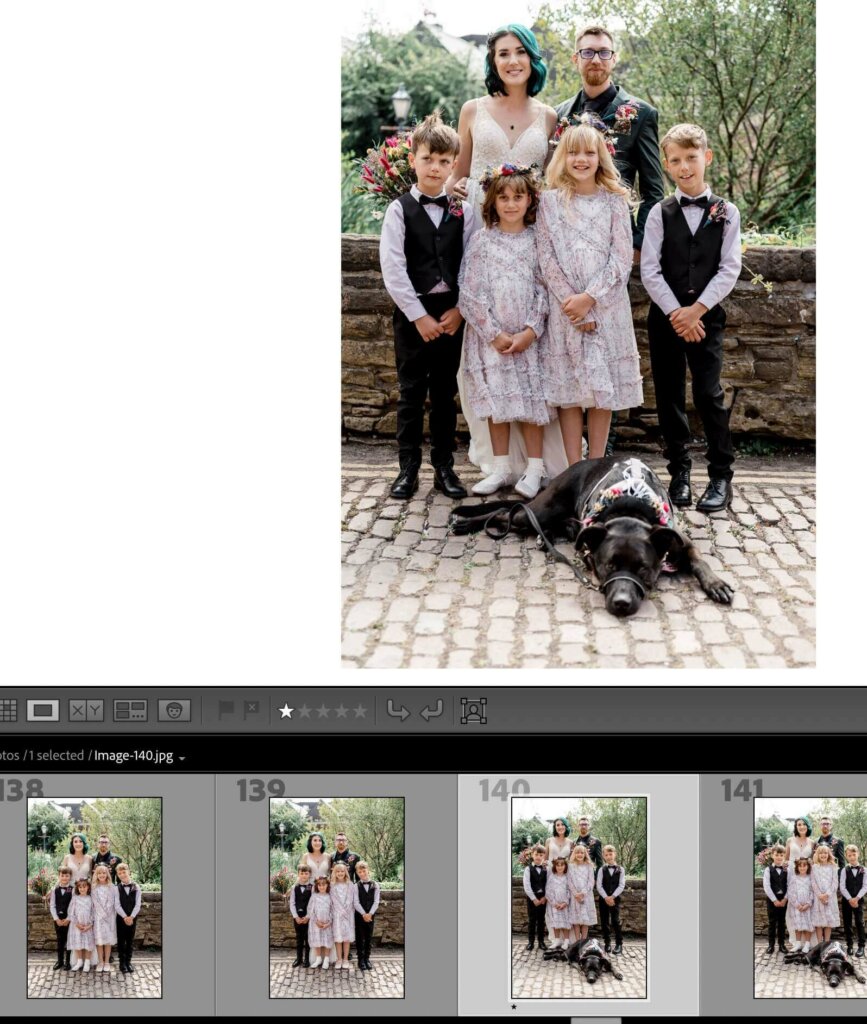
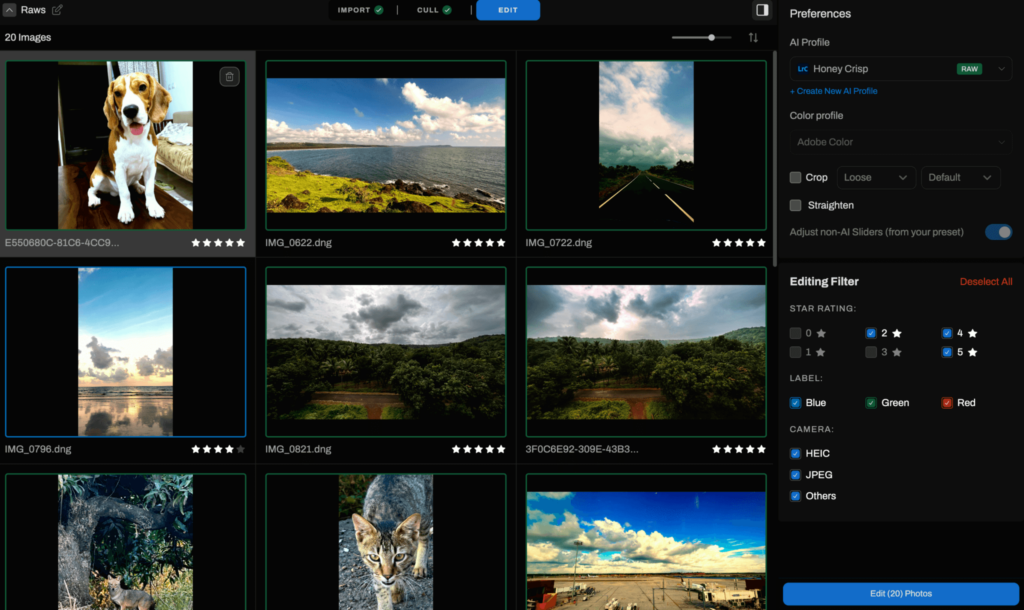
2. Cull your Photos
Once you’re confident your photos are backed up, it’s time to cull. At weddings, we can shoot thousands of images, and not all of them will be delivered to the client. Culling is the process of selecting the best photos from a larger set. This can be daunting, so having an efficient workflow can save hours of your precious time.
There are a few popular approaches to culling.
a) Cull within Lightroom
Lightroom can be a powerful tool for culling and is great if you want to keep everything within the same program. You can quickly flag or rate your photos and immediately start editing your favorites.
My tip is to use Smart Previews within Lightroom, as this will make it quicker to sift through the images. The downside is that Lightroom can be slower than a dedicated culling program, especially when dealing with the large number of photographs we shoot at weddings.
b) External Culling Programs
If, like me, you find Lightroom’s culling process a bit sluggish, external programs can speed up the process. A classic favorite for many wedding photographers is Photo Mechanic, although newer software exists. This software is great for handling a large number of images without lagging. You can then import only the selected images into Lightroom.
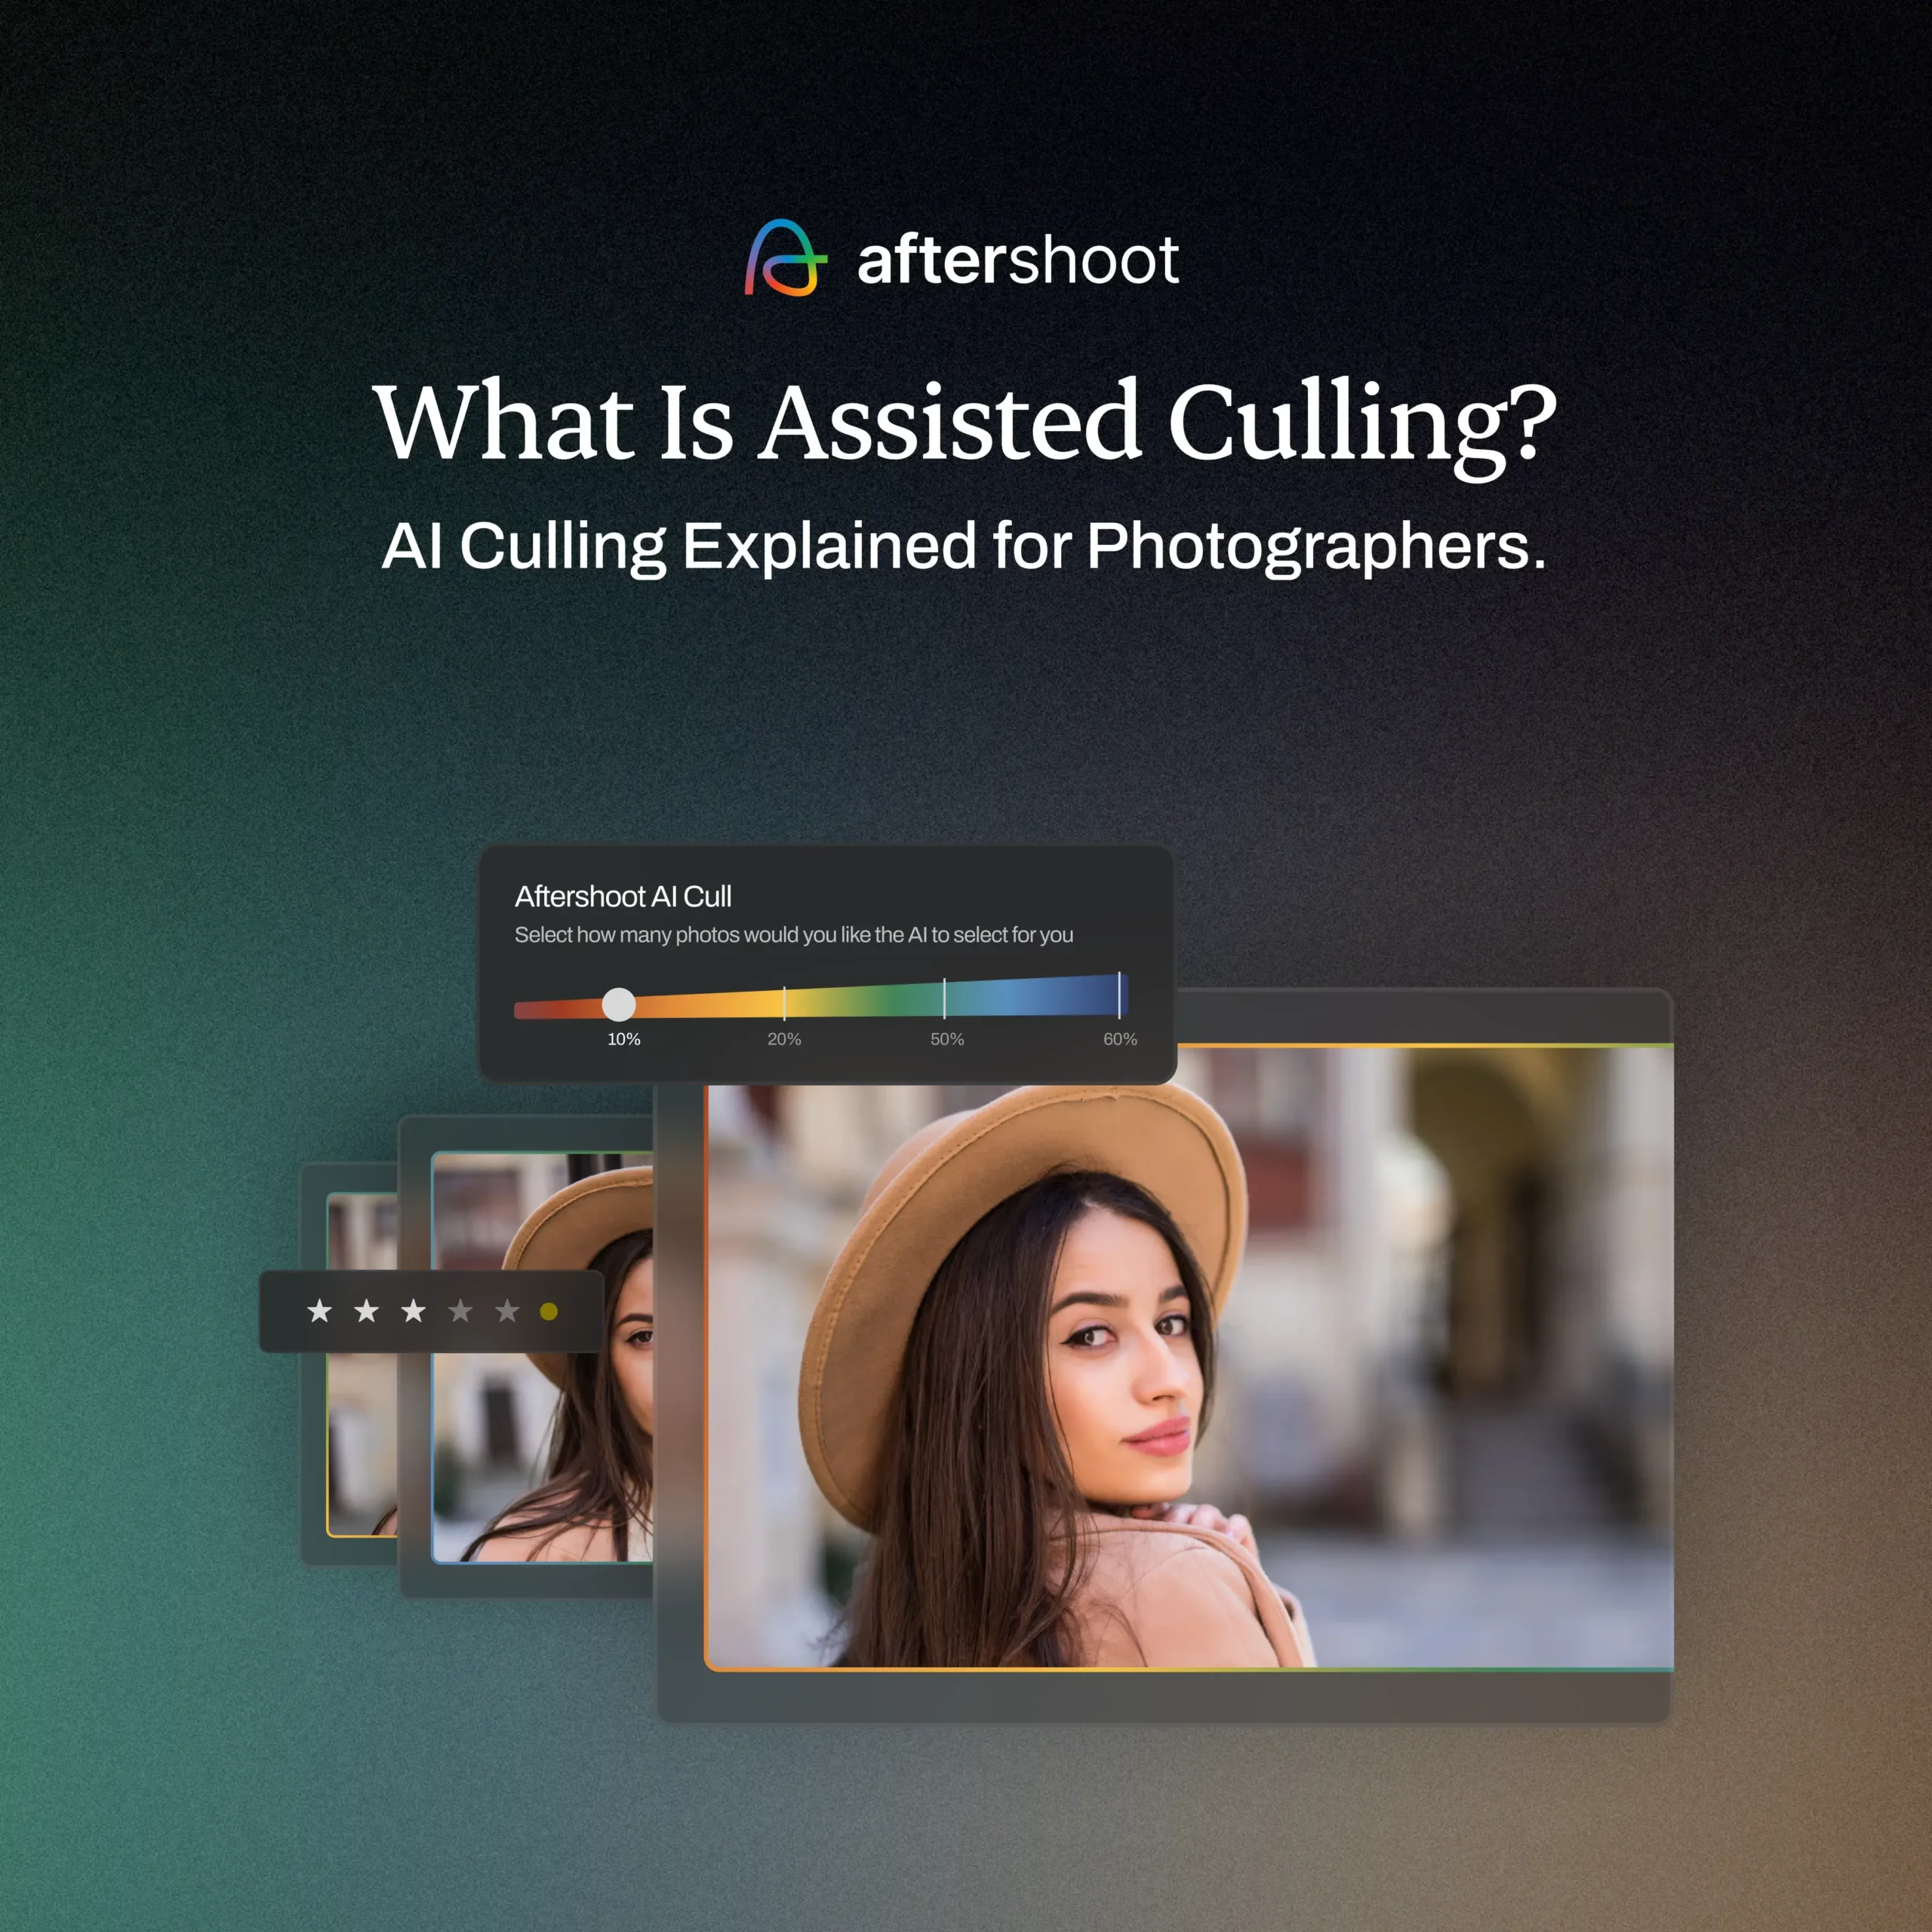
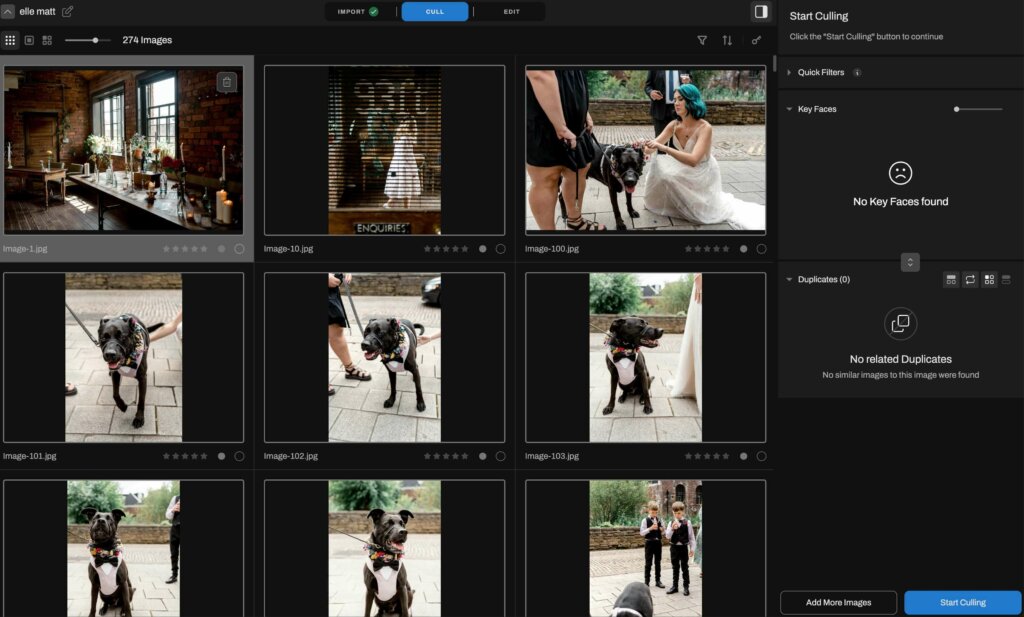
c) AI Culling Tools
More recently, new AI tools have emerged to assist with the culling process. AI culling software like Aftershoot analyzes your images and helps decide which photographs are the best. This has recently become my preferred option. I can drastically reduce the time spent culling while still casting my final judgment on which photographs I’ll be editing.
3. Keep File Names, Folders, and Backups Predictable
I will quickly touch on organization. For the sake of your future self, organizing your images is crucial. Create a folder structure that is logical to you, such as organizing by date, event, or client name. Keep this consistent.
I like to organize my files in a large folder by year. I then break this down into subcategories like ‘01. Katie & Andrew’ and ‘02. Joanne & Michael.’ Within these folders, I keep subfolders for RAW files, selected images, and the exported JPEG files once edited.
A well-organized photo library not only saves time but also helps you stay focused on the creative aspects of editing rather than getting bogged down in administrative tasks.
4. Set up Your Physical and Digital Workspace
A professional photo editing workflow in 2026 starts before the first slider moves. Creating an efficient and comfortable workspace is crucial, as it enhances both productivity and the quality of your work. I also like to make my office a pleasant place to spend time.
Start by investing in a supportive chair, a spacious desk, and proper lighting to reduce eye strain and accurately view colors. Organizing your physical workspace to minimize distractions allows you to focus fully on your editing tasks.
In Lightroom, you can collapse and hide the tools you don’t use. I prefer to use the Develop tools in ‘Solo Mode,’ which lets you concentrate on the specific tools you’re working with.
It’s worth investing in a computer with enough processing power and RAM to handle your camera’s files without struggling, enabling you to work quickly.
What Do Professional Photographers Use to Edit Their Photos?
Professional photographers do not usually rely on one tool for everything. They build a workflow around the type of work they shoot, how many images they need to deliver, and how much control each image needs.
For most photographers, Lightroom is the main editing workspace. Photoshop is used when an image needs more detailed retouching or cleanup. Other tools, plugins, AI editors, and physical editing consoles can then support the workflow and make the process faster.
Why Lightroom Is Still the Main Editing Tool for Many Photographers
Lightroom is still one of the most widely used editing tools for professional photographers because it handles the full RAW editing workflow in one place.
You can import and organize images, apply presets, adjust exposure and color, use masks, sync edits across similar photos, sharpen, reduce noise, and export final files for web, print, or client galleries.
That matters when you are editing more than one image. A professional workflow is not just about making one photo look good. It is about making a full set of images feel consistent.
For wedding photographers especially, Lightroom is useful because a single gallery can include thousands of images across completely different lighting situations: morning prep, ceremony light, portraits, reception lighting, flash, candles, and dance floor images. Lightroom makes it easier to edit those scenes in groups while still fine-tuning individual photos.
I also like Lightroom because it works well as the final creative step in a larger workflow. For example, I can cull and apply a first-pass edit in Aftershoot, then bring the gallery into Lightroom to make final decisions on color, tone, masks, and export.
Lightroom does not make a photo professional on its own. But it gives you the control and consistency you need to edit like a professional.
Additional Software, Plugins, and Physical Tools That Speed Up Editing
Once your main editing workflow is in place, additional tools can help you work faster and with more control.
Plugins can add advanced filters, effects, retouching options, AI-powered enhancements, or specialized export features. Some photographers use plugins for noise reduction, sharpening, color grading, skin retouching, or creative finishing touches.
These tools should support the edit, not take over the edit. I think of them as workflow helpers: useful when they solve a specific problem or save time, but not a replacement for understanding exposure, color, composition, and consistency.
Physical tools can also make a big difference. Devices like TourBox and Loupedeck give you customizable dials, buttons, and knobs for common editing actions. Instead of relying only on a mouse and keyboard, you can make quick adjustments with tactile controls.
I personally use the TourBox, and it speeds up my Lightroom workflow. It also reduces the strain from repetitive mouse movements, which matters when you are editing large galleries for long periods of time.
For professional photographers, these tools are less about making one image look better and more about making the full editing process smoother, faster, and easier to repeat.
How to Edit Photos Like a Professional in Lightroom: My 7-Step Workflow
Once the files are backed up, culled, and organized, I move into the actual edit.
This is where the image starts to become the final photograph. Lightroom is my main tool here because it lets me work quickly across a full gallery while still giving me enough control over individual images.
Here is the 7-step process I use.
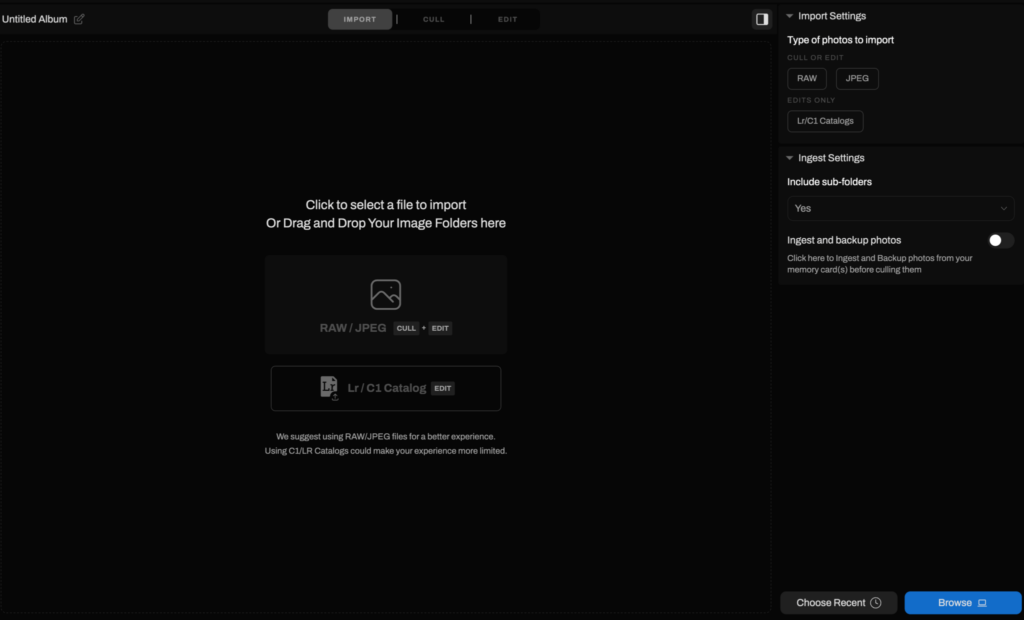
1. Import Your Images
The first step in any editing workflow is importing and organizing your photos.
In Lightroom, I usually import after the images have already been backed up and culled. That means I am not bringing every single frame into my editing catalog. I am working with the images that have already made it through the first selection.
As I import, I like to add metadata, keywords, and copyright information where needed. This helps with searching later and also protects your work.
You can also choose the size of your previews. I find standard previews work well for most situations, and Smart Previews can make the editing process faster, especially when working with large wedding galleries.
If you already use Aftershoot, the culling and first-pass workflow can happen before Lightroom, with ratings and metadata carrying over into your catalog.
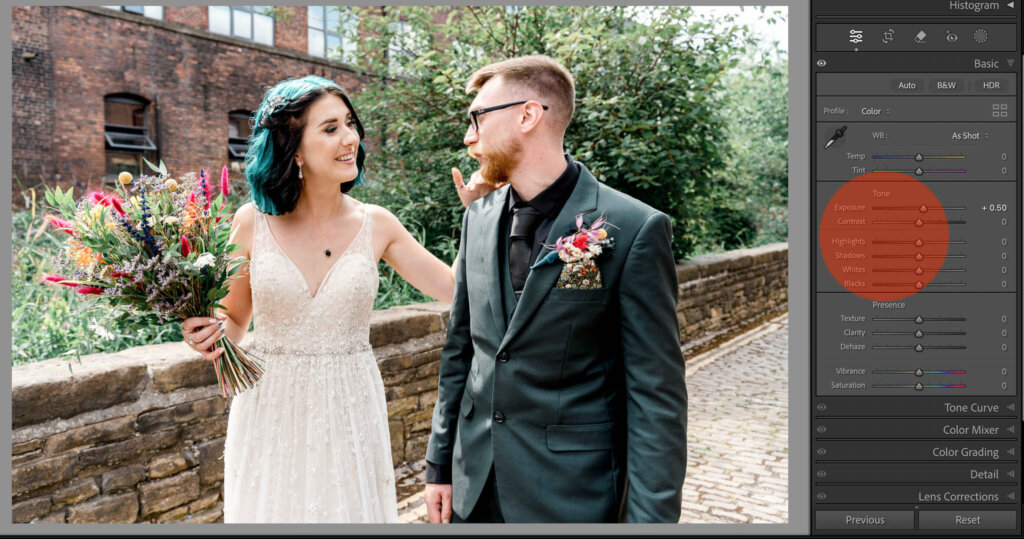
2. Make Basic Adjustments First
Basic adjustments are the foundation of the edit.
This is where I look at the overall image and ask: does it feel too dark, too bright, too flat, or too heavy?
Start with Exposure to correct the overall brightness. Then use Highlights and Shadows to recover detail in the brightest and darkest parts of the image. Whites and Blacks help set the final dynamic range.
A simple order is:
- Exposure for overall brightness
- Highlights for bright areas like skies, dresses, windows, and reflections
- Shadows for darker areas where important detail is hiding
- Whites for clean brightness
- Blacks for depth and contrast
Be careful not to flatten the image by lifting every shadow or reducing every highlight. A professional edit still needs shape and depth. The goal is not to remove contrast; it is to control it.
Clarity can add punch, but I use it carefully, especially on portraits. Too much clarity can make skin look harsh.
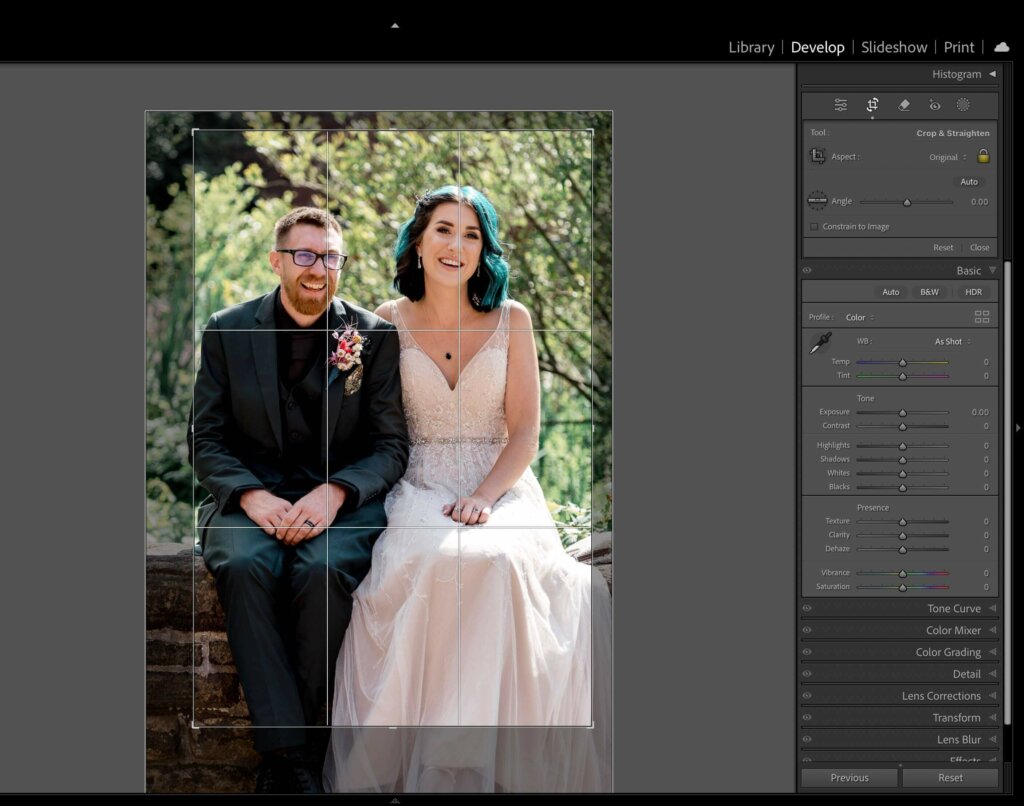
3. Crop and Straighten the Photo
Cropping and straightening can completely change how professional a photo feels.
Before I spend too much time on color, I want the composition to feel intentional. In Lightroom, use the Crop Overlay tool to straighten horizons, remove distractions around the edges, and guide attention toward the subject.
The rule of thirds can be useful, but it is not a law. Sometimes a centered subject works better. Sometimes negative space makes the image stronger. Sometimes a tighter crop removes clutter and makes the emotion clearer.
For wedding photos, I’m also careful not to crop out important context. A slightly wider frame can sometimes tell the story better than a technically cleaner crop.
Pro tip: use the “R” key to quickly enter the crop tool in Lightroom.
4. Fix White Balance, Skin Tones, and Color
Color is one of the fastest ways to make an image look either professional or amateur.
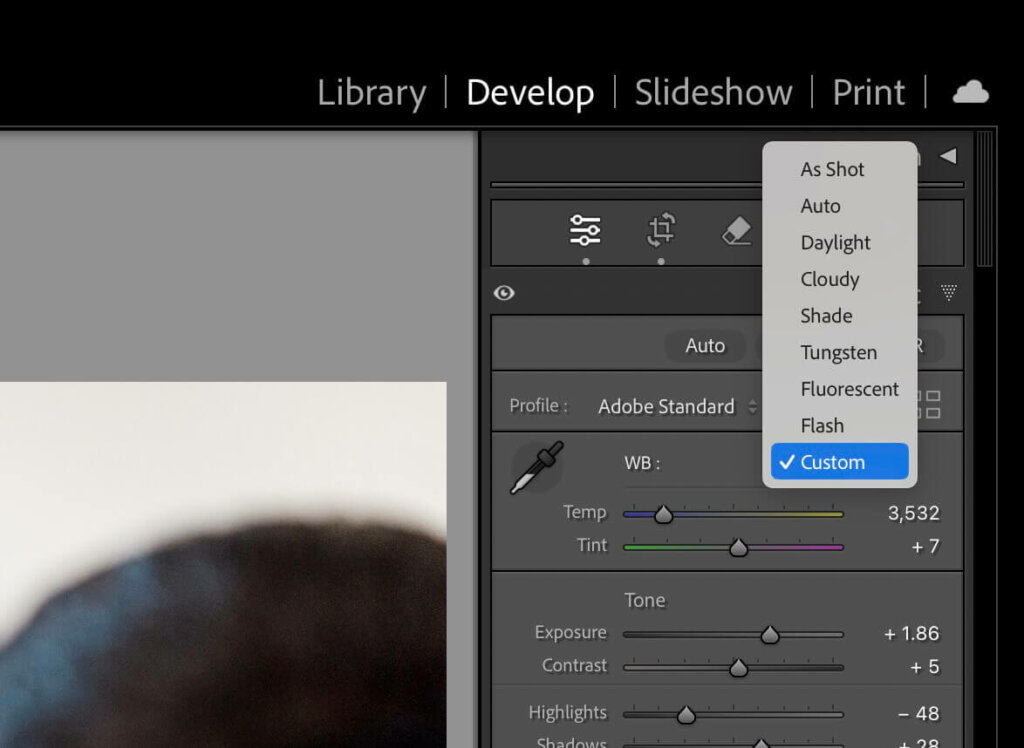
Start with white balance. If the image is too warm, too cool, too green, or too magenta, fix that before doing more creative color work.
In Lightroom, use Temperature and Tint as your starting point. You can try presets like Daylight or Shade, or use the white balance eyedropper, but your eye still matters.
For portraits and weddings, skin tone is usually the priority. A technically neutral image is not always the most flattering image, but skin should still feel believable.
Once white balance is in a good place, you can use Vibrance and Saturation carefully. I usually prefer smaller, controlled changes over dramatic global saturation. If one color is distracting, use the HSL or Color Mixer panel to adjust that specific color instead of pushing the whole image.
This is also where consistency matters across a full gallery. A wedding can include window light, harsh sun, shade, tungsten bulbs, flash, candles, and DJ lights. The scenes will not all be identical, but the gallery still needs to feel cohesive.
Aftershoot’s AI Profiles can help create a consistent baseline across different lighting situations. Aftershoot’s white balance models were recently updated to improve consistency across images shot in the same scene, reducing the need for manual correction once you bring images into Lightroom. This applies automatically for Instant and Marketplace Profiles. If you use a Custom Profile, you’ll need to opt into the white balance update manually.
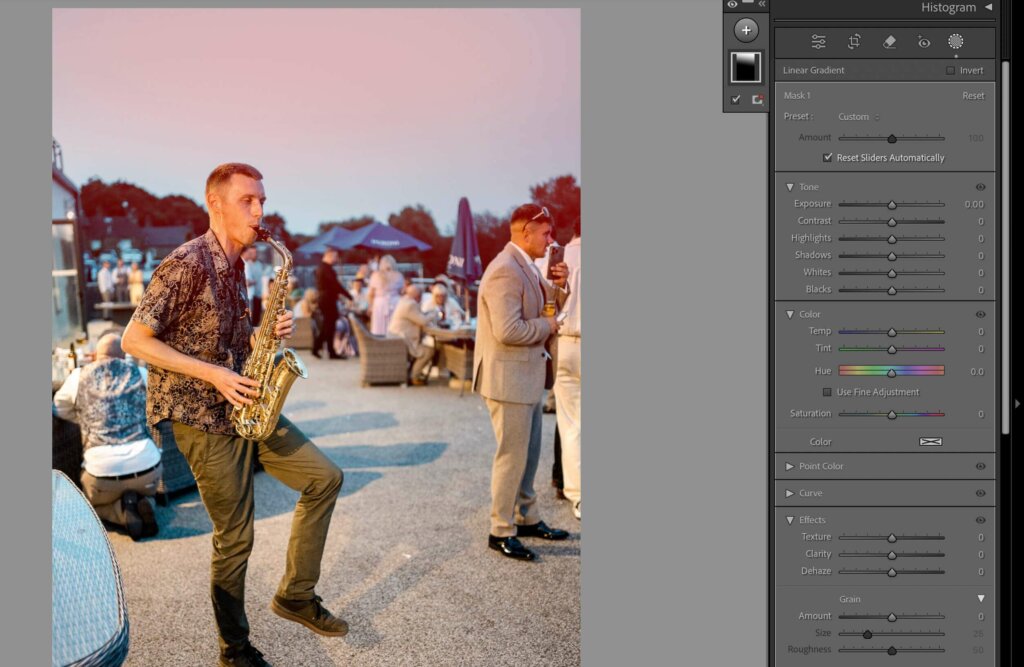
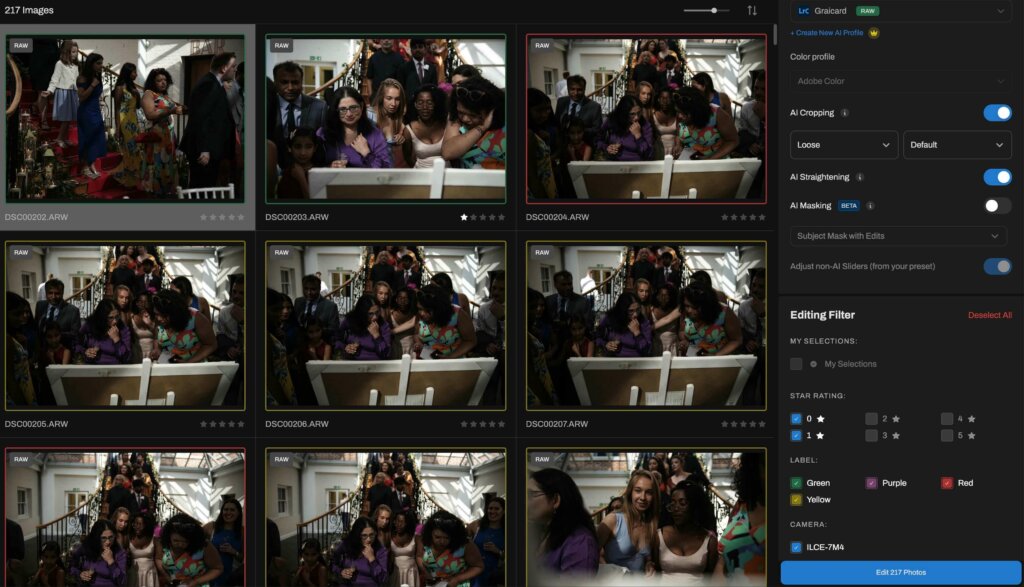
5. Use Masking and Local Adjustments
Once the global edit is in a good place, I move into local adjustments.
This is where an edit can start to feel much more polished.
Global adjustments affect the entire image. Masks let you work on specific parts of the frame: the subject, background, sky, face, dress, foreground, or any area that needs more attention.
In Lightroom, tools like masking, subject selection, radial gradients, linear gradients, and brushes allow you to make targeted changes.
You might use masks to:
- Brighten the couple slightly
- Darken a distracting background
- Recover detail in the sky
- Add gentle contrast to the subject
- Soften a bright edge of the frame
- Bring attention back to the face
For example, if the subject is slightly darker than the background, I might lift the subject a little and bring the background down slightly. It should not look obvious. It should simply help the viewer’s eye go where I want it to go.
The key is restraint. If someone can see the mask immediately, it is probably too strong.
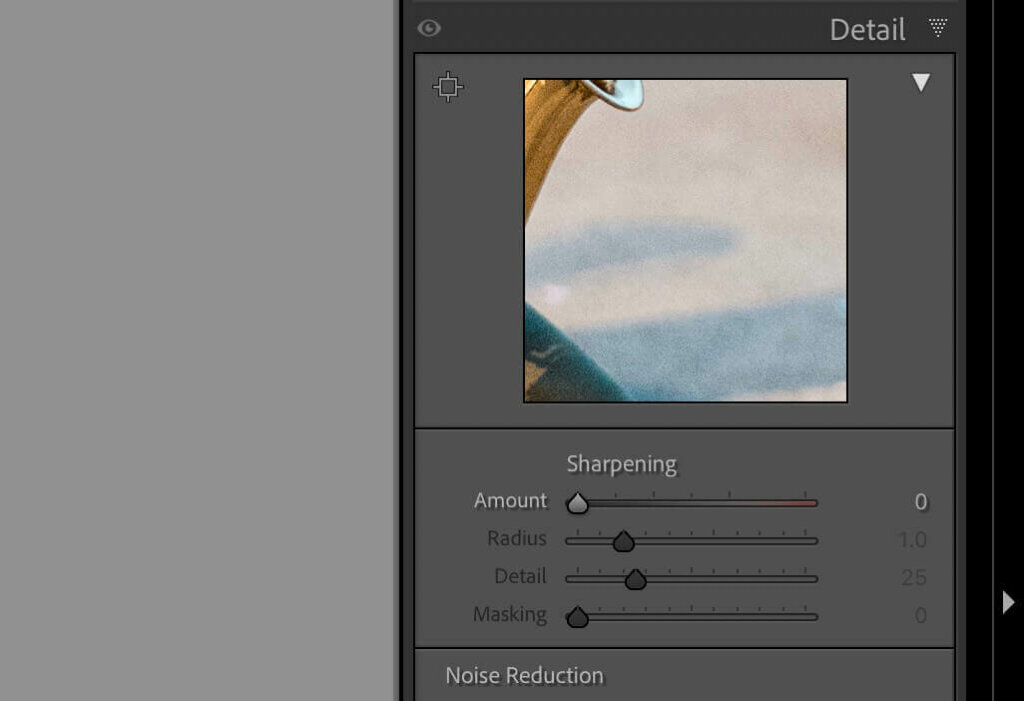
6. Sharpening and Noise Reduction
Sharpening and noise reduction are the finishing touches that can significantly enhance the quality of your images. In Lightroom, use the Detail panel to apply sharpening, focusing on bringing out the fine details without making the image look overly crisp.
Adjust the Radius and Detail sliders to control how sharpening is applied, and use the Masking slider to protect areas that don’t need sharpening. For noise reduction, increase the Luminance slider to reduce graininess in the image, especially in low-light shots. Balance these adjustments carefully to maintain a natural look.
7. Final Touches
The final touches bring your edit together and prepare your image for export. Review your image at full screen (use the ‘F’ key), checking for any remaining spots or distractions using the Spot Removal tool.
Consider adding a subtle vignette using the Effects panel to draw attention to the center of the image. If your image will be printed, ensure it’s in the correct color profile and consider soft proofing to see how it will look in print.
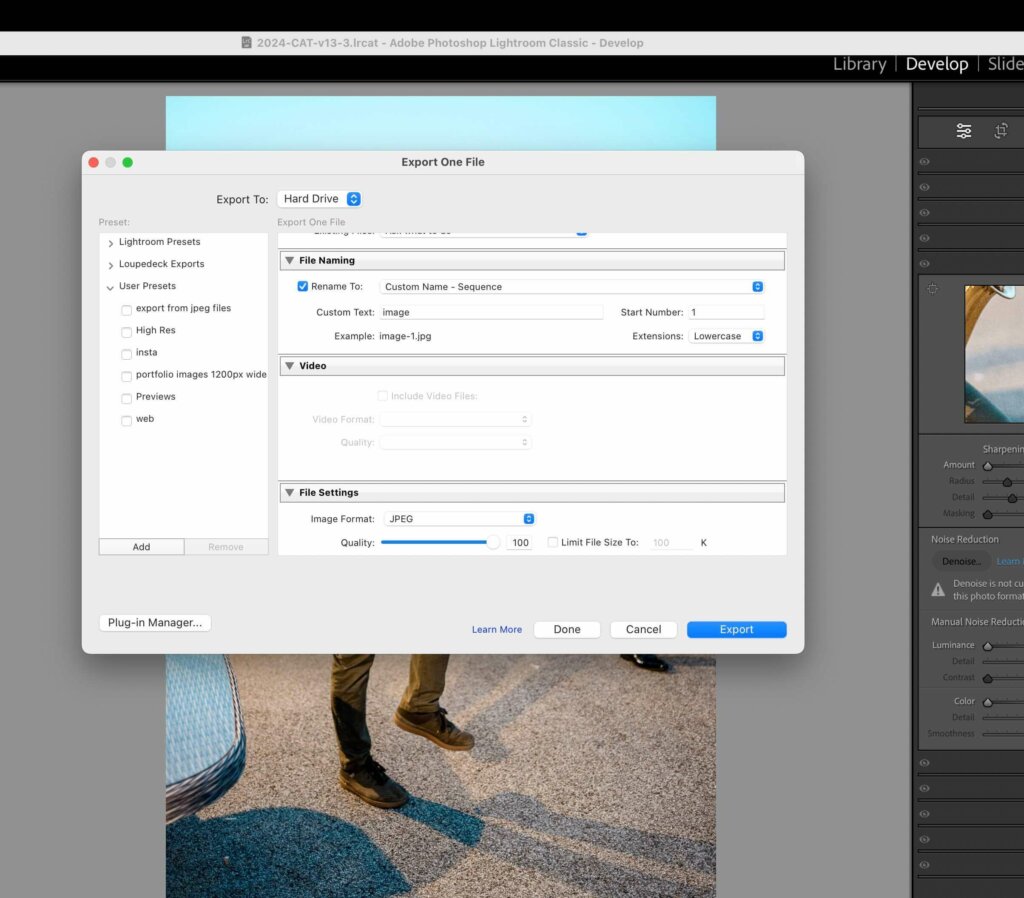
Finally, export your images with the appropriate settings for your intended use, whether for print, web, or client delivery.
The last check I do is consistency. One image might look good on its own, but if it belongs to a full wedding gallery, it needs to sit well beside the images before and after it.
Lightroom Presets – Should You be Using Them?
Editing presets in Adobe Lightroom are a powerful tool that can significantly speed up your workflow and help you achieve a consistent look across your images. Presets are essentially pre-configured settings that you can apply to your photos with a single click, instantly adjusting parameters like exposure, contrast, color balance, and more.
Also check out Lightroom wedding presets for photographers
Whether you’re working with your own custom presets or those created by other photographers, they can be a game-changer in your editing process.
As a wedding photographer, the reason I use presets is to maintain a consistent aesthetic across an entire set of photographs. For example, if you want all the images from a wedding to have a warm or desaturated feel, applying a preset design for that look can quickly set the tone for your edits.
Lightroom also allows you to fine-tune the presets after applying them, so you can make minor adjustments to suit each individual photo. This flexibility makes presets a great starting point, saving time on repetitive tasks while still allowing room for creative decisions.
By applying various presets to the same image, you can quickly see how different looks might enhance your photo. This is especially useful when you’re trying to define your personal editing style.
I personally have a set of personalized presets, which I can call upon in different scenarios. While they should not replace manual adjustments entirely, presets can serve as a valuable starting point in your editing, helping you achieve greater efficiency.
When to Take an Image Into Photoshop
Lightroom is where I do most of my editing, especially for full galleries. Photoshop is where I go when an image needs more detailed work.
Photoshop is useful for:
- Complex object removal
- Detailed skin retouching
- Cleaning up backgrounds
- Fixing clothing distractions
- Removing difficult elements
- Working with layers and masks
- Creating composites
- Preparing hero images for albums or print
For most wedding galleries, I do not need to take every image into Photoshop. That would slow the workflow down too much. But for key portraits, album spreads, or images that need more advanced cleanup, Photoshop can be the right tool.
A practical professional workflow often looks like this:
- Cull and organize the gallery
- Apply a baseline edit
- Refine the images in Lightroom
- Send only selected images to Photoshop
- Return the finished files to the gallery workflow
That keeps the process efficient without sacrificing quality where it matters.
Where AI Photo Editing Fits Into a Professional Workflow
AI photo editing is useful when it supports your creative decisions instead of replacing them.
For one image, I can make every decision manually. But for a full wedding gallery, where I may be working through thousands of files, the challenge is not just making one photo look good. It is keeping the whole gallery consistent while delivering it in a reasonable amount of time.
That is where AI tools can help.
AI can assist with:
- Culling
- Grouping similar images
- Applying baseline edits
- Matching your editing style
- Keeping skin tones consistent
- Speeding up repetitive work
- Reducing the time spent on first-pass edits
For me, AI works best as an assistant. It can handle the repetitive parts of the workflow, but I still want final creative control.
What is AI Editing?
AI editing has become an essential tool for myself and many industry friends, offering efficiency and consistency that was hard to get manually. AI editing uses machine learning algorithms to analyze and adjust your images based on patterns and preferences, often with just a few clicks for setup. AI editing can save countless hours.
AI Tools Within Lightroom
Adobe Lightroom has embraced AI with several powerful features designed to streamline your workflow.
Tools like Enhance Details and AI Noise Reduction use advanced algorithms to automatically refine your images, bringing out the best in certain scenarios. AI Noise Reduction has been a game-changer in improving the quality of low-light wedding shots, reducing noise without messing around with the detail.
The Enhance Details feature, on the other hand, helps me to achieve sharper, more defined images with just a click, particularly useful when dealing with intricate bridal gowns.
2026 update: Lightroom’s AI suite now includes Generative Remove, Lens Blur, and Reflection Removal (in Camera Raw preview). They handle object cleanup, realistic depth-of-field, and reflection fixes directly inside Lightroom without round-tripping to Photoshop.
Stand-Alone AI Editing Software
Beyond Lightroom, stand-alone AI editing software like Aftershoot has completely changed the way I approach my editing. Aftershoot’s AI-driven culling and editing features let me quickly sort through thousands of wedding photos, automatically picking out the best ones without needing to check each image myself. This has saved me a ton of time on culling, so I can focus more on the creative side of editing.
Here’s how I use Aftershoot in my workflow:
Step 1: Culling
First, I import all my photos into Aftershoot. The AI quickly analyzes and sorts through my gallery, selecting and grouping the images based on factors like sharpness, composition, and even facial expressions. It’s like having an extra pair of eyes that’s never tired. I can then go in and select the final images that I want to deliver.
Step 2: Select Images
Next, I select the images by using Star Ratings and Color Labels to choose the images I want to edit
Step 3: AI-Driven Editing
After culling, I let Aftershoot apply my editing style. The software has learned how I typically adjust my images, so it replicates those edits across the selected photos. In 2025, Aftershoot introduced Instant AI Profiles, which convert your Lightroom presets into adaptive profiles in about a minute. The software also includes Retouching, a fast local cleanup tool that smooths skin and reduces distractions while preserving texture for the whole batch.
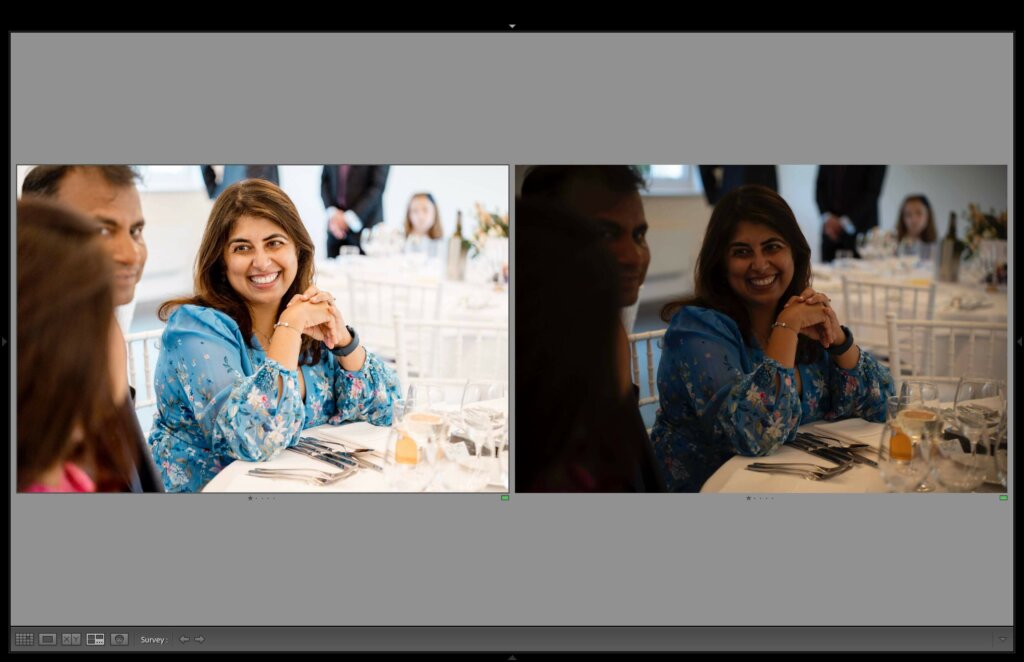
The image below shows the difference between an image edited completely by Aftershoot vs the original file.
With Aftershoot Develop, RAW editing is now free for all users, giving you full manual sliders (white balance, light, HSL, color grading, detail), crop and straighten tools, and subject masking, all inside Aftershoot. This means the fine-tuning step I used to do in Lightroom can now happen directly in Aftershoot if I want a fully in-app workflow, or I can still export to Lightroom for additional creative grading.
Step 4: Finish and Refine in Lightroom
Once Aftershoot has worked its magic, you now have a choice: fine-tune directly within Aftershoot Develop using manual sliders, or import the edited photos into Lightroom for additional creative color work. Since Aftershoot has already applied your general style, and can now handle detailed manual adjustments too, this step has become optional rather than mandatory for many workflows.
Edits, ratings, and metadata from Aftershoot carry over automatically, so everything stays organized once you return to Lightroom for finishing touches. With most of the heavy lifting done, these final adjustments are quick and easy, especially using my Tourbox for assistance.
This process has really streamlined my workflow. With Aftershoot handling a lot of the repetitive tasks, I can deliver consistent, high-quality results without spending endless hours in front of the screen.
Balancing AI with Manual Editing
While AI tools offer incredible convenience, it’s crucial to balance their use with manual editing to maintain full creative control, and know what to fix when it doesn’t quite get things right. I view AI as a personal editing assistant, one that can handle repetitive and time-consuming tasks but still leaves artistic decisions in my hands.
By combining Aftershoot’s efficiency with my own adjustments, I ensure that every image reflects my unique style and meets my professional standards. AI can enhance your workflow, but it’s your creative vision that ultimately defines the final product.
Lightroom Alternatives Worth Knowing
This article is mainly geared towards editing with Adobe Lightroom. Lightroom is the most popular RAW editing software used by professionals, including myself.
That said, it is not the only option.
Capture One is a strong alternative, especially for studio, commercial, and tethered workflows. Affinity Photo is useful for photographers who want a Photoshop-style editor without a subscription. Luminar offers AI-powered editing tools, and free options like Darktable or RawTherapee can also help you learn the basics of RAW editing.
Most editing programs use the same core ideas: exposure, contrast, white balance, cropping, color, sharpening, and local adjustments. Once you understand those fundamentals, you can move between tools more easily.
Those tools are better suited for photographers who still want a desktop editing workflow. If you are editing personal images, social content, travel photos, or learning the basics before investing in professional software, you can still apply the same editing principles on a phone or with free tools.
How to Edit Photos Like a Pro on Your Phone
Lightroom is still my main editing tool for professional client work, especially when I’m editing full wedding galleries. But the same editing principles apply even if you’re using a phone, a free app, or a simpler editor. You may not have the same speed, RAW control, or batch workflow, but the order of decisions stays similar: crop, exposure, white balance, contrast, color, local adjustments, and export.
Apps like Lightroom Mobile, Snapseed, VSCO, Apple Photos, and Google Photos all give you enough control to improve exposure, color, contrast, crop, and sharpness.
The mobile workflow is similar:
- Crop and straighten first
- Fix exposure
- Recover highlights
- Lift shadows carefully
- Correct white balance
- Add contrast
- Control saturation
- Use selective edits if available
- Sharpen lightly before export
The biggest mistake with phone editing is overdoing it. Heavy filters, intense saturation, too much clarity, and aggressive skin smoothing can make an image look less professional.
Start with small adjustments. A polished mobile edit usually comes from several subtle changes, not one dramatic filter.
How to Edit Photos Like a Pro for Free
You do not need expensive software to learn the fundamentals of photo editing.
Free or low-cost tools can help you practice the most important skills:
- Lightroom Mobile
- Snapseed
- Apple Photos
- Google Photos
- Darktable
- RawTherapee
- Photopea
- Canva for simple edits
These tools are enough to learn cropping, exposure, contrast, white balance, color correction, and basic sharpening.
Paid tools become more useful when you need advanced RAW processing, batch editing, professional retouching, AI culling, gallery consistency, client delivery, or a faster workflow.
The tool matters, but your editing decisions matter more. A beginner with a good eye and a simple app can often create a better edit than someone using expensive software without understanding the basics.
Common Editing Mistakes That Make Photos Look Amateur
Most beginner edits do not look amateur because the photographer used the wrong software. They look amateur because the edits are pushed too far or applied without a clear reason.
Here are the mistakes I see most often.
- Too Much Saturation: Oversaturated colors can make greens, oranges, and skin tones look unnatural. Use Vibrance and Saturation carefully, and adjust individual colors when needed.
- Heavy Skin Smoothing: Skin should still look like skin. Removing every bit of texture can make portraits feel artificial.
- Overusing Clarity: Clarity can add punch, but too much of it makes skin, clothing, and backgrounds look harsh. I use it carefully, especially for portraits and weddings.
- Crushed Shadows: Deep shadows can add mood, but if every dark area loses detail, the image can feel heavy and unfinished.
- Ignoring White Balance: If the white balance is off, every other color decision becomes harder. Fix temperature and tint before you start creative color grading.
- Relying Too Much on Presets: Presets are helpful, but they are not magic. They need to be adjusted for the light, scene, and subject.
- Oversharpening: Too much sharpening creates crunchy edges and unnatural texture. Sharpen for the final use, and check the image at a realistic viewing size.
- Editing Every Image Differently: This is a big one for client galleries. A full set of photos should feel consistent, even if the lighting changes throughout the day.
How to Train Your Eye to Edit Like a Professional
Learning how to edit photos like a pro is not just about learning Lightroom sliders. It is about training your eye.
The more you edit, the more you start to see what an image needs before you touch anything.
A few exercises can help:
- Study professional before-and-after edits
- Edit the same RAW file in three different styles
- Use reference images from photographers you admire
- Compare your edit to the original after taking a break
- Pay attention to skin tone in different lighting
- Practice matching color across a full set
- Ask other photographers for critique
- Re-edit old work and compare your decisions
One of the best exercises is to take one image and edit it several ways: clean and natural, warm and romantic, darker and moodier, bright and editorial.
That teaches you how exposure, contrast, white balance, and color grading change the feeling of a photo.
Over time, editing becomes less random. You stop asking, “Which slider should I move?” and start asking, “What does this image need?”
That is when your edits start to feel more professional.
Final Thoughts: Editing Like a Pro Is About Intention
Professional editing is not about making a photo look heavily edited. It is about making clear, intentional decisions.
Start with the fundamentals: crop, exposure, white balance, highlights, shadows, contrast, and color. Then use masks, cleanup tools, sharpening, noise reduction, presets, and AI tools to refine the image.
For one photo, you can do all of this manually. For a full wedding, portrait, or commercial gallery, the challenge is doing it consistently and efficiently.
That is where a modern workflow helps.
For me, Aftershoot is useful because it handles a lot of the repetitive first-pass work, from culling to baseline edits. Lightroom then gives me the creative control I want for final refinements.
The best workflow is not manual editing or AI editing. It is knowing which parts need your eye and which parts can be sped up without compromising your style.
FAQs About Editing Photos Like a Pro
How do I edit my photos like a professional?
To edit photos like a professional, start with the basics: crop and straighten the image, correct exposure, recover highlights and shadows, set white balance, adjust contrast, and refine color. Then use masks, cleanup tools, sharpening, and noise reduction to polish the image. The goal is to make the photo look intentional and natural, not overedited.
What do professional photographers use to edit their photos?
Many professional photographers use Adobe Lightroom for RAW editing, batch editing, presets, color correction, and export. Photoshop is often used for advanced retouching and complex object removal. Some photographers also use Capture One, Affinity Photo, Photo Mechanic, Luminar, and AI tools like Aftershoot for culling, editing, and retouching large galleries.
What is the 80/20 rule in photo editing?
In photo editing, the 80/20 rule means that a small number of adjustments usually create most of the improvement. Cropping, exposure, white balance, highlights, shadows, contrast, and color correction often make the biggest difference. Advanced edits are useful, but they work best after the basics are right.
Can I edit photos like a pro on my phone?
Yes. You can create polished edits on a phone using apps like Lightroom Mobile, Snapseed, VSCO, Apple Photos, or Google Photos. Follow the same basic workflow: crop, adjust exposure, fix white balance, control highlights and shadows, refine color, and avoid heavy filters or over-smoothing.
How can I edit photos like a pro for free?
You can use free tools like Lightroom Mobile, Snapseed, Apple Photos, Google Photos, Darktable, RawTherapee, or Photopea. Focus on learning the fundamentals first: exposure, white balance, cropping, contrast, color, sharpening, and export. Paid tools are helpful for speed, batch editing, and advanced control, but they are not required to learn good editing.
How do professionals keep skin tones consistent across lighting?
Professionals usually start with correct white balance, then fine-tune warmth, tint, saturation, and individual color channels. For portraits and weddings, skin tone should look believable before any creative color grade is applied. Avoid pushing orange, red, or magenta tones too far, and be careful with heavy presets.
Should I use presets to edit photos?
Presets can speed up your workflow and help create a consistent style, but they should not replace manual adjustments. Use presets as a starting point, then adjust exposure, white balance, contrast, and skin tone for each image.
How do I make my edits look less amateur?
Avoid over-saturation, heavy filters, too much clarity, crushed shadows, excessive skin smoothing, and oversharpening. Focus on clean exposure, natural color, intentional cropping, subtle local adjustments, and consistency across the full set of images.
Is AI photo editing useful for professional photographers?
Yes, AI photo editing can be useful for speeding up repetitive work, especially with large galleries. AI can help with culling, first-pass edits, retouching, and consistency. The best results usually come from combining AI efficiency with a photographer’s final creative judgment.
Does AI replace manual photo editing?
AI does not replace your creative eye. It can help with repetitive tasks and speed up the first pass, but professional editing still depends on taste, judgment, and final refinements. Think of AI as an assistant that helps you work faster, not as a replacement for your style.
Which AI photo editor works offline for large jobs?
Aftershoot handles culling, editing, and retouching locally, so photographers can work through large RAW galleries without uploading every file to the cloud. With free RAW editing (Aftershoot Develop) now included, you can also fine-tune, crop, and export images entirely offline within Aftershoot, without needing Lightroom for basic adjustments.
What is the fastest way to edit a full wedding gallery?
The fastest professional workflow is to back up your files, cull the gallery efficiently, apply a consistent baseline edit, then refine the final images in Lightroom. Tools like Aftershoot can help with AI culling and first-pass editing, while Lightroom gives you final creative control.
Do AI photo editors replace outsourcing or complement it?
For most professionals, AI replaces first-pass outsourcing. Aftershoot handles bulk editing locally, so you can reserve outsourcing budgets for specialized retouching or overflow work.
Can I skip Lightroom entirely with Aftershoot?
With Aftershoot Develop, RAW editing is now free for all users, offering full manual controls, crop and straighten tools, and subject masking directly in the app. Many photographers can complete their entire workflow, cull, edit, retouch, and export, without ever opening Lightroom, though Lightroom remains useful for advanced creative grading or plugin-based work.
How can I make my workflow future-proof in 2026?
Keep file structure simple, adopt software that updates regularly, and rely on tools that learn your preferences. Aftershoot and Lightroom both evolve with new AI models while maintaining catalog stability.