The battle for flyaway hairs, red toddler cheeks, someone blinking in the only photo where everyone else looks perfect is real. As you start editing, the familiar questions creep in:
- Why does everyone look shiny?
- Why does skin smoothing make them look like mannequins?
- How do I fix those flyaways again without spending 10 minutes per image?
Family photo retouching is a weird tightrope. You want to deliver polished, professional images… but you also want to keep the soul in them. And let’s be honest, nobody has time to manually finesse 100 photos when your calendar is packed.
That’s where a smarter, hybrid retouching workflow comes in. One that doesn’t flatten skin texture, doesn’t turn toddlers into porcelain dolls, and definitely doesn’t burn you out.
📸 Summary
Photographers have a love-hate relationship with most retouching tools, mostly because they either turn real people into plastic dolls or apply edits so inconsistently that Uncle Joe ends up looking like a wax statue while the toddler still has jam on his face. The result? Endless tweaks, creative fatigue, and late-night staring contests with your screen.
What if there’s a better or a smarter way? Well, there is. Let AI handle the first pass with soft, natural-looking edits across your whole gallery. This way, you can focus your energy on the shots (and faces) that actually matter.
That’s why Aftershoot built its retouching tool to make retouching across family portraits easier. No more grandpa Earl looking waxy and baby Tim looking like a creepy doll. Your answer for consistency, subtlety, and natural edits is here.
In this blog, we’ll show you how you can use AI to transform your retouching workflow so you can focus on the things that matter.
If you’d rather just watch a video instead, here’s a quick guide on how to retouch photos on Aftershoot
Take AI Retouching on a quick spin. Try it out 30 days for free, no questions asked!

AI + Manual Retouching: What’s the Right Mix in Family Photography?
Manual retouching shines when you have the time to carefully sculpt every detail to perfection. But let’s be honest: for most family sessions with hundreds of images and tight deadlines, time is not our friend.
And this is where AI plays an essential role in helping you get to 90% done. AI tools excel at foundational fixes like skin, blemish, hair, and background distractions that would otherwise chew through hours of your time. These tools act like your assistant, performing repetitive cleanup so you can add the finishing touches.
A user in the photography community echoed this pragmatically:
“I used to avoid AI retouching because I didn’t want to lose the natural look — freckles, smile lines, all of it. But Aftershoot changed my mind. It gives me total control: I can clean up flyaways or blemishes while keeping texture and personality intact. No plasticky edits, just faster results that still feel like my work. Now I run every gallery through it and fine-tune as needed.” — Silas Holfer
AI isn’t perfect, but it can help you save hours of the most tedious part of your workflow. True efficiency comes when AI handles the groundwork while you oversee, adjust, and add your creative vision.
It’s Not Either/Or. It’s You + AI
Family photographers are already making smart decisions on how to streamline their post-production workflow. AI enhances that process by making post-production faster, more consistent, and far less exhausting.
For example: Aftershoot’s AI retouching handles repetitive edits: batch retouching, blemish cleanup, stray hair fixes, remove distractions leaving you time to polish hero shots and deliver faster.
AI gives you clean, natural-looking results so you can stop feeling buried under minor retouching tasks and start dedicating your energy to final polish and creative expression.
The best workflow blends both: let AI do the repetitive cleanup and batch consistency, while you fine-tune and deliver the emotionally resonant, authentic final gallery clients love.
💡 Want to dive deeper into a retouching workflow that actually works for you? Try it free for 30 days
Retouching Mistakes That Make Grandma Look Like a Wax Figure (And How to Avoid Them)
- Over-smoothed skin: Too much polish flattens natural features. Retouch blemishes, not personality — keep freckles, fine lines, and textures intact. Remember, the best retouching enhances the beauty of the subject without drawing attention to the editing process.” said a photographer on Reddit
- Over-whitened eyes and teeth: Go easy or risk the “creepy doll” effect. Subtle brightening works better. Use AI to do base touch ups like these.
- Dodge & burn overkill: That warp bone structure is not real and you know it. Keep it soft — shade gently and always compare before/after at 100%.
- Inconsistent retouching across the gallery: I am sorry that baby definitely shouldn’t look like that and what about grandpa? Sync your retouch settings across the session using tools like Aftershoot. When the baby grows up, he will thank you for it
- Ignoring the small stuff: Let’s not leave the stray hairs, outfit wrinkles, and background clutter to chance. Use healing or object removal tools to clean things up so your photos instantly look delivery-ready
Family Photo Retouching Workflow: Step-by-Step Guide
Once the session is over, you’re staring down hundreds of images that need to look polished and natural. Here’s how family photographers can speed up their retouching without compromising on authenticity:
Step 1: Import Your Photos into Aftershoot
Let’s start with the clean-up: those repetitive, time-consuming touchups that AI can now handle in seconds.
Option A: If you’re already culling and editing in Aftershoot, simply export your edited files and re-import them as JPEG or TIFF for retouching.
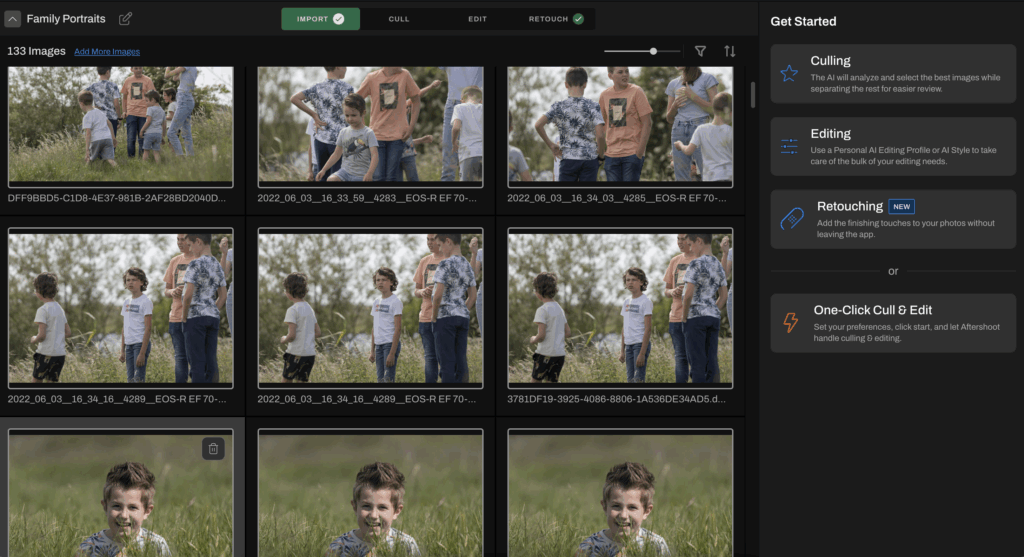
Option B: If you use Lightroom Classic, you can send photos directly to Aftershoot by selecting them, right-clicking, and choosing “Edit in Aftershoot.”
Step 2: Head to the Retouch Tab
Once your photos are in, jump into the Retouch tab. The right-hand panel will show tools that help you quickly clean up:
- Skin smoothing
- Blemish removal
- Whitening teeth
- Fixing flyaways and smoothing hair
- Object removal

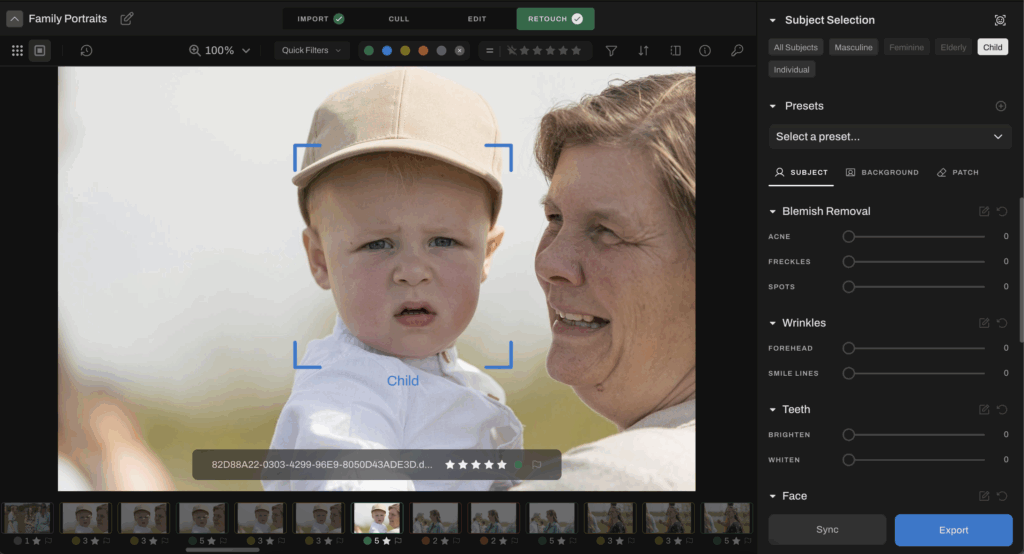
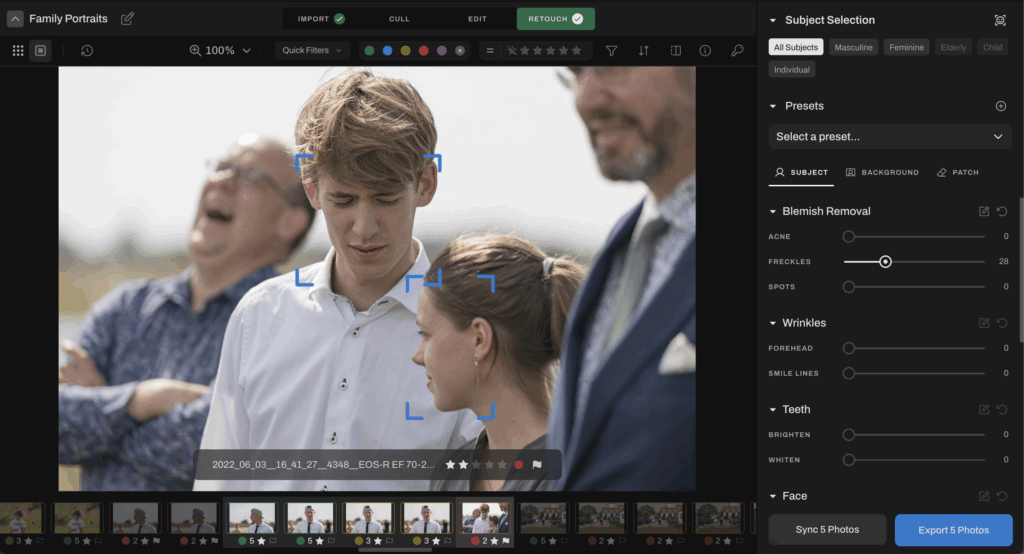
Step 2A: Retouch Per Person
Family portraits often include 2–5 (or more!) people in one image. With Aftershoot, you can retouch each person individually. Perfect for reducing shine on Dad, softening blemishes on Mom, or gently cleaning up baby’s skin without overdoing it.
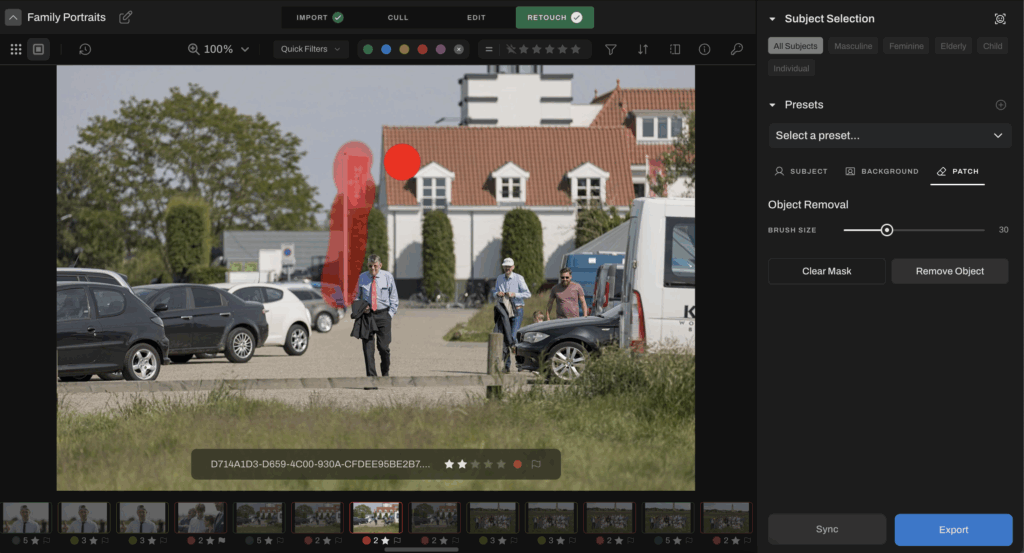
Step 2B: Clean Up the Background
Outdoor family session? Use the Patch Tool to remove unwanted distractions like clutter on the ground, or a rogue tree branch behind the toddler.
Step 3: Sync and Apply
Happy with how one image turned out? Great! Sync the settings across the rest of your session. You can also apply one of your saved retouching presets in Aftershoot to instantly maintain consistency.
Pro tip: Use the before/after toggle to see the difference in real time. It’s the fastest way to make sure the retouch still feels natural and emotionally true.
Step 4: Export for Your Signature Finish
Now that the skin is polished, blemishes are gone, and the images are cleaned up you’re ready for the creative part.
Export your batch and bring the images into Lightroom, Capture One, or your editing software of choice to apply your signature tones, style, and final tweaks.
And just like that, your gallery is polished, consistent, and ready for delivery without spending hours stuck behind the screen. Aftershoot helps you take care of the technical cleanup, so you can focus on the emotional impact and storytelling that makes family photography special.
Keeping It Real Across Your Gallery
The messy, joyful, chaotic moments you capture are what families will cherish for years. Retouching should elevate those moments, not erase them. But when you’re editing hundreds of photos per session, spending hours on skin, hair, and background cleanup can burn you out and delay delivery. That’s where a hybrid workflow using tools like Aftershoot makes all the difference.
So next time you’re staring down 300 photos: know that there is a better way.
Try Aftershoot free for 30 days and see the difference.