Capturing a great image is only half the work. The real polish happens in post-production, and Lightroom continues to be one of the best photo editing software for professional photographers in 2026.
With its full RAW controls, color consistency tools, and seamless integration with AI-assisted editors like Aftershoot, it lets you refine your style without slowing your workflow.
I’m Paul, a UK-based wedding photographer, and in this guide, I’ll walk you through the essential steps and tools on how to edit photos in Lightroom. Whether you’re new to Lightroom or looking for a few tips, this Lightroom editing tutorial will help streamline your workflow and produce better results.
Why Lightroom is still gold standard for editing in 2026
- New AI and HDR features, but purpose-fit matters: Lightroom’s 2025–26 updates added AI-powered masking, improved HDR export controls, and better color-variance tools, which are all great for refining tone and lighting consistency across portraits and smaller sessions.
- Lightroom new AI culling works for low-volume work: Its new Assisted Culling option suits hobbyists or portrait shooters working with hundreds of images. But for professionals handling thousands of wedding or event photos, the speed and accuracy of Aftershoot’s dedicated AI culling still outperform generalist tools.
- Offline or cloud flexibility. Lightroom Classic continues to work entirely offline for on-site or travel editing, while Lightroom CC supports cloud access for mobile or hybrid workflows.
- Face-aware and tone-aware adjustments. The enhanced Point Color and AI Masking tools improve skin-tone and background separation, keeping Lightroom competitive for portrait editing.
- Performance boosts for 2026 hardware. GPU-accelerated previews, faster exports, and smarter cache management make it more reliable on modern systems, even with RAW files from high-resolution cameras.
- Seamless AI handoff. Lightroom integrates smoothly with Aftershoot Edits and Retouch, letting you jump from culling and base editing to Lightroom finishing without re-imports or manual metadata work.
81% of photographers who use AI in their workflows have reclaimed work-life balance in 2025, as per our recent survey of 1000+ pro photographers.
Further, with hybrid workflows, they are able to shorten delivery timelines (as 54% clients expected deliveries within days now), and with a bulk of post-processing handled by AI, are commanding premium prices.In fact, 68% of photographers expect AI to handle majority of post-production work in just the next 2 years.
Read this report before you dive into the nitty grits of editing workflows, so you go into it with 360 context and a tried-and-tested playbook from early adopters.

🎥 Prefer visuals? Watch the Lightroom Editing Tutorial on YouTube to follow these steps in real time.
Lightroom vs. Lightroom Classic: What is the Difference?
Both versions of Adobe Lightroom remain industry standards, but 2026 workflows look very different from when photographers edited every image manually.
Lightroom (often referred to as Lightroom CC) is cloud-based app that allows you to edit photos on multiple devices seamlessly, making it ideal for photographers who need flexibility and access from anywhere. It is very practical for hobbyists or portrait photographers working with smaller sets. It’s flexible, connected, and pairs well with AI-driven tools like Aftershoot for culling and editing.
Lightroom Classic, on the other hand, is still the preferred desktop setup for professionals who want full offline control and RAW power. It handles color grading and local adjustments beautifully, but the real bottleneck for wedding and event shooters is volume.
That’s where Aftershoot comes in.
How Lightroom and Aftershoot Create a Smarter Workflow Together
- Cull thousands of photos fast. Lightroom’s built-in culling can handle small batches, but Aftershoot’s AI automatically selects the best shots from high-volume weddings or events — learning your style over time.
- Edit consistently, in your Lightroom look. Aftershoot Edits analyzes your prior Lightroom catalogs to create an AI Profile that mirrors your style automatically, so you spend minutes fine-tuning instead of hours batch-editing.
- Offline-friendly workflow. Lightroom Classic runs fully offline, and Aftershoot can sync results via XMP, so nothing breaks when working from client sites or travel shoots.
- Faster HDR, better tone control. Lightroom’s 2025–26 updates (HDR Limit slider, improved Tone Curve Variance) keep it strong for portrait and HDR editing — while Aftershoot accelerates everything before that point.
In this guide, we’ll focus on Lightroom Classic for the core editing steps — but remember, most professionals today use Lightroom and Aftershoot together to combine creative control with AI speed.
For this guide, I will be using Lightroom Classic, as it provides more comprehensive features and control for professional wedding photographers.
Preparing for the Editing Process
Before we learn how to edit photos in Lightroom, here are some basic preparations we must follow in our editing process:
Back up Your Images, Twice Locally and Once in the Cloud
Before you begin editing, make sure your images are safely backed up. Shooting weddings means capturing some of the most important moments in people’s lives, and losing those photos could be catastrophic for your reputation and career.
I always write my photos on two memory cards during the day. Once I’m back at my computer, I have three copies of each file: my working files, one backup drive, and one stored off-site, which in my case is a cloud backup.
Hybrid cloud systems such as Backblaze or Dropbox Pro sync fast enough to serve as automatic off-site storage without slowing Lightroom Classic. We did a piece explaining the 3-2-1 photography backup rule too, if you’re interested.
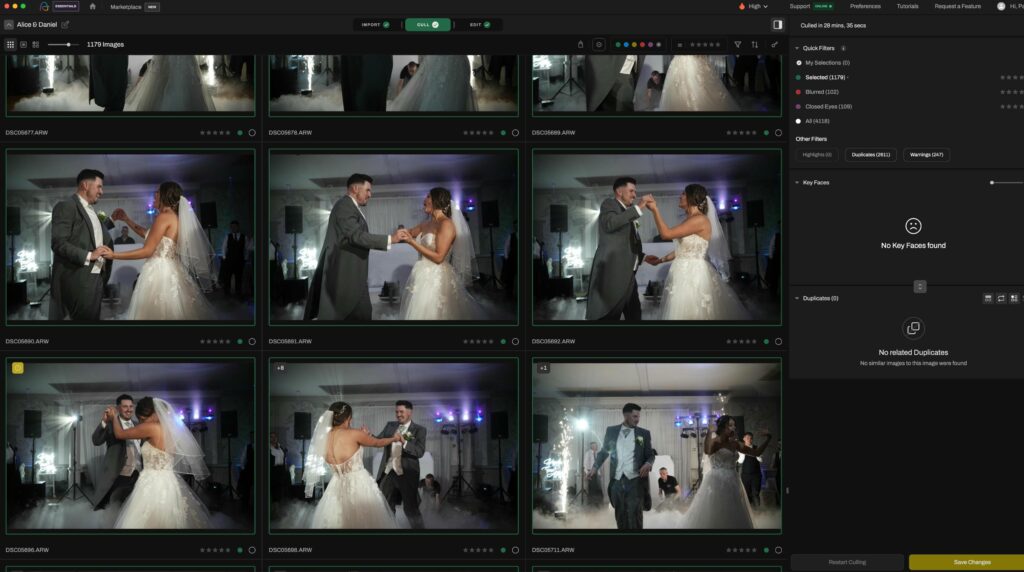
Cull Your Photos
With thousands of images captured during a wedding, culling is a critical step. This process involves selecting the best photos from your shoot. There are several ways to efficiently cull your photos:
Cull within Lightroom: Use Lightroom’s rating and flagging system to quickly sort through your images. Smart Previews can speed up this process by allowing you to work with smaller versions of your photos.
External Culling Programs: If Lightroom’s culling feels sluggish, consider external programs like Photo Mechanic. These are designed to handle large batches of photos with minimal lag, making the selection process faster.
Lightroom’s built-in rating and flag tools and manual culling with tools like Photo Mechanic work fine for small shoots, but for high-volume events, AI tools handle this stage better than humans.
Newer AI tools like Aftershoot can automatically analyze and select the best images from your shoot, significantly speeding up the culling process. In this tool, all you need to do is import your photos and the AI will automatically cull your photos based on your selected preferences.
- Which part of the photo editing process does AI handle best?
Culling and base color corrections. Aftershoot uses AI to analyze sharpness, emotion, and duplicates, then selects the best images automatically, saving hours per wedding. - Does AI culling matter for professional photographers?
When you’re editing thousands of images, speed equals profitability. Aftershoot can sort an entire wedding in minutes and export flags and ratings directly to Lightroom via XMP, keeping your workflow tight and non-destructive. - Where does Lightroom fit in an AI-powered workflow?
Use Lightroom’s built-in Smart Previews only for fine-tuning smaller sessions or portraits. It’s a solid start point for hobbyists, but not built for bulk.
You can learn more about how to cull in Aftershoot here.
Organize Your Photos
A well-organized photo library is essential for an efficient workflow. Create a logical folder structure, such as organizing by year, client name, or event type, with sub-folders for RAWs, Aftershoot Selections, and Final Exports.
Consistent organization will save you time and help you focus on editing rather than searching for files. This also mirrors how AI tools expect your library to be set up and prevents lost links when moving projects between drives.
Set Up Your Physical and Digital Workspace
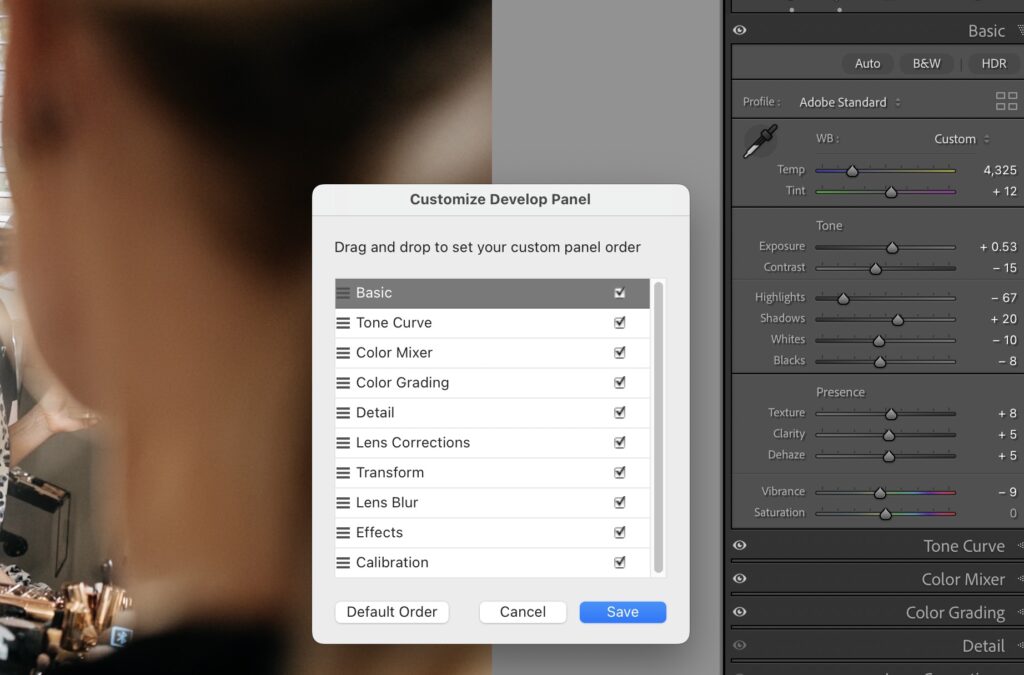
Your workspace should be both comfortable and efficient. Invest in a good chair, a spacious desk, and proper lighting to reduce eye strain. In Lightroom, use Solo Mode in the Develop module to keep your workspace clutter-free by collapsing panels you’re not using. This allows you to concentrate on the tools relevant to your editing process.
If you’re using Aftershoot and Lightroom side by side, open both on a dual-monitor setup so you can review AI picks and make manual edits simultaneously.
Pro Tip: Use a GPU-accelerated machine or M-series Mac for Lightroom 2026. Combined with Aftershoot’s AI engine, you can cull and base-edit a full wedding gallery faster than Lightroom can render previews alone.
How to Edit Photos in Lightroom: Step-by-Step
Once your photos are backed up and culled, import the selections from Aftershoot directly into Lightroom Classic using the XMP ratings. That keeps your chosen shots and metadata intact and avoids re-sorting inside Lightroom.
1. Import Your Images
Start by importing your images into Lightroom. During import, you can add metadata, keywords, and copyright information to protect your work and make future searches easier. You can also choose to create Smart Previews, which allow you to edit images faster without needing the full-sized file.
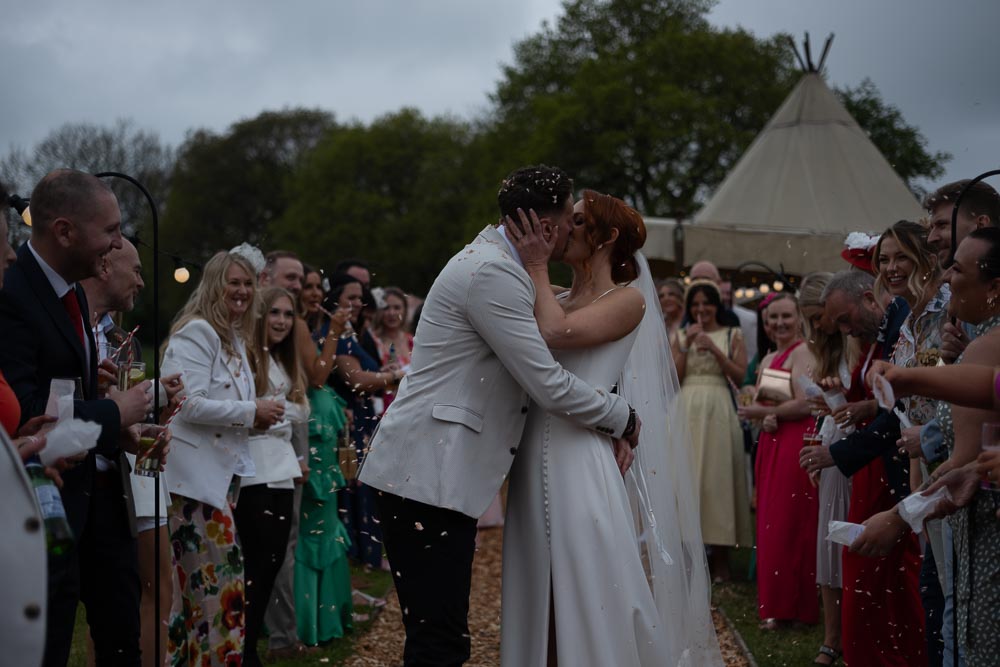
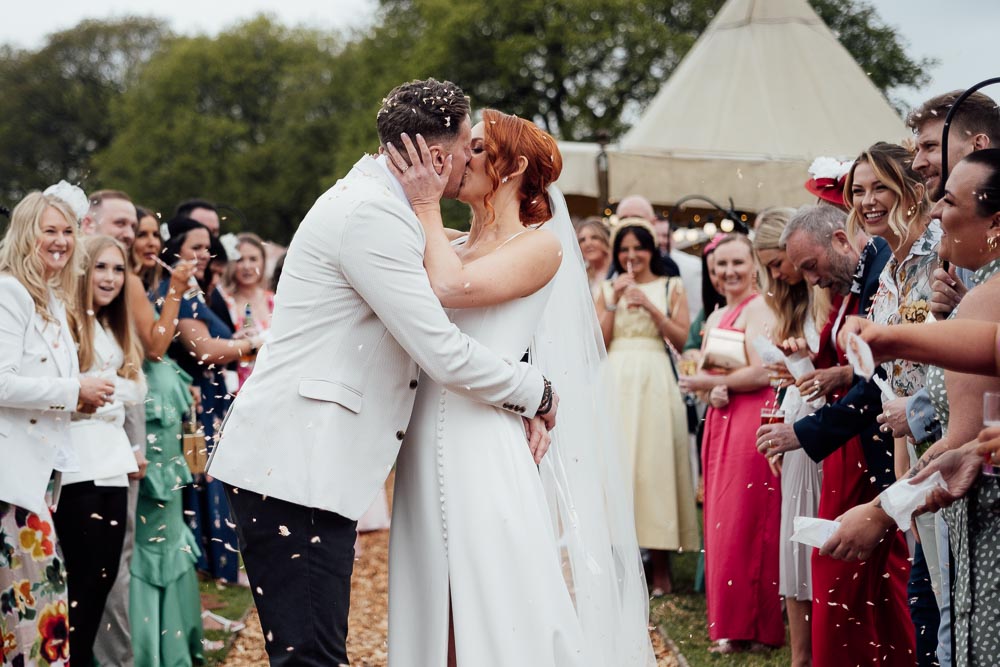
Below, see the image that I’ll be editing in this walk-through.
2. Basic Adjustments
The foundation of any edit begins with basic adjustments:
- Exposure: Adjust to correct overall brightness.
- Contrast: Adds depth to the image.
- Highlights and Shadows: Recover detail in bright and dark areas.
- Whites and Blacks: Set the dynamic range.
- Clarity: Adds mid-tone contrast for a punchier look.
These basic tweaks create a balanced, polished appearance, setting the stage for more detailed edits.
Lightroom 2026’s adaptive Auto Tone is more accurate with mixed light, but your AI Profile from Aftershoot will already have handled baseline exposure and white balance if you used Aftershoot Edits. Aftershoot’s AI learns your Lightroom style and applies exposure, contrast, and tone automatically, so your manual adjustments become about refinement instead of repetition.

Pro Tip: Use the ‘J’ key to toggle the clipping warning, which shows you where the image is too bright (highlighted in red) or too dark (highlighted in blue).
3. Cropping and Straightening
Perfect your composition using Lightroom’s Crop Overlay tool. Use the rule of thirds grid to align key elements. For wedding and portrait work, maintain a clean 3:2 aspect unless you’re delivering for social crops. If your horizon is tilted, use the Straighten tool to correct it.
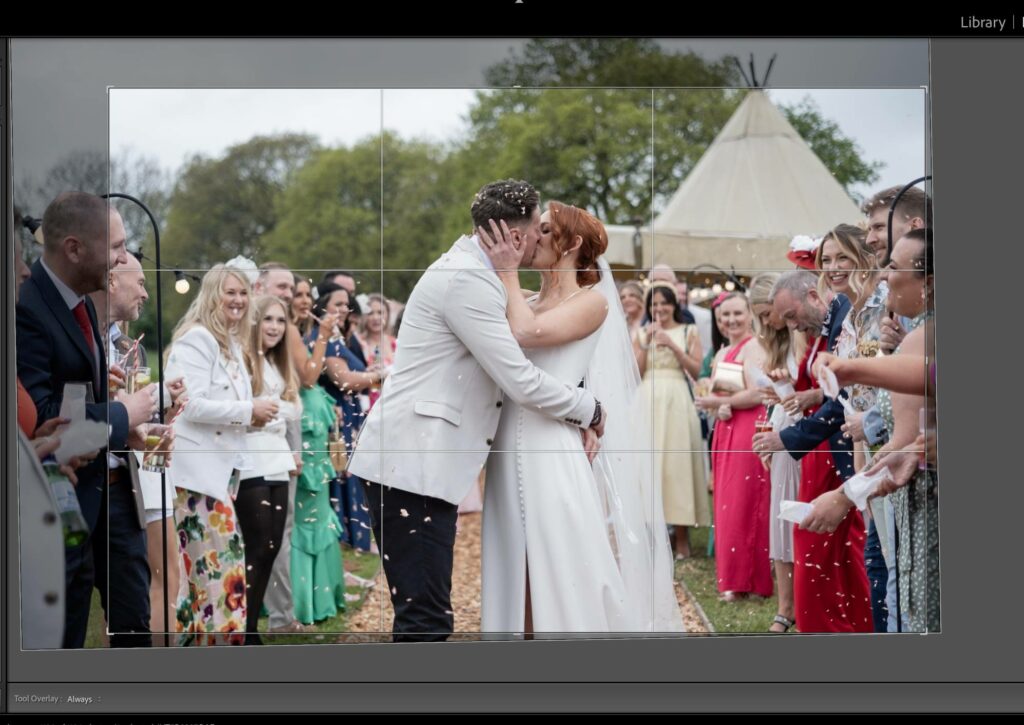
Pro Tip: Press the ‘R’ key to quickly enter the crop tool. Press ‘X’ while in crop mode to toggle between landscape and portrait orientation.
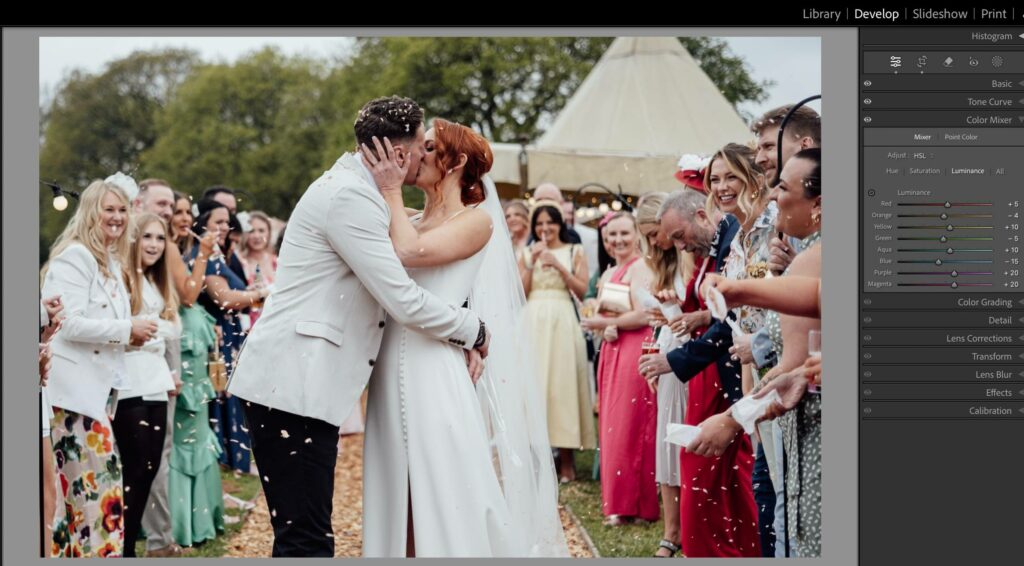
4. Color Correction and Enhancements
Color correction is vital for achieving a consistent look:
- White Balance: Adjust the Temperature and Tint sliders to control warmth or coolness. Presets like Daylight or Shade can be great starting points.
- Vibrance and Saturation: Enhance colors, but avoid over-saturation, which can make images look unnatural.
- HSL Panel: Adjust specific colors to keep skin tones and other elements looking natural.
- Tone Curve: A more advanced method to control color rendition and contrast more accurately.
- Point Color Variance Slider: lets you target narrow hue ranges, which is perfect for skin consistency across the day.
- HDR Limit Slider: offers smoother highlight roll-off for high-dynamic-range wedding scenes.
- Face-aware Masking: automatically isolates faces for tone or texture corrections.
Have you tried Aftershoot’s AI styles? These are exactly like Lightroom presets but the key difference is that they don’t apply the same pre-defined settings to every image like Lightroom presets do. I have talked more on this below so keep reading. You can check out all the AI styles on Aftershoot marketplace and try it for yourself
5. Fine-tuning, Masking, and Local Adjustments
Fine-tune your image with local adjustments using:
- Adjustment Brush: For precise control over specific areas.
- Radial Filter: Apply adjustments in circular or elliptical areas.
- Graduated Filter: For gradual changes over a linear area.
Use masking to ensure adjustments affect only targeted parts of the image.
Pro Tip: Use the ‘O’ key to toggle the mask overlay on and off, making it easier to see where adjustments are applied.
For portrait and newborn work, subtlety matters. So keep skin texture and remove only what distracts. Aftershoot Retouch can automate this across the entire set before you even open Lightroom.
6. Sharpening and Noise Reduction
Enhance image quality with sharpening and noise reduction:
- Sharpening: Use the Detail panel to bring out fine details. The Masking slider can help protect areas that don’t need sharpening.
- Noise Reduction: Increase the Luminance slider to reduce grain, especially useful for low-light images.
Apply minimal sharpening through the Detail panel. Hold Alt (Option on Mac) while adjusting Masking to preview affected areas.
Use Luminance Noise Reduction for low-light reception images; Lightroom 2026’s AI Denoise is cleaner but slower, so run it on select images only. For bulk corrections, Aftershoot’s Retouch handles noise suppression faster without bottlenecks.
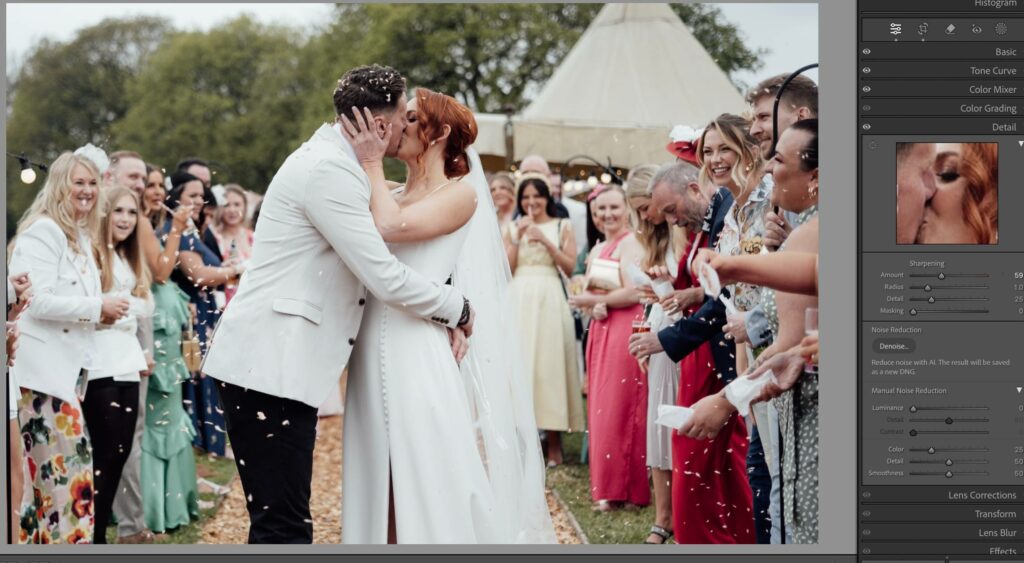
Pro Tip: Hold the Alt key (Option on Mac) while adjusting the Masking slider to see which areas are being affected by sharpening.
7. Final Touches
Finish your edit with these final adjustments:
- Spot Removal Tool: Remove distractions or imperfections.
- Vignette: Add a subtle vignette to draw attention to the subject.
- Soft Proofing: If printing, check how the image will look using different color profiles.
Below is the final image, as delivered to my client.
Pro Tip: Use the ‘F’ key to view your image in full screen and spot any remaining issues.
Using Lightroom Presets for Editing Photos
Lightroom presets are pre-defined editing settings that can be applied to your photos with a single click.
They allow you to achieve a consistent look across multiple images quickly, saving you time during the editing process. Presets can adjust various elements, such as exposure, color balance, contrast, and more, to help you create a particular style or mood. You can create your own presets or use ones developed by other photographers. They act as a great starting point for more refined editing for newer editors understand what combinations of settings create certain moods or lighting styles.
But now, presets are evolving. They had to.
That’s the main limitation of traditional presets. They apply identical settings to every image, regardless of lighting or color shifts. For portraits and weddings, where lighting changes constantly, that can introduce inconsistencies across the gallery.
Modern editors now pair Lightroom with AI-powered photo editing tools such as Aftershoot Edits. These tools learn your personal Lightroom adjustments and build a custom profile that adapts exposure, white balance, and tone per image.
Lightroom Presets vs. Aftershoot AI Styles
With Aftershoot, you can either create your own AI profile based on your editing style/preset or choose from a variety of styles available in the Aftershoot marketplace. By utilizing Aftershoot AI Styles, you can automatically apply edits that match your preferred look across your images, saving lots of time and effort.
Or, if you want to just test waters with AI, you can personalize a Lightroom preset you love, and have it adapt intelligently across different lighting for an entire gallery with Instant AI profiles. You upload your preset, edit 3 sample images and in under a minute, you have a personalized AI profile that’ll scale adaptively across your gallery.
In short:
- Presets give you a style template.
- AI Profiles learn your actual editing decisions and replicate them intelligently.
This is what pro photographers mean when they say “AI photo editing,” using machine learning to handle repetitive decisions so you can focus on creative direction. That’s the secret to managing volumes with consistency, cohesiveness, speed, and costs optimized in 2026.
Benefit: For portrait or wedding photographers, adaptive AI editing means consistent skin tones, balanced exposure across mixed lighting, and faster delivery without losing your look.
The next section explores this transition in more depth — how Lightroom Presets compare with Aftershoot AI Styles, and why most professionals are adopting hybrid workflows to stay consistent at scale.
Build a Smart and Efficient Workflow
Mastering photo editing in Adobe Lightroom is a powerful way to elevate your work and create stunning images. By following these steps, using smart workflow strategies, and integrating tools like Aftershoot, you can streamline your editing process while maintaining creative control. With practice and attention to detail, your edited photos will consistently impress, capturing the essence and emotion of each moment you shoot.
Pro Tip: Familiarize yourself with keyboard shortcuts to speed up your editing process. For example, press ‘D’ to jump to the Develop module, ‘G’ to return to the Library grid view, and ‘\’ to see a before and after view of your edits.
And btw guess what? You can try Aftershoot for FREE. Start your 30-day trial now!
FAQs
What is AI photo editing and how does it benefit photographers?
AI photo editing refers to using machine learning algorithms to automate repetitive tasks like culling, exposure adjustments, and color correction.
For photographers, this saves hours by automating the decision-making process, ensuring consistency across large galleries, and allowing more time for creative work.
Aftershoot is an AI-driven tool that helps photographers cull, edit, and retouch photos at scale, offering consistency without sacrificing quality.
Which photo editing software is considered the best for professional portrait photographers?
Lightroom remains a popular choice for portrait photographers due to its advanced editing tools and color accuracy.
However, Aftershoot AI Styles takes it a step further by learning your specific editing style and automatically applying it to all your portraits, ensuring consistent skin tones and lighting across an entire gallery.
Which software has face-aware editing functions for portraits?
Lightroom 2026 has introduced basic face detection via its AI Masking tool. While this is useful for isolated adjustments, Aftershoot Retouch offers more advanced face-aware features, automatically refining skin, smoothing tones, and preserving natural texture, all in bulk across hundreds or thousands of portraits.
Which software handles HDR editing for wedding photography?
Lightroom Classic’s 2026 HDR tools are excellent for wedding photographers who need dynamic-range recovery.
However, for high-volume workflows, Aftershoot applies automatic style adjustments and ensures consistent exposure before you jump into HDR merging in Lightroom, saving you time in the overall process.
Which software can handle editing thousands of wedding photos quickly?
Aftershoot is specifically designed to tackle high-volume workloads. It automates culling, base edits, and retouching, which makes it possible to deliver entire wedding galleries faster.
Lightroom, while powerful, requires more manual effort to handle large volumes, which can be time-consuming. Aftershoot helps you cut down processing time, so you can focus on finishing touches in Lightroom.
What features should I look for in portrait editing software?
For portraits, look for software that handles skin tone consistency, fine-tuning exposure, and color correction.
Aftershoot integrates seamlessly with Lightroom to apply your personalized edits to every portrait shot, including skin smoothing, sharpness adjustments, and background blurring, with AI precision.
Lightroom’s face detection is useful, but Aftershoot is the go-to for consistent, batch-style portrait editing.
What are the top photo editing tools that use AI?
Top AI-powered photo editing tools include Lightroom (with AI Masking), Aftershoot (for AI-powered culling and batch edits), and Luminar AI.
For professionals working with high volumes, Aftershoot is the best choice, as it’s specifically built for automating repetitive tasks while preserving creative control.