Capture One Editing, Pre-built AI Profiles & More: Our Biggest Update!
Aftershooters, we hope you’re ready for our biggest update since we announced EDITS!
We won’t keep you in suspense with a long intro. 😉
Here’s a summary of the latest Aftershoot updates:
- Aftershoot EDITS now works with Capture One
- We’ve introduced 9 pre-built AI Profiles called AI Styles for Lightroom users
- You can now fine-tune your AI Profile to your liking with Profile adjustments
- We’ve improved the filtering screen in EDITS to streamline your experience
- The Culling preferences screen has been revamped
Too excited to read about it? Watch this video to see what’s new this August:
Aftershoot EDITS is compatible with Capture One!
We’re delighted to announce that you can now use Aftershoot EDITS with Capture One.
Here’s a little fun fact for you: Currently, Aftershoot is the only AI editing software that works with Capture One.
Previously, only our Culling software was compatible with Capture One, and Aftershoot EDITS was only compatible with Lightroom. Not anymore!
So, if you’re a Capture One fan, you’ve come to the right place to automate your editing process!
How to use Aftershoot EDITS & Capture One:
First, you’ll have to create your AI Profile. To do so, you need to do the following:
1. Choose your profile settings.
- Black & White or Color
- JPEGs or RAW
2. Upload your Capture One catalog and filter for the edited images you want our AI to learn from.
You need to upload at least 2,500 images (5,000 is recommended) to create an AI Profile.
The more images you add for training, the better the AI will perform.
Good Profiles contain a variety of scenes and lighting conditions while maintaining a consistent editing style.
3. Once your AI Profile is trained, you’ll get an email letting you know your unicorns are ready to edit.
Open up Aftershoot and let your AI Profile download.
4. You’re ready to automate your editing process!
To edit, simply add your Capture One catalog to the edits screen, choose your AI Profile, and filter for the images you want to edit. Sit back while the magic happens.
Introducing AI Styles: Pre-built AI Profiles
The highly-anticipated and frequently requested addition to Aftershoot EDITS is finally here!
We’ve curated 9 beautiful AI Styles that function like editing presets – only smarter because they’re automated by our magical unicorns.
You’ll find them in our new Aftershoot Marketplace.
Take a peek at what the AI Styles can do:
1. Graicard
This is your swiss army knife profile! Think perfect exposure, optimal white balance, not too contrasty, yet not too flat.
It’s your go-to AI Style for a neutral edit, focusing on neutral skin tones to make sure your subjects look their best.
This universal profile will give you maximum flexibility, allowing you to customize your images further using your Lightroom presets.
2. Vanilla
Vanila amps up Graicard with warm and soft tones while keeping it simple and classic.
It’s designed to give some depth and warmth to skin tones while stylizing your surroundings.
Expect your hues to shift into a delicious new space with tone adjustments. Your greens will be tweaked to a softer and more earthy brown tone.
The traditional white balances get shifted into a more organic feel, embracing the surroundings of the image.
3. Lemon
Take that perfect white balance in Graicard, ramp up the contrast a few notches, and you get perfect tones with a little punch!
Lemon is bright, soft, and creamy. It gives you a gentle tone that mimics many of the current bright film styles in photography.
This AI Style takes hints from traditional film and pulls them into modern technology, giving you fantastic skin tones, while keeping a flowy and airy feel to your images.
4. Walnut
Walnut is a true classic! It’s here to take those skin tones to the next level with white balance tweaked to a cool space and saturation levels set that create a unique look.
It gives images a true-to-life feel that is then pulled back into a classic tone that you will cherish forever.
Walnut has a touch of contrast and hint of matte, which makes this AI Style feel completely natural.
5. Pistachio
Pistachio is here to give you that hint of dark and moody tones stacked on an ideal white balance.
This AI Style keeps skin tones true while incorporating contrast and strong undertones to help you cherish and preserve the darkness within an image.
6. Brownie
This stand-out AI Style gives you contrast, warmth and beautiful natural tones.
This trendy style brings highlights back into your images while giving your shadows the boost they need to shine.
7. White Chocolate
Need a style that looks like no other? This vintage styling is perfect for photographers looking to transform images into a style reminiscent of the 1970s.
White Chocolate gives you muted shadows, soft mid-tones, and creamy highlights.
It adds a truly epic and filmesque style by bringing in warmth and depth to the images with the perfect tinge of orange and brown toning.
8. Black and White
Casablanca has nothing on this high-key, black-and-white styling that gives you all you need to offer something different.
Enjoy the combination of intense blacks and powerful whites that create this high contrast, classic look.
9. Hazelnut
Hazelnut is a dreamy AI Style that gives your images a soft look with its earthy tone and soft light.
Handcrafted tweaks to tone curves and presence sliders allow for a vibrant, yet soft and matted image.
With a little grain added on top, this profile feels like some of the greatest films you can use, without losing any of the important colors and tones you would expect from digital.
Note: The pre-built AI Styles are only available for Lightroom users at this time. Capture One compatibility is in the pipeline.
These pre-built AI Profiles are especially useful for Aftershoot users who don’t have enough images to create their own AI Profile – you need at least 2,500 edited images to train the AI editing engine.
It’s also a great alternative for users who have found inconsistencies in their AI Profiles. You’ll now have the option to use an AI Style that bolsters consistency.
Simply download the new profile you want ➝ Start editing ➝ Select the profile
Adjust your AI Profile
You can now globally adjust your AI Profile without having to retrain it!
Adjust the sliders in your AI profile that correspond to the sliders you would tweak in Lightroom with the click of a button.
You can adjust the following sliders:
- White Balance
- Tone
- Presence
- Sharpening
- Noise Reduction
- Tone Curve
- HSL/Gray Mixer
There are two options when making Profile adjustments:
1. AI Correction
This is in case you want to adjust sliders relative to what the AI did.
In this mode, you can adjust the dynamic values the AI sets for each image. Adjust these values by adding or subtracting the dynamic values by a certain amount.
2. Fixed Value
This option lets you override the AI dynamic values by applying a fixed value across all the images.
You can also turn off sliders that you don’t want the AI to adjust when it edits your images.
If you’ve ever felt like your AI Profile is just a little off, this new function will help you get it just right.
This function also opens the door for using Aftershoot’s AI editing as a baseline for your manual edits.
For example, you may turn off all sliders other than White Balance and Exposure, giving you a "base profile" for you to edit further.
Here’s how to adjust your AI Profile:
Go to your profile ➝ Click on the three dots on the right of the profile ➝ Click Adjust Profile
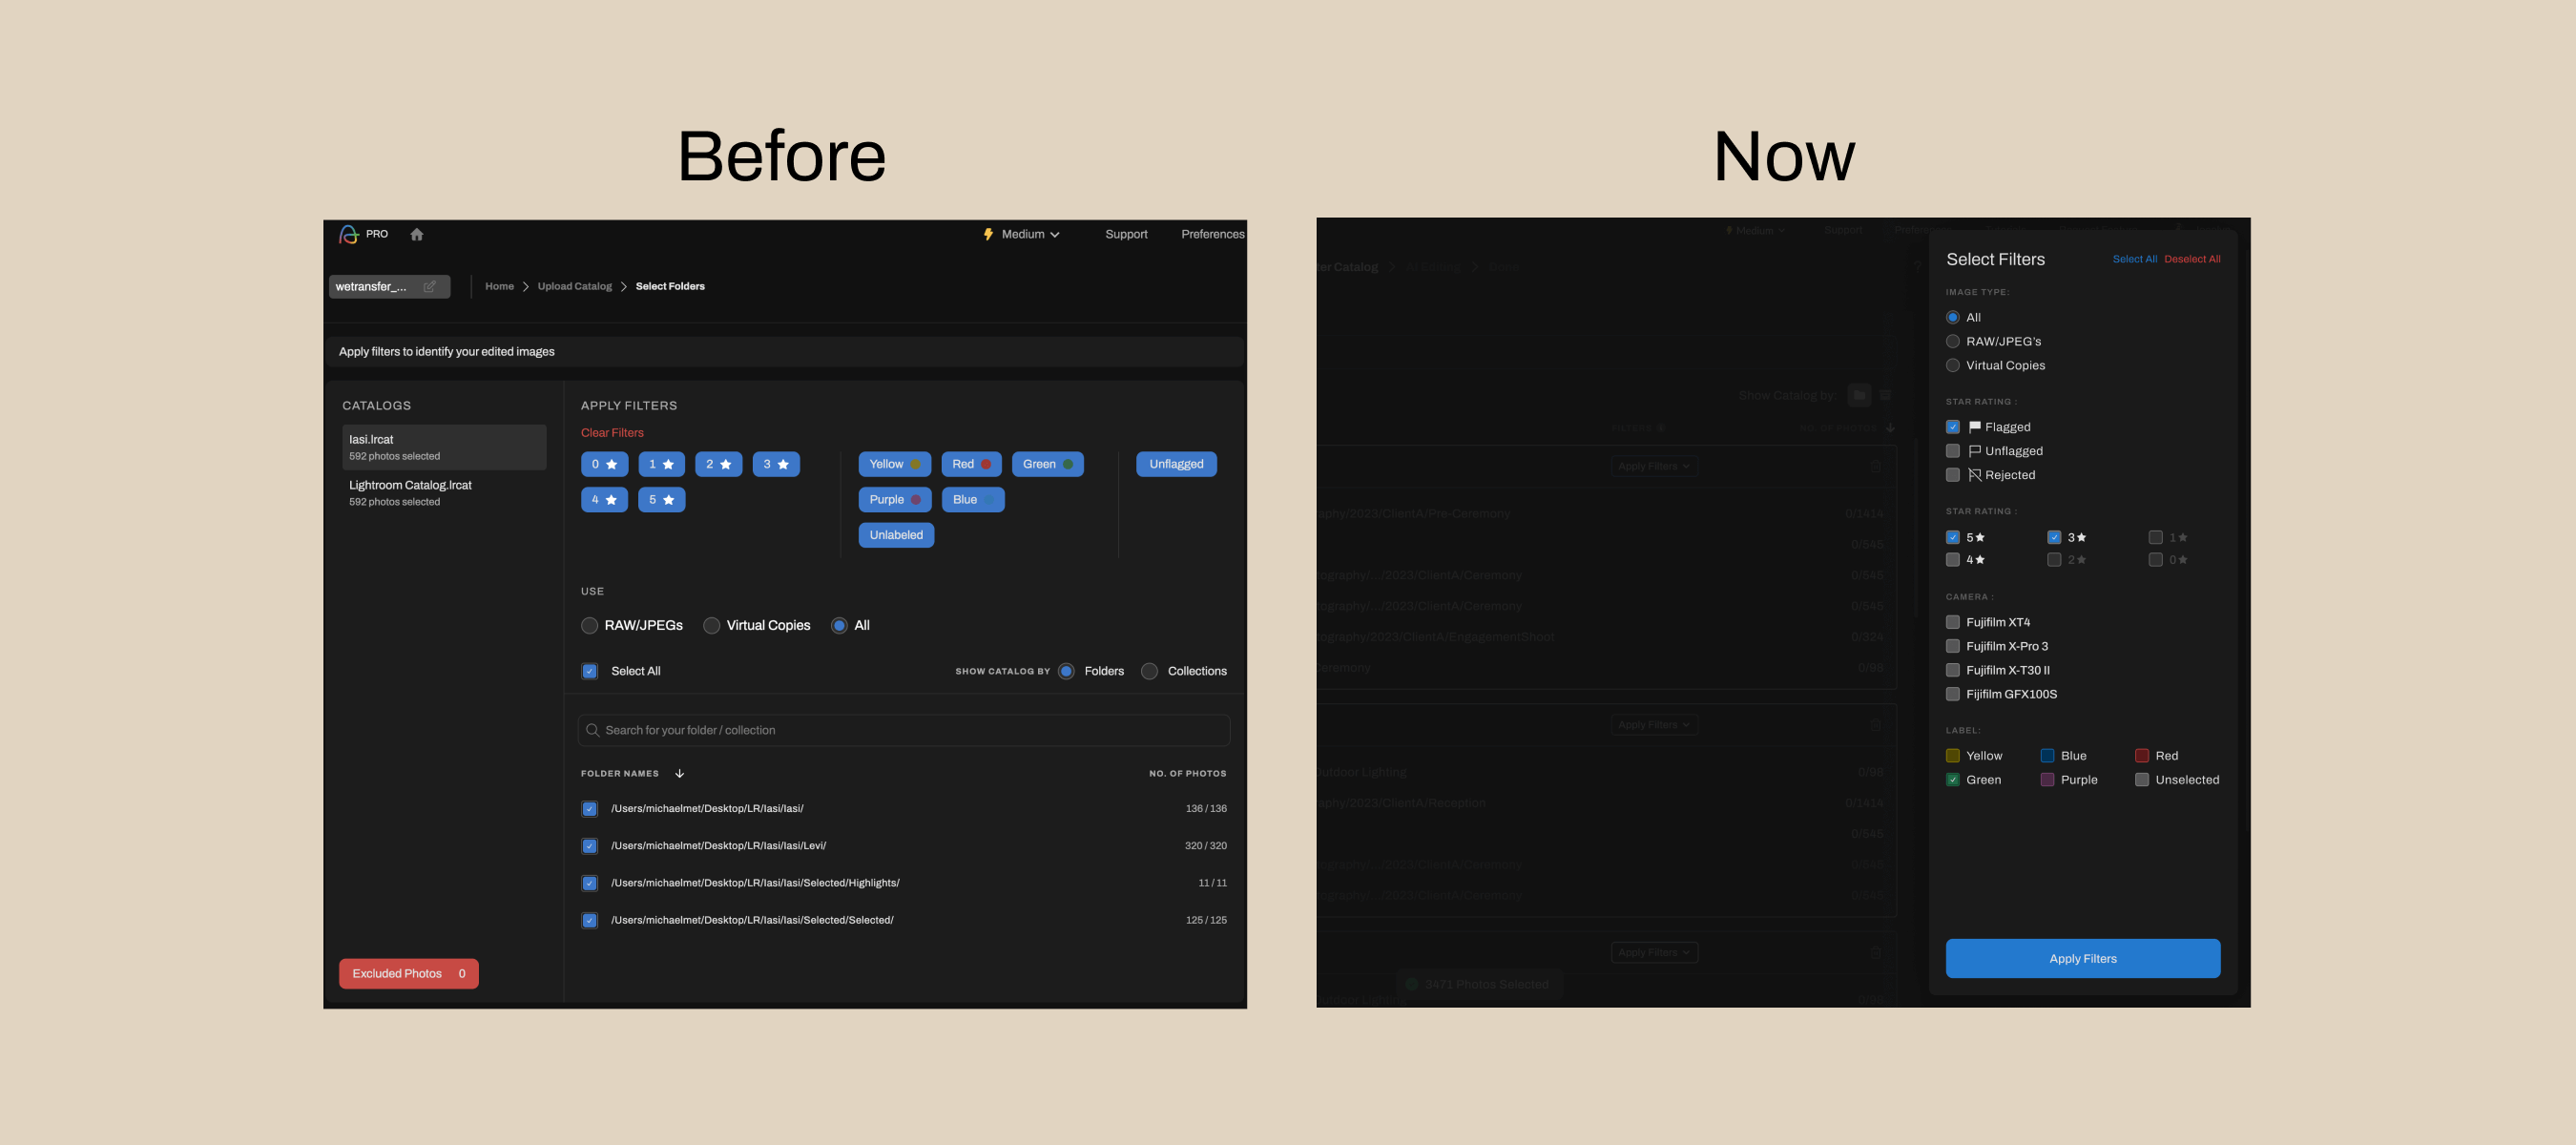
Improvements to the filtering screen
We’re constantly finding ways to improve your overall user experience.
This month, we’ve made tweaks to the filtering screen in Aftershoot EDITS to simplify your workflow.
Since most Aftershoot users are familiar with Lightroom’s style of cascading catalogs, we decided to replicate that interface, making it easier to navigate the Edits and AI Profile screens.
This familiar catalog structure will make it easier to select and filter the images you need.
Simply click the Filter button and add the filters you want. Easy as that!
P.S. We’ve also made some UI improvements to Spray Can mode and updated a few Editing keyboard shortcuts.
A revamped Culling preferences screen
We’ve improved the Culling preferences screen by adding two modes for you to choose from.
1. Automated Cull
Use the slider to choose how many images you want (few, standard, or more) and let the AI automatically cull your photos.
2. Customized Cull
This gives you more culling control. You can select whether Aftershoot should take the following factors into account when culling:
- Highlights
- Duplicates
- Blurry photos
- Closed eye detection
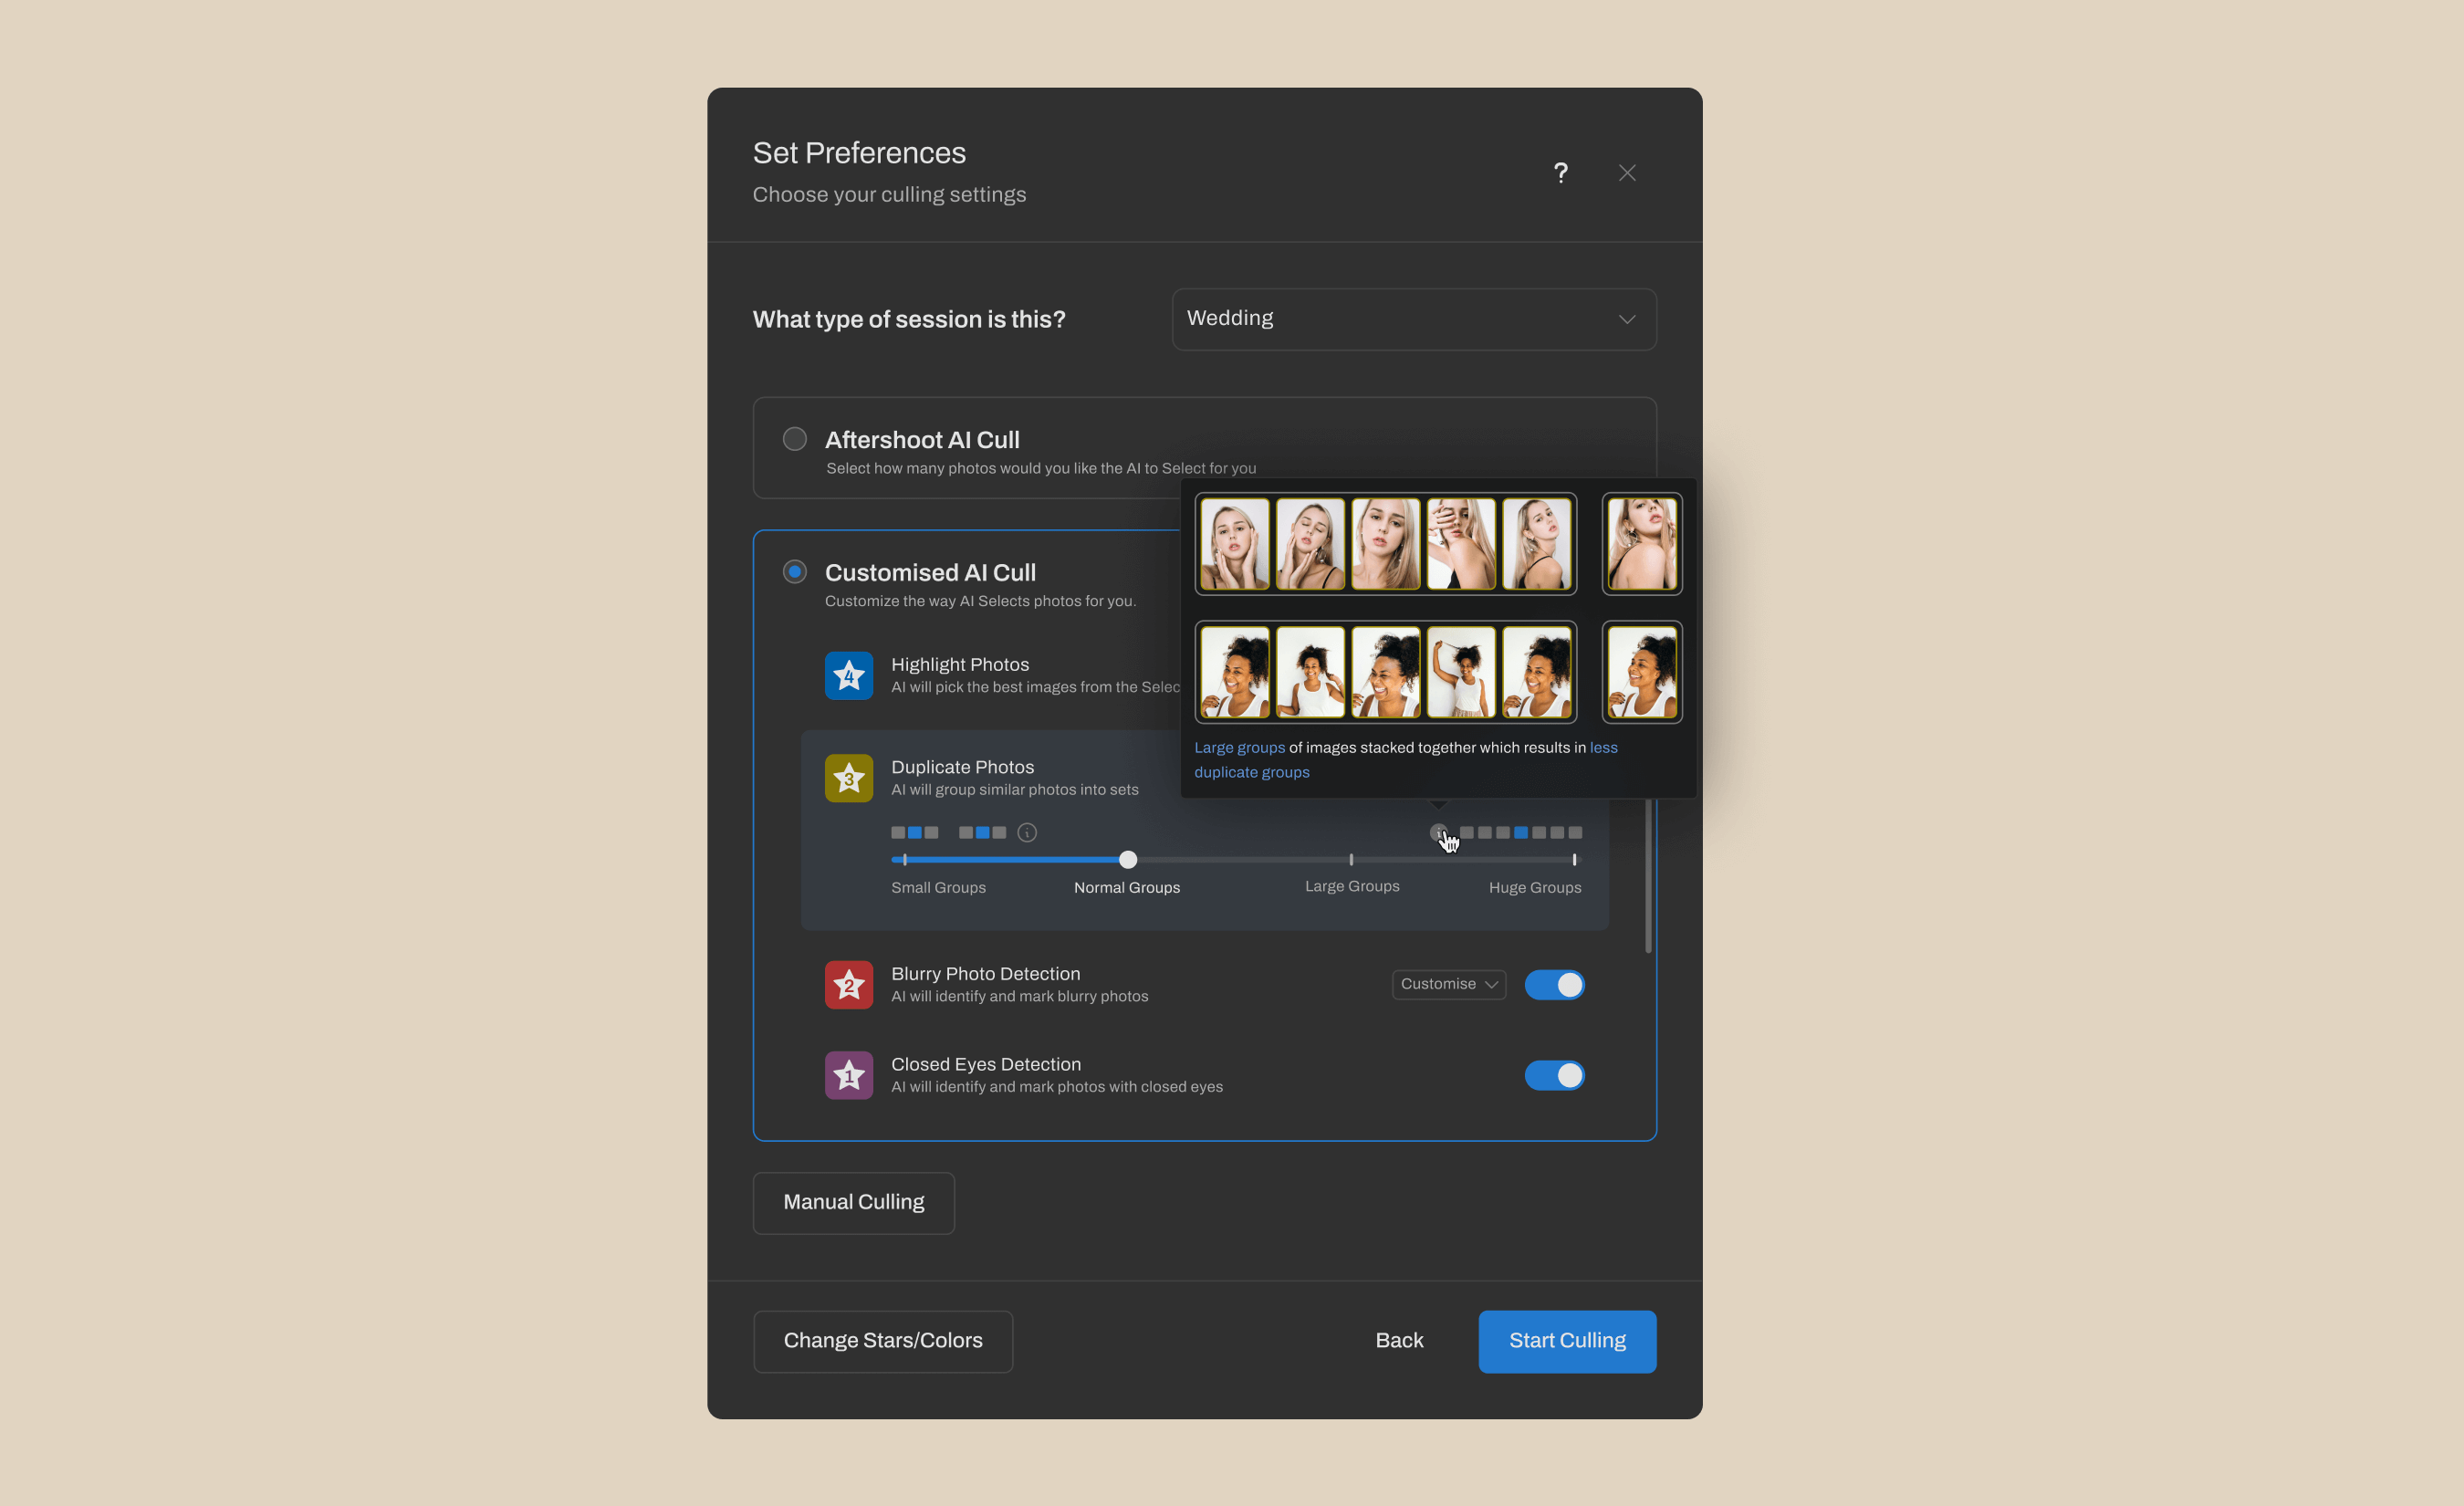
This simplified preferences screen makes it easier for new users to get started with Aftershoot Culling.
If you simply want our AI to cull for you, and you don’t want to set all the preferences; using the Auto Cull mode is for you.
If you want to fine-tune how the AI culls your images, use Customized Cull mode instead and set your parameters.
Update your app and try our new features!
Are you ready to experience the new and improved Aftershoot? We are especially excited for you to try out the pre-built AI Profiles!
Don’t forget to let us know what you think about our updates. We love hearing your feedback!
Share your thoughts in our Facebook Group or on Instagram. Remember to tag @aftershootco or use #aftershootupdates.
