A Brand New Way to Cull & Edit – Unveiling the Aftershoot Tab Bar
Can’t believe it’s just February and we already have another amazing update for you.
Our team has worked exceptionally hard and long on something VERY exciting. It will change the way you use Aftershoot for good – and for the better.
Say hello to the long-awaited, the game-changing, the big-surprise-in-a-small-package – the Aftershoot Tab Bar!
A Brand New Way to Cull & Edit Your Photos in Aftershoot
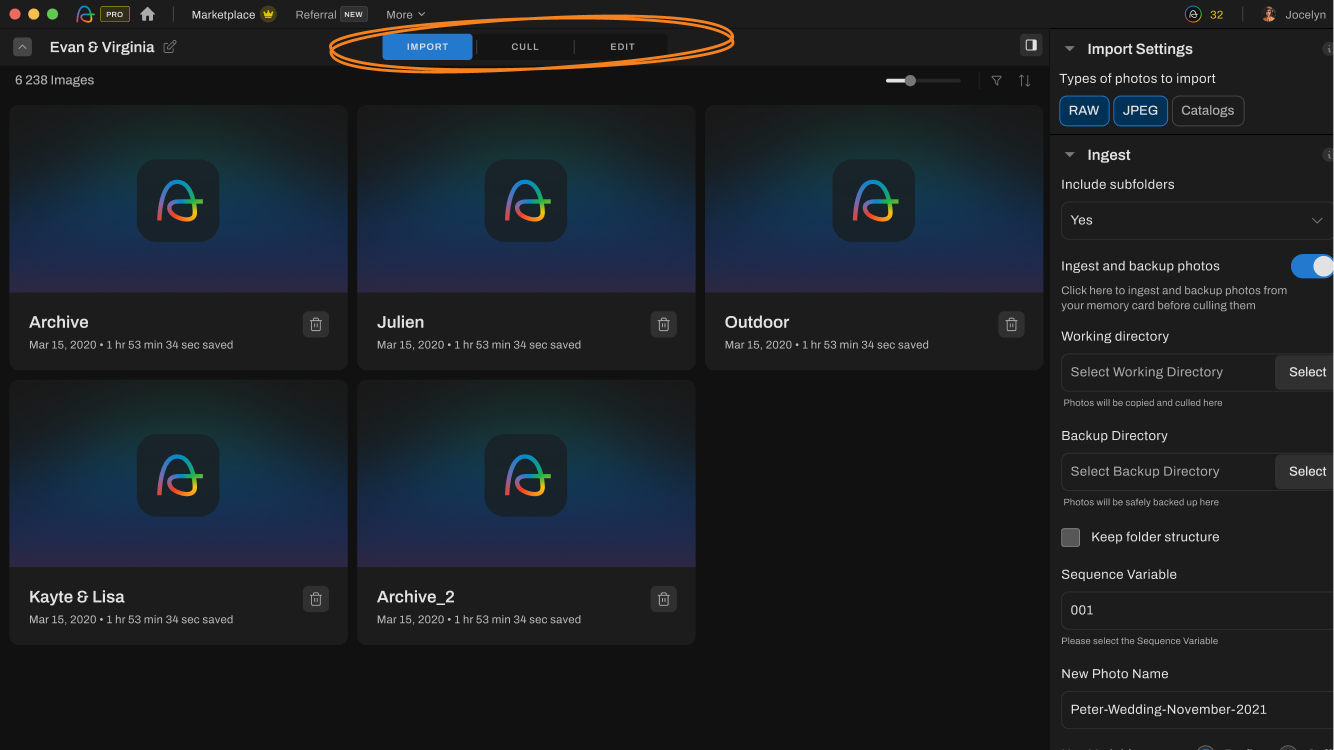
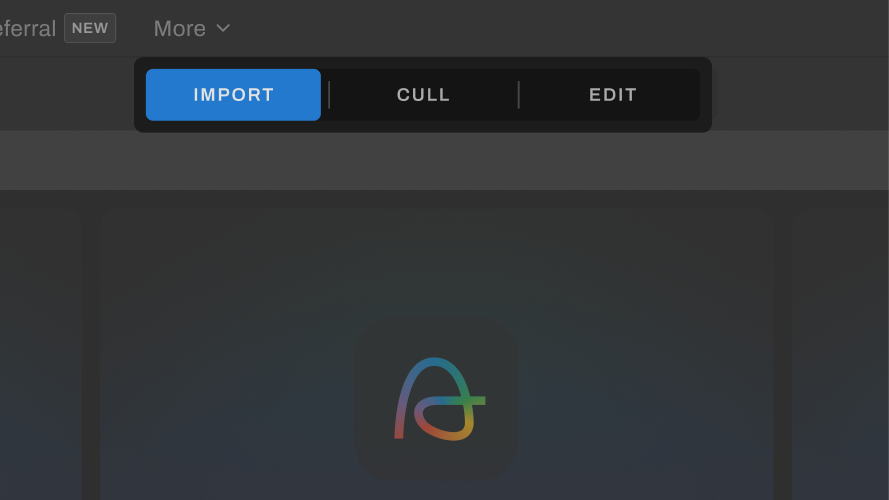
A nifty little introduction to your Aftershoot app, the Tab Bar sits right on top of your Album Screen and divides your workflow into three tabs – Import, Cull, and Edit.
Now you can move between the different parts of your post-processing workflow with ease.
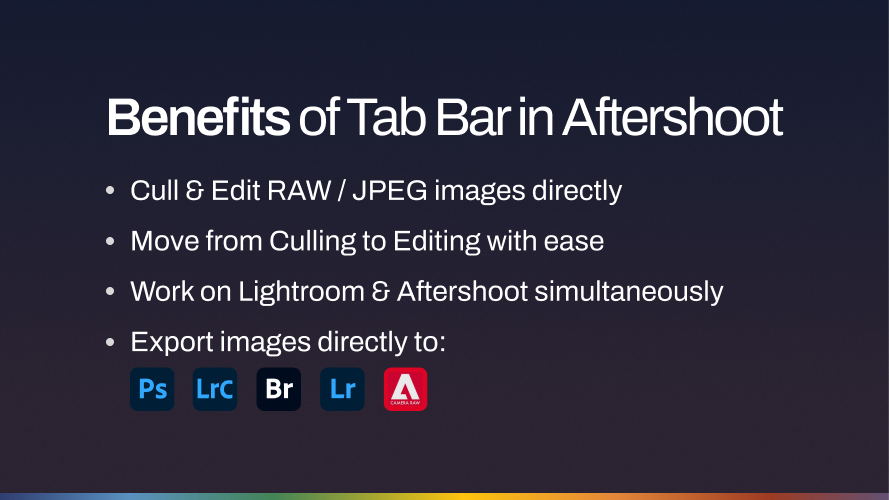
Here’s how the Aftershoot Tab Bar transforms your experience:
- Cull and Edit RAW or JPEG images directly! Yes, that’s correct, you don’t need to import your Lightroom Catalogs into Aftershoot anymore.
- Experience a smoother workflow by moving your selected images from Culling to Editing without leaving the Aftershoot app.
- Get to work on Lightroom and Aftershoot simultaneously. Make your tweaks in Aftershoot and see real-time updates in Lightroom.
- Send your edited images to the software of your choice for your final edits, like Adobe Bridge, Lightroom Cloud, Adobe Camera RAW, Lightroom Classic, etc.
A More Efficient Workflow with the Aftershoot Tab Bar
Let’s show you how it works. This is where the good stuff begins. *rubbing hands in glee*
Getting Started – Import Your Images
While your home screen remains the same, the moment you create a new album or open one of your existing albums, you’ll see a brand new module.
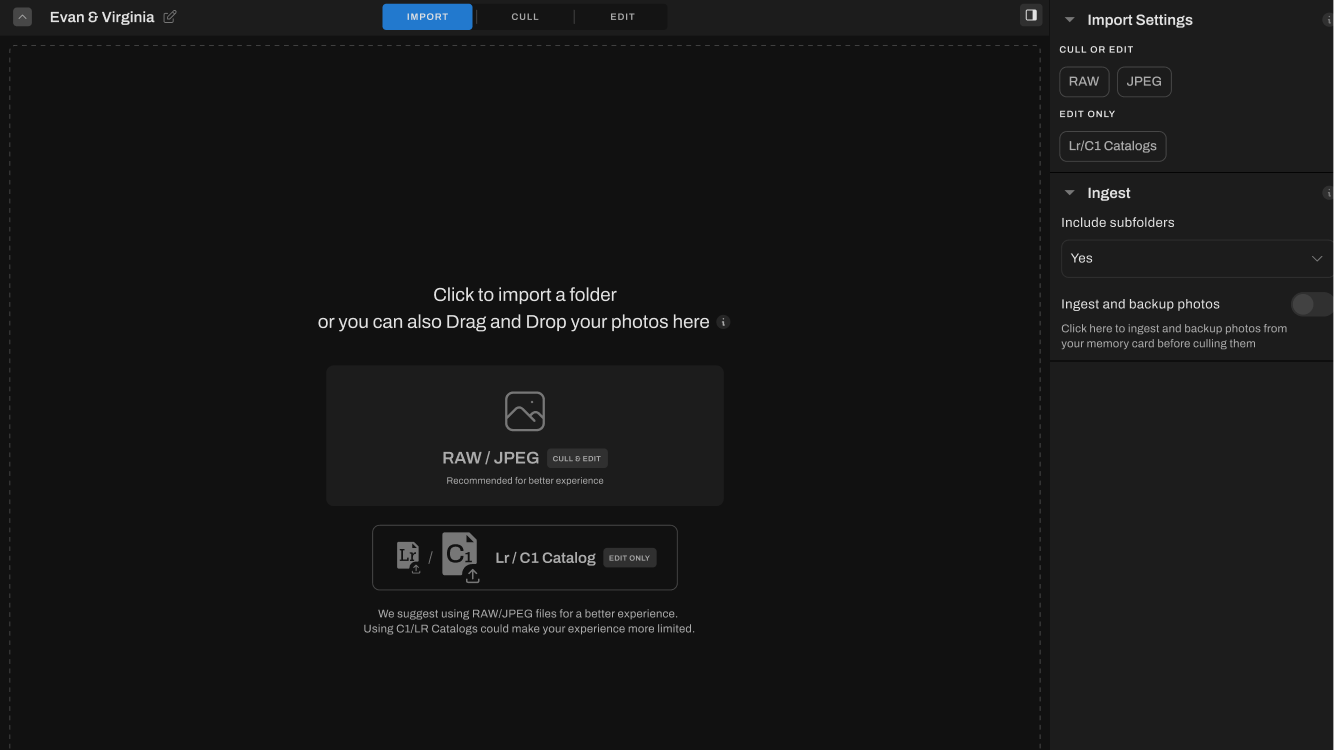
You now have the option to directly import your RAW / JPEG images into Aftershoot whether you want to Cull them, Edit them, or do both.
And you still have the option to import Lightroom Catalogs or Capture One Sessions as well, if that’s what you prefer.
All this while Tab Bar sits nicely on top for you to easily navigate between culling and editing once you’ve imported your images.
Moving Forward – Cull and Edit Your Images
Now that you have your images imported, the Tab Bar begins to show its brilliance.
Remember the good ol’ days of importing your catalogs into Aftershoot and then culling and exporting your selections into Lightroom or Capture One, and then importing your Catalogs or Sessions back into Aftershoot before you could edit them?
Whewwwwww we’re so done with the old.
Say hello to an all-new workflow where you can choose to directly cull and edit your imported images without ever having to leave the Aftershoot app.

Just import your images. Cull them like you used to. Edit your selections (you can continue to use either your personal AI Editing Profiles or any of the profiles from the Marketplace). And hit Export. Viola. You’re done!
You can always choose to either just cull and export or edit and export your images too.
Sweet, isn’t it?
Exporting Your Edits
Here you are, with your images culled and edited in Aftershoot, ready to make your final touch-ups before you share them with your client.
So what comes next?
Easy peasy. You now have the option of exporting your RAW / JPEGs directly to the software of your choice – Adobe Bridge, Adobe RAW Classic, Adobe Photoshop, etc.
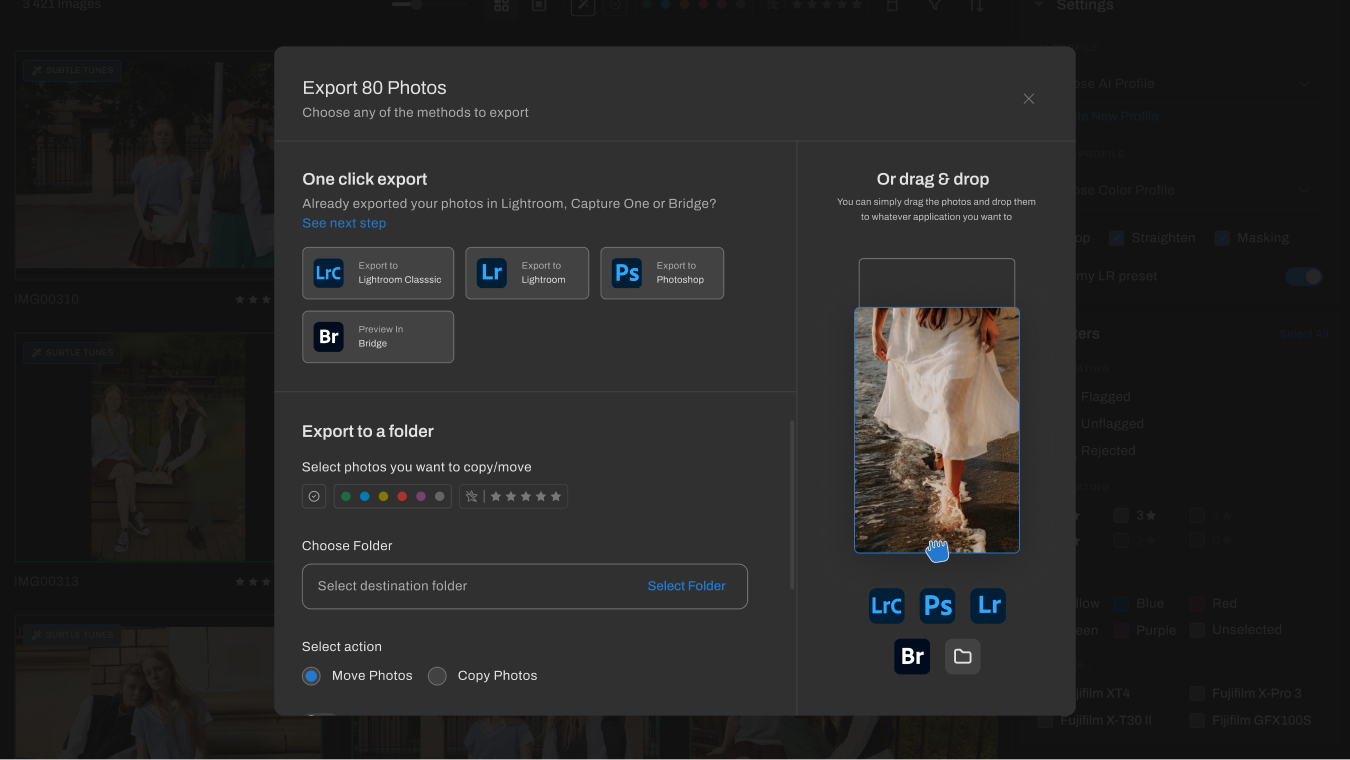
And that’s not all. If you’re a Lightroom user, you can simultaneously view your edited images within Lightroom while you make tweaks in Aftershoot.
Yeah, we made it possible for both of these powerhouses to work together to maximize your output.
Something to Keep In Mind
While you’ve had the tour of the new Tab Bar launch, here are some things that will help you get the most out of your experience with Aftershoot:
Upload RAW / JPEG Images OR Upload a Catalog
You can upload either RAW / JPEG images or you can upload a catalog. You can’t upload a mix of both. It would make sense to plan this before you begin post-processing and go ahead with whatever workflow works best for you.
Export Catalog for Capture One
Once you’re done with your edits, you will need to export a catalog for Capture One. As of now, Capture One can’t read the edited files that Aftershoot creates so you will not be able to export images if you are a C1 user.
Personal AI Editing Profiles Will Need Catalogs
You still need a catalog to train and create a personal AI Profile in Aftershoot. You can edit your RAW / JPEG images with your personal AI Profiles, but to make any improvements or to train your porofile further, you will still need a catalog.
Over to You
Whether you’re an existing Aftershoot user or someone new to it, we’d love for you to try the new update and tell us what you think. We’re very excited to hear from you and always take your feedback seriously.
We hope you like the new Tab Bar that we have introduced and that it helps you improve your experience with Aftershoot. If you’re already familiar with Aftershoot, you’ll find a few more features that we’ve just introduced.
We’ll keep innovating and making your post-processing workflows easier and less time-consuming. Until the next update!