You’ve just shot three hours of nonstop action — dunks, celebrations, and thousands of frames later, your card is full, and the clock’s ticking.
Welcome to every sports photographer’s beautiful nightmare, where editing is just as intense as the game. Between massive image volume, tricky lighting, and tight deadlines, a smart editing workflow isn’t optional; it’s essential.
Let’s dive into 9 tried and tested tips for sports photo editing that’ll help you cull faster, edit smarter, and deliver winning shots every time.
TL;DR: Quick Wins for Sports Photo Editing
Most sports editing workflows fall apart under real pressure. This workflow is built to handle game-day chaos and deliver punchy, professional galleries fast. Here’s the difference you’ll see:
What most sports photographers do:
- Manually sift through thousands of burst images, second-guessing each frame.
- Lose hours wrestling with unpredictable stadium lighting and unflattering color casts.
- Over-sharpen every shot or miss crispness completely
- Rush edits and compromise quality just to meet deadlines.
What you’ll learn to do instead:
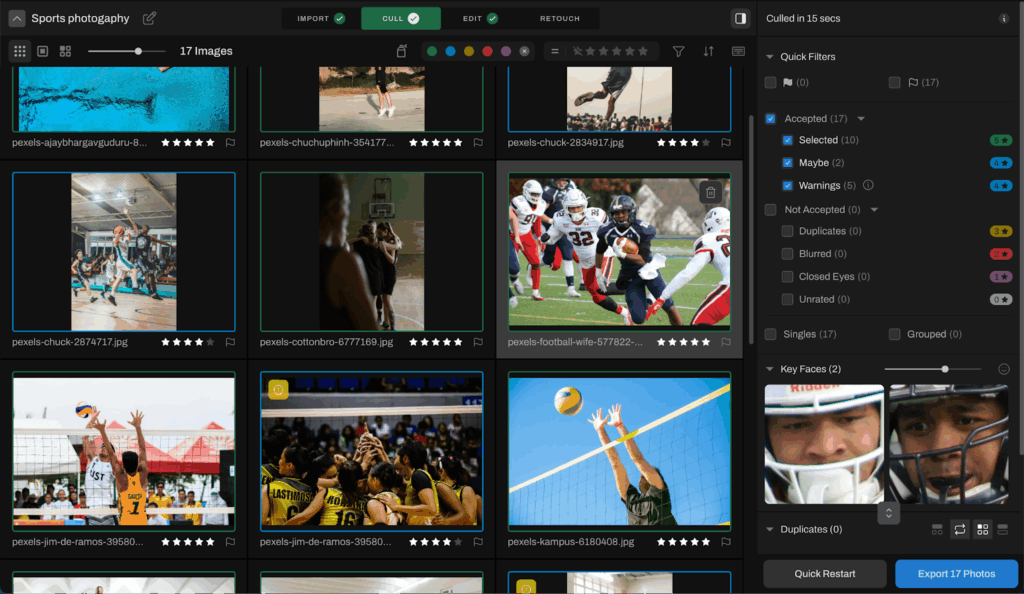
- Cull quickly using AI tools like Aftershoot to automatically detect closed eyes, soft focus, and help you zero in on true peak moments.
- Batch edit for consistency, applying your signature style across every photo, and trust smart tools to handle white balance and exposure challenges.
- Sharpen only what matters (faces, action, gear), while letting motion blur tell the story of speed and intensity; no more one-size-fits-all edits.
- Build a workflow that protects your creative energy and keeps you enjoying the process.
We’ll guide you step-by-step and show exactly how Aftershoot (and other smart tech) fits right into your workflow. By the end, you’ll have a sports editing system that supports storytelling, turns chaos into clarity, and gives you more time to celebrate every win, big or small.
Tip #1: Cull Sports Bursts Like a Pro
If you’re shooting sports in burst mode (and you likely are), you’re going to capture mountains of nearly identical frames. The difference between photographers who burn out and those who thrive is knowing which 5% of those sequences actually deserve your precious time.
Let me demonstrate with a quick example: When you’re clicking away to catch that perfect touchdown reception, you’ll often end up with sequences where:
- Frame 47-50 show the receiver reaching for the ball
- Frame 51-54 capture the actual catch
- Frame 55-58 reveal the defender’s “oh no” face
- Frame 59-64 show the celebration beginning
Which ones tell the most compelling story?
Peak Action Moments to Hunt For
- Ball contact in any catching sport
- The apex of jumps or dives (when gravity briefly loses)
- Facial expressions that scream victory or defeat
- Body positioning that screams power and grace
- The exact moment when everything changes
This is where AI culling tools come in a clutch. Instead of squinting at endless similar shots until your eyes bleed, AI helps:
- Group your burst sequences into manageable chunks
- Identify the sharpest frames with surgical precision (while also allowing you to let through some artistic blurry shots)
- Detect which shots have the best facial expressions and select peak action moments
- Learn your style preferences over time
See how Aftershoot works — without signing up, booking a call, or committing to anything. Our self-guided demo walks you through the exact workflow photographers use to cull, edit, and deliver faster.

Tip #2: Level Your Photos & Frame Strategically
You can easily spot a beginner at sports photography through their hasty framing.
Sure, pro photographers experiment a lot with their angles and cropping, but there’s a difference between an intentional angle and an unleveled photo. Perhaps the first thing you want to do at the editing stage is straighten your photos and decide how you want to tell the story — are the background elements essential, or will it be more impactful to close it up a little and focus on the subject’s expression?
Some tips to consider while you’re doing this:
- Never crop at joints because it looks unnatural and makes viewers uncomfortable.
- Leave space in the direction of movement so athletes appear to be moving into the frame, not escaping it.
- Preserve context when it adds to the story, because sometimes the environment is part of the narrative.
- Avoid cutting off hands and feet unless absolutely necessary for composition.
Don’t be afraid to experiment with unconventional crops that create visual drama:
- Extreme close-ups on hands gripping a ball or bat.
- Vertical crops that emphasize height and athletic power.
- Square crops that focus attention on central action.
- Wide crops that capture the full energy of the moment.
Also, remember that different social media platforms favor different aspect ratios. Consider your delivery requirements when making cropping decisions so you’re not recreating work later.
Tip #3: Make Sports Action Shots Pop Without Losing Motion
You want crisp athletes and that satisfying streak of movement.
Balancing between frozen and flowing action is where sports editing gets fun but tricky. Oversharpening can kill the vibe and ruin the natural flow of movement, while under-editing makes it all feel blurry or entirely flat.
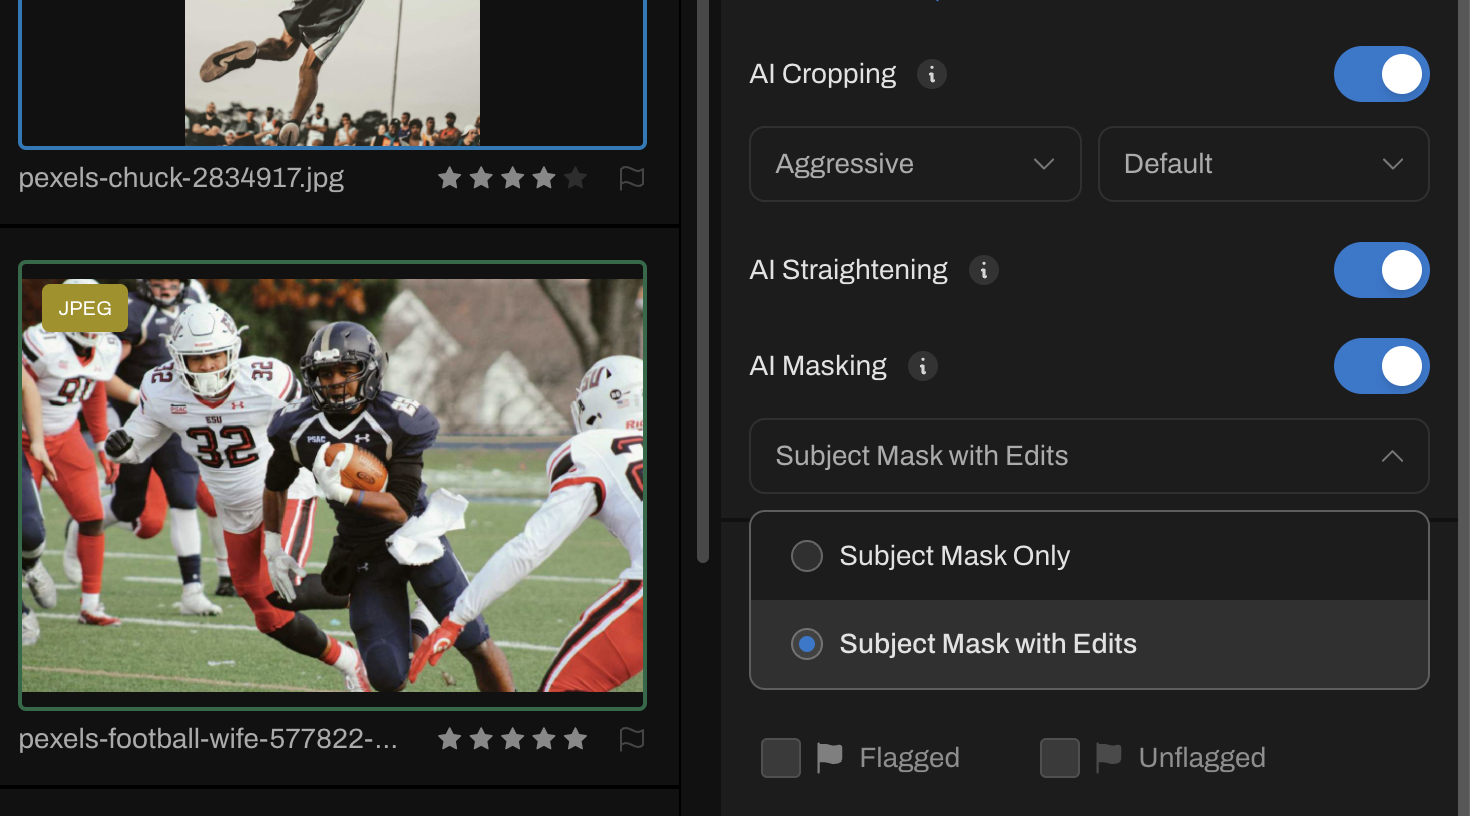
This is where editing can help you “cheat” a little bit and make the best of both worlds. Use subject masking to enhance your subject while keeping the background slightly soft to create depth and focus.
You can create your mask while editing in Aftershoot and carry out your edits directly in Photoshop or Lightroom later.
Tip #4: Conquer Weird Lighting Like a Boss
From noon sun in outdoor arenas to weird yellow glows in indoor gyms, lighting in sports is chaotic. Mixed lighting, cheap LEDs, stadium shadows… it’s the wild west of white balance.
Before touching anything else, nail your white balance. This is more than just making colors look “correct.” You need to maintain consistency across your entire shoot so your gallery doesn’t look like it’s been put together by multiple photographers.
How can you do this?
- Set custom white balance in-camera whenever humanly possible.
- Batch correct sequences shot under similar conditions.
- Deploy AI tools into your post-processing workflow for intelligent white balance detection across mixed lighting scenarios.
Tip #5: Balance Sharpness Without Creating Plastic People
Athletes are often wearing textured uniforms, making complex moves, and surrounded by chaos. Sharpening helps bring your subject forward, but it’s easy to go overboard.
For sports photography, it’s important to avoid global sharpening. It can introduce noise in already noisy compositions, especially when dealing with high ISO images shot in low-light arenas. The goal with sharpening here is to guide the viewer’s eye exactly where you want it to go.
Professional sports photographers often use luminosity masks or selection tools to apply different sharpening levels to different image areas. The athlete’s jersey might get moderate sharpening while their face gets the full treatment.
Pro tip: Use a high-pass filter in Photoshop for controlled sharpening, or Lightroom’s Texture slider to boost detail only where it matters (like jerseys or facial expressions).
Tip #6: Color Grade Sports Images to Match Emotion + Energy
RAW sports photos often turn out unbearably cool-toned, whether due to cheap LED lighting or grass greens reflecting against players’ skins. This is when you can’t let natural lighting affect your storytelling.
The golden glow of a late-afternoon baseball game tells a completely different story than the stark blue-white of indoor arena lighting. Your color choices can transform a simple snapshot into an emotional narrative.
You usually want to go for warmer tones to pump up the intensity and make everything pop. Bring up the vibrance and saturation, and bump up the reds and magentas. Again, with all things, make sure you don’t overdo it and keep it consistent with your entire gallery as well as client expectations.
Your color choices will also depend on whether you’re covering an event, shooting for a business, or helping with marketing material. For the last two, it’s best to rely on your client’s vision for the campaign instead of defaulting to warm tones.
Consistency Across Your Gallery
Whether you’re delivering 50 images or 500, they should feel like they belong in the same universe and follow the same narrative.
This is where Aftershoot’s AI Styles and custom profiles can be complete lifesavers. Use a pre-defined style or train an AI profile that matches your preferred color treatment, then batch apply it across your entire shoot. You can always fine-tune individual images afterward, but starting with a consistent foundation saves hours of tedious work.

Tip #7: Harness AI for a Consistent Experience
Speaking of AI, photography pros are using it to ramp up their speed and efficiency during post-processing, so they can focus on what they love to do best. Unlike Lightroom presets, AI actually learns your personal style instead of just applying generic edits and hoping for the best.
Modern AI editing tools can analyze your previous edits and create custom profiles that match your unique artistic vision. Upload your best edited sports photos, and the AI learns your specific preferences for:
- Exposure compensation in different lighting scenarios.
- Color grading choices for various sports and venues.
- Contrast and saturation levels that match your style.
- Cropping tendencies that define your compositional approach.
The real beauty of AI profiles lies in their ability to work within your existing photo editing workflow. AI-processed images integrate seamlessly while maintaining all the metadata and edit history you need for future adjustments.
Want to see how it works?
Tip #8: Master Background Refinement and Distraction Removal
Sports venues are visual chaos factories. Advertising banners fight for attention, crowd members wave giant foam fingers, officials run around in striped shirts, and other athletes photobomb your perfect composition.
Smart background editing can transform a cluttered snapshot into a compelling visual story.
This doesn’t mean you need to obliterate all backgrounds, but they should support your main subject instead of competing for attention.
How can you improve your background?
- Graduated blur to maintain some environmental context.
- Selective focus to keep important background elements sharp.
- Color desaturation in backgrounds to reduce visual weight.
- Luminosity adjustments to darken distracting elements.
- Object removal for elements that really need to go.
- Generative fill when you need more of one background and less of the other.
Aftershoot’s retouching tools can intelligently remove distracting elements while preserving the natural look of the scene. Whether it’s eliminating a photographer lurking in the background or cleaning up unsightly equipment that ruins your composition, AI-powered object removal is becoming incredibly sophisticated.

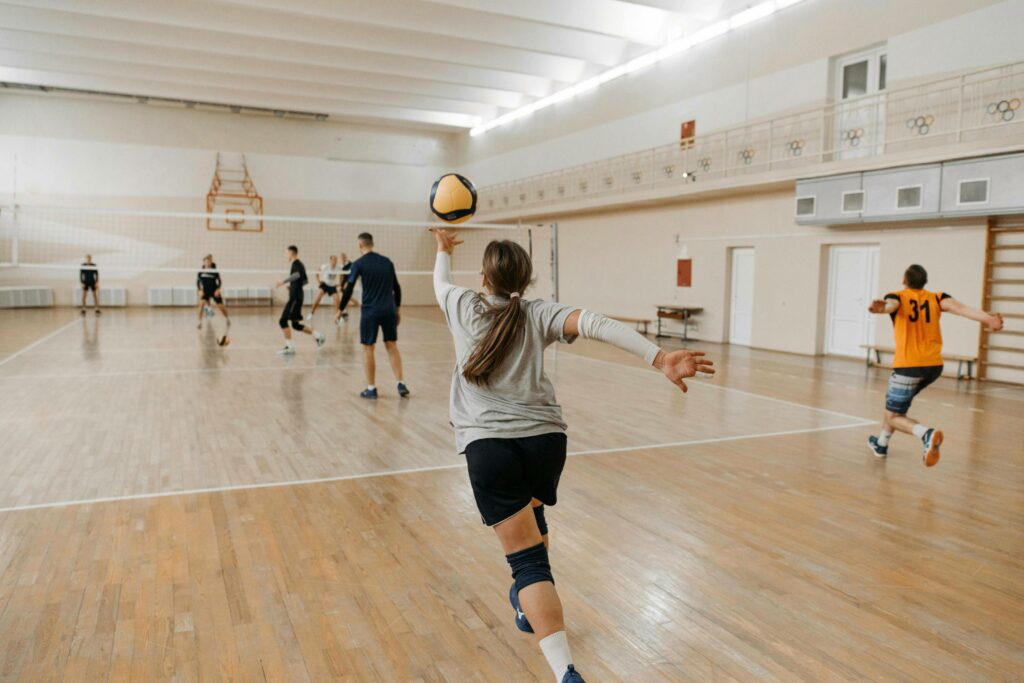
Editing out a stray volleyball using Aftershoot’s AI Object Removal Tool
Tip #9: Optimize Your Batch Processing Workflow
When you’re dealing with thousands of images from a single event, efficiency isn’t a nice-to-have. It’s essential for maintaining your sanity and delivering quality work on time. Batch processing can be the difference between meeting deadlines and pulling caffeine-fueled all-nighters.
Before you even open your editing software, set yourself up for success with a smart organization.
- Create logical folder structures by game, team, or time period.
- Use consistent naming conventions that make sense six months later.
- Tag or rate images during initial culling to streamline later processing.
- Separate different shooting conditions for targeted batch processing.
AI-Powered Batch Operations
This is where AI tools like Aftershoot can be your knight in shining armour. Instead of manually adjusting each image, you can:
- Apply learned style profiles across entire shoots instantly.
- Batch correct common issues like underexposure or color casts.
- Automatically crop to consistent aspect ratios for delivery.
- Generate multiple sizes for different client requirements.
- Export optimized files for various platforms and uses.
The Ideal Sports Photo Editing Workflow
Professional sports photographers often work in multiple focused passes instead of trying to do everything at once:
- Quick cull pass to eliminate obvious rejects and disasters, often combined with the AI pass for technical corrections and consistency.
- Manual review pass for creative adjustments and fine-tuning.
- Final selection pass for client-specific edits and delivery prep.
- Client delivery automation to streamline the final steps once everything is done.
This approach ensures you’re spending your creative energy where it matters most while letting automation handle the routine technical work that doesn’t require artistic judgment.
Ready to Transform Your Sports Photography Editing?
The difference between good sports photographers and truly exceptional ones often comes down to post-production efficiency and consistency. Though you can’t control whether the quarterback throws a perfect spiral or if the stadium lighting decides to cooperate, you absolutely can control how quickly and effectively you transform those raw captures into compelling visual stories.
We took you through 10 of our best learnings on how to edit sports photos, and now it’s time for you to take the helm. The real transformation happens when you start applying these techniques to your actual work and seeing the results in your editing speed, image quality, and client satisfaction.
Ready to cut your editing time by 75% while maintaining your creative vision?
Frequently Asked Questions About Sports Photography Editing
How do you edit your sports pictures effectively?
Focus on ruthless culling first, address technical issues like exposure and white balance, before moving to creative adjustments. Use AI tools for batch processing and maintain consistency across your entire shoot for professional results.
Do sports photographers edit their photos?
Absolutely! Professional sports photographers extensively edit their images to enhance drama, correct challenging lighting conditions, and ensure consistency across large volumes of photos. The key is balancing technical corrections with authentic storytelling that preserves the moment’s integrity.
What is the best app to edit sports photos?
Adobe Lightroom remains the industry standard for sports photo editing, while Photoshop is the chosen one for retouching and creating detailed effects. Additionally, AI-powered tools like Aftershoot can dramatically speed up the culling and initial editing process by learning your personal style preferences.
What camera settings work best for sports photography editing?
Always shoot in RAW format for maximum editing flexibility. Use shutter speeds of 1/500s or faster for most sports, ISO settings between 800-3200 depending on lighting conditions, and apertures around f/2.8-f/4 for the right balance of subject sharpness and background separation.
Should I shoot JPEG or RAW for sports photography?
Always shoot RAW when possible. The larger file size is absolutely worth it for the editing flexibility, especially when dealing with challenging lighting and high-contrast situations that are common in sports photography environments.
How can I speed up my sports photo editing workflow?
Implement AI-powered culling and editing tools, create consistent file organization systems, use batch processing for common adjustments, and develop custom presets or AI profiles that match your editing style. Tools like Aftershoot can reduce editing time by up to 75% while maintaining quality.
What’s the biggest mistake in sports photo editing?
Over-sharpening images until they look artificial and plastic. The goal is to enhance the natural drama and motion, not create unrealistic-looking athletes. Use selective sharpening techniques and preserve intentional motion blur that adds energy and authenticity to the story.