You just wrapped a wedding that felt like pure magic. A teary first look, golden hour portraits that landed perfectly, and spontaneous dance floor chaos captured mid-motion. It’s the kind of shoot that fills your card with gold and leaves you riding that creative high all the way home.
But as soon as you load up the files, reality settles in. Thousands of images await you to sort, select, edit, and deliver. And if it’s peak season? You’re already behind before you even begin.
That’s why streamlining your wedding photography editing workflow is everything. When every hour counts, you need a process that helps you stay ahead of schedule, protects your style, and helps you focus on what matters: creating stunning images your clients will never forget. Let’s walk through the steps that make it possible.
Step 1: Prepare Your Files Before Editing
Before you can start sorting, editing, or delivering, you need to get your images off the cards and into a system that keeps things fast, safe, and organized. This is the foundation of any efficient wedding photography editing workflow.
Import and Back Up Your RAW Files
Start by transferring all your RAW files to a reliable and fast external hard drive. Once everything is on your working drive, create your first backup immediately:
- Use a mirrored external hard drive or a RAID system.
- Make sure your first backup is stored locally.
- Cloud storage services like Backblaze or Dropbox can come later as an extra layer of safety.
You are working with irreplaceable memories and should not keep all your eggs in one basket!
Create a Clear and Repeatable Folder Structure
Whether you shoot five weddings a year or fifty, your folder structure should always stay consistent. Start by creating one main folder named after the couple. Inside, include these subfolders:
- RAW
- Previews
- Selects
- Edits
- Exports
Once your files are imported, backed up, and clearly organized, you are ready for the next step in your wedding photography editing workflow.
Step 2: Use AI Culling to Select the Best Shots
Once your files are organized, the next step in your wedding photography editing workflow is culling. Manually sifting through thousands of photos can be daunting and time-consuming. Photographers who have integrated AI into their culling process report significant time savings. Nicola from Trapani, Sicily, shares:
“Aftershoot has helped me streamline my workflow, allowing me to spend more time on creativity and less on technical stuff like image selection. With this tool, I can maintain high-quality work while managing multiple projects efficiently.”
Here’s how to efficiently cull your images using Aftershoot:
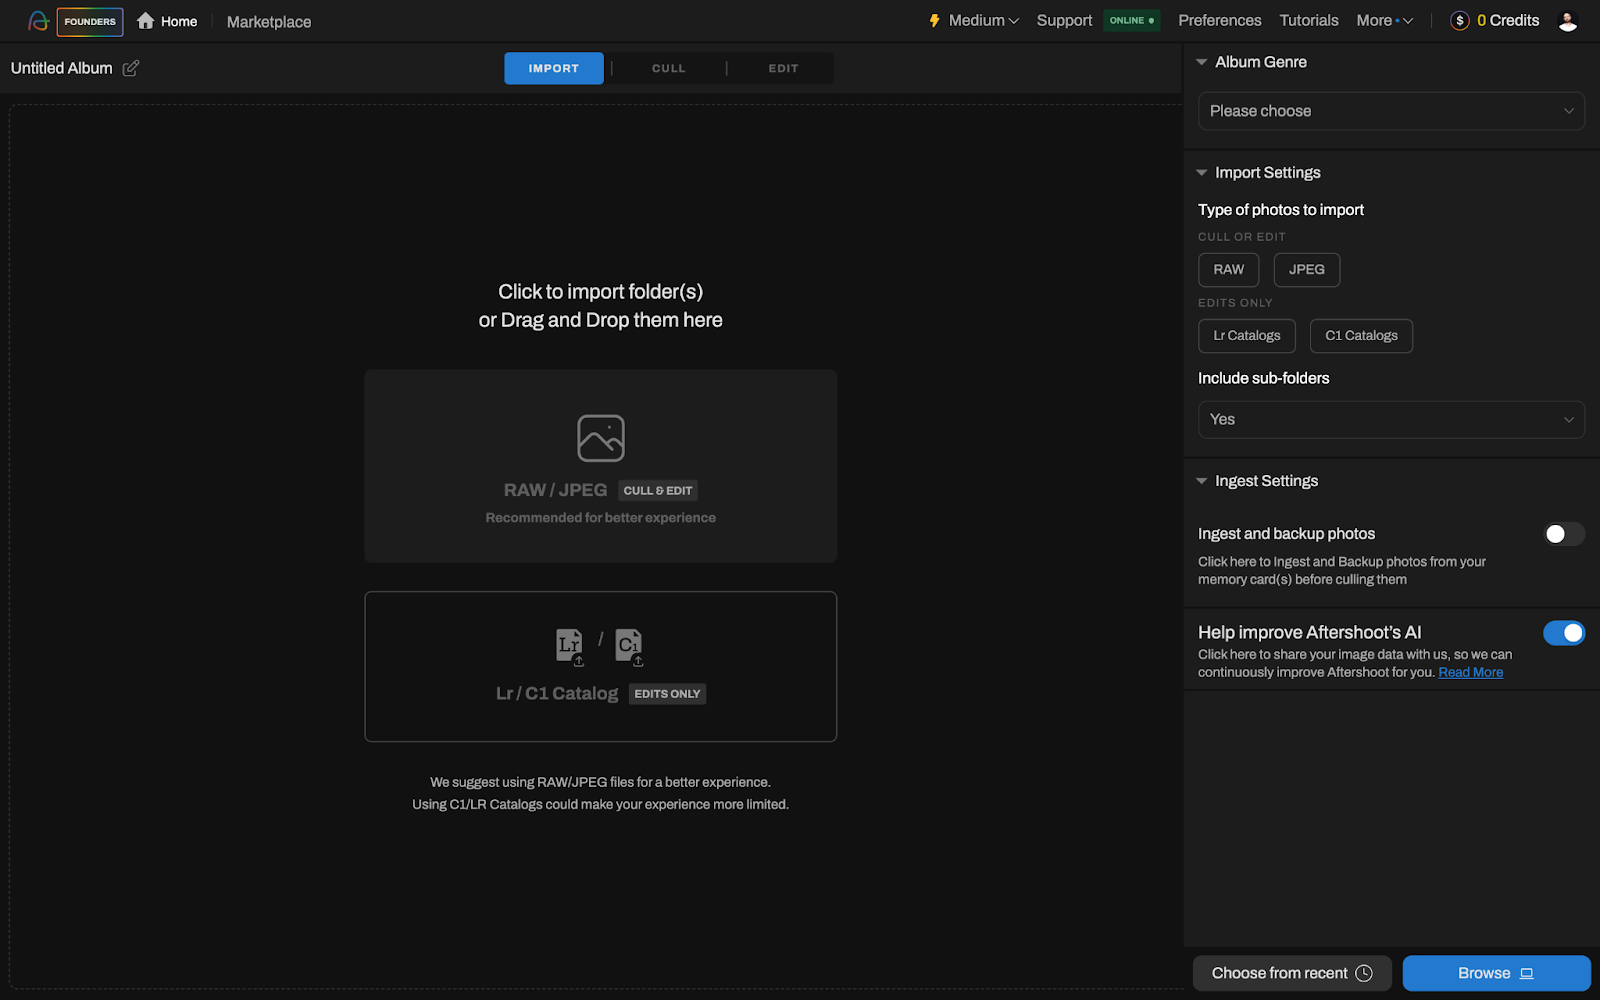
Import Your Images
Open Aftershoot and create a new album, then import your RAW or JPEG files directly into the album.
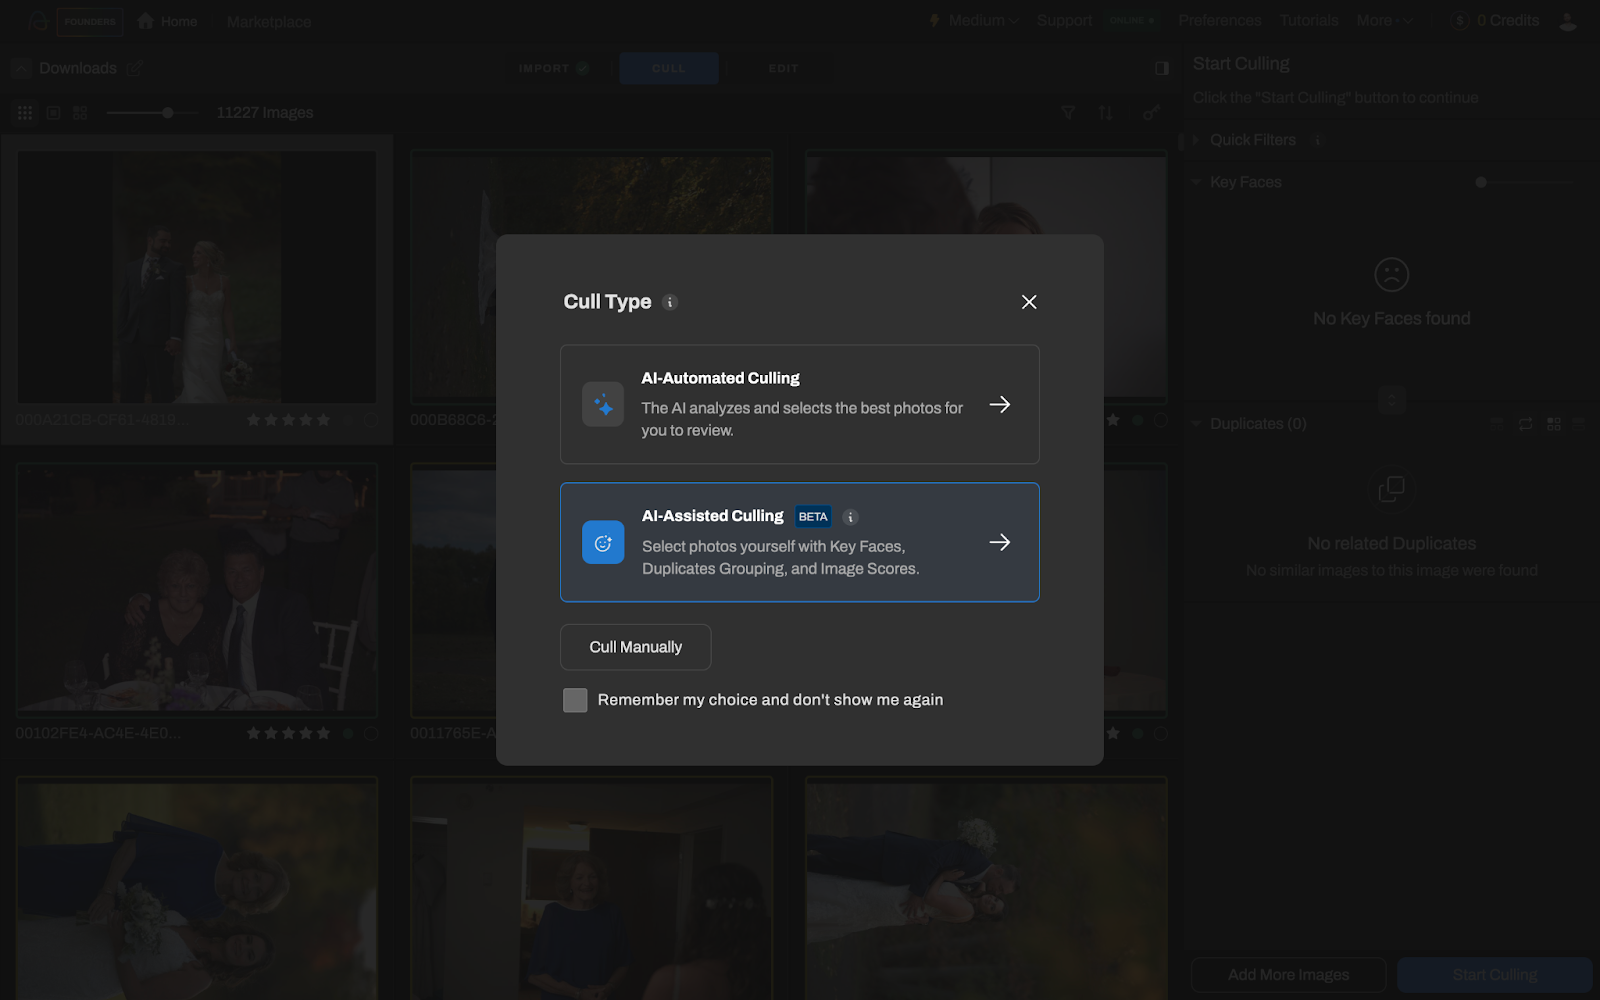
Choose Your Culling Method
You can choose between two workflows:
- AI-Automated Culling: Aftershoot analyzes and selects the best images for you.
- AI-Assisted Culling: You review grouped duplicates and make final selections with AI assistance.
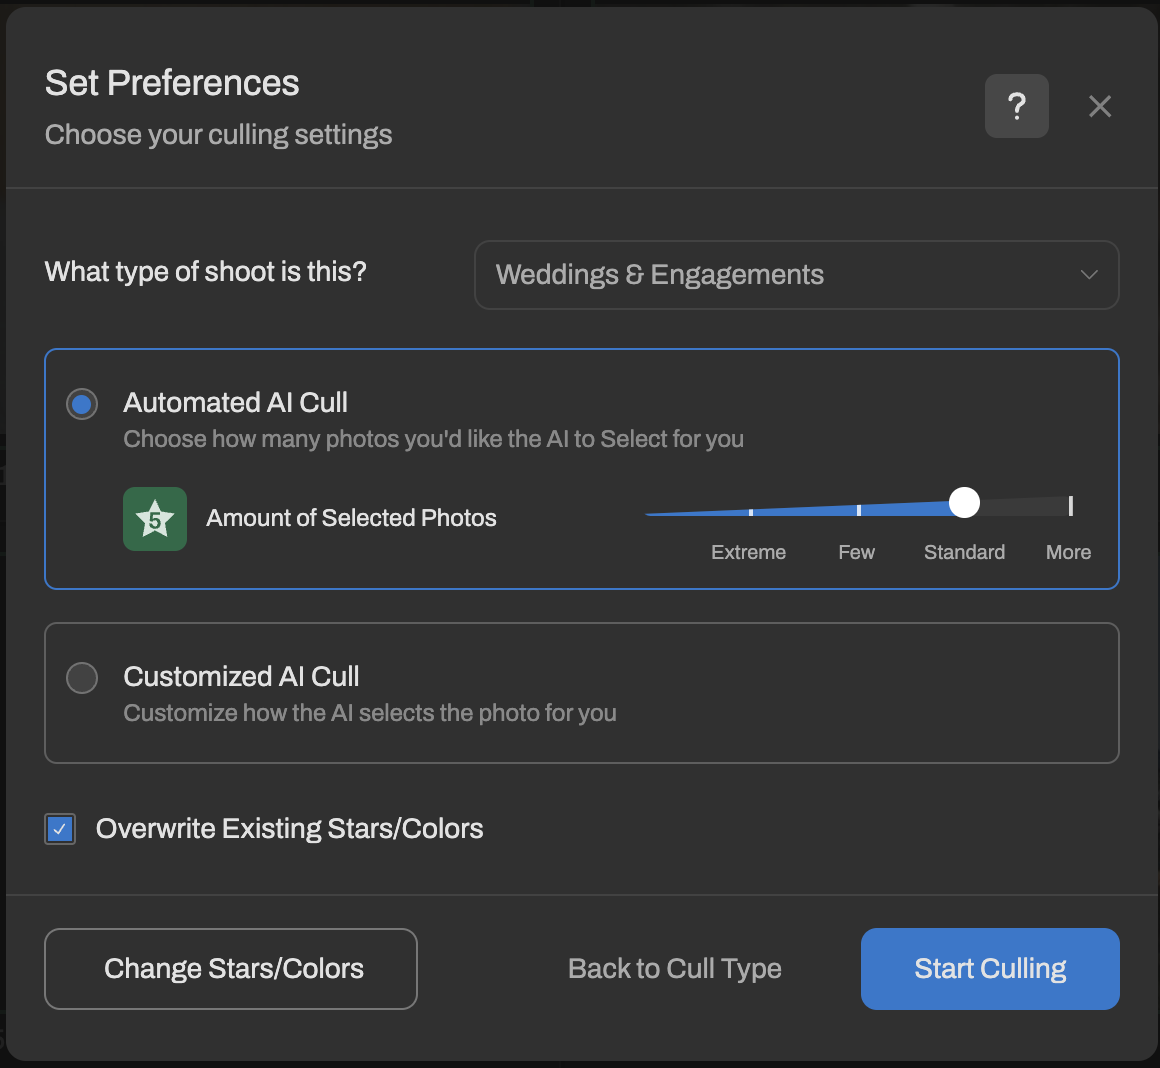
Set Your Culling Preferences
Adjust settings for duplicate grouping, blur detection, and closed-eye detection (with customized AI cull) to tailor the culling process to your needs.
Review and Refine Selections
After Aftershoot completes the initial cull, you always have the final say.
- Utilize Different Views:
- Grid View: Provides an overview of all images for quick assessment.
- Loupe View: Allows detailed examination of individual images.
Survey Mode: Enables side-by-side comparison of similar images.
Step 3: Batch Edit Photos in Your Wedding Editing Style
Once you have selected the images, it is time to edit them in your unique wedding editing style. Aftershoot gives you two options to speed things up while keeping your creative style intact. You can build a Personal AI Editing Profile based on your past edits or use one of the Pre-Built AI Styles available in the marketplace.
Photographer, Kasey, co-owner of Studio Twelve:52, shared her experience:
“We’re never going back to manually culling or applying our base edits again. Aftershoot has been a total game-changer.”
Create a Personal AI Editing Profile
Access AI Profiles:
- Open Aftershoot and navigate to the “AI Profiles” section.
Create a New Profile:
- Click on “Get started” and then “+ New Profile.”
Assign a descriptive name to your profile. - Select the image type (RAW or JPEG) and color type (Color or Black-and-White) corresponding to your editing preferences.

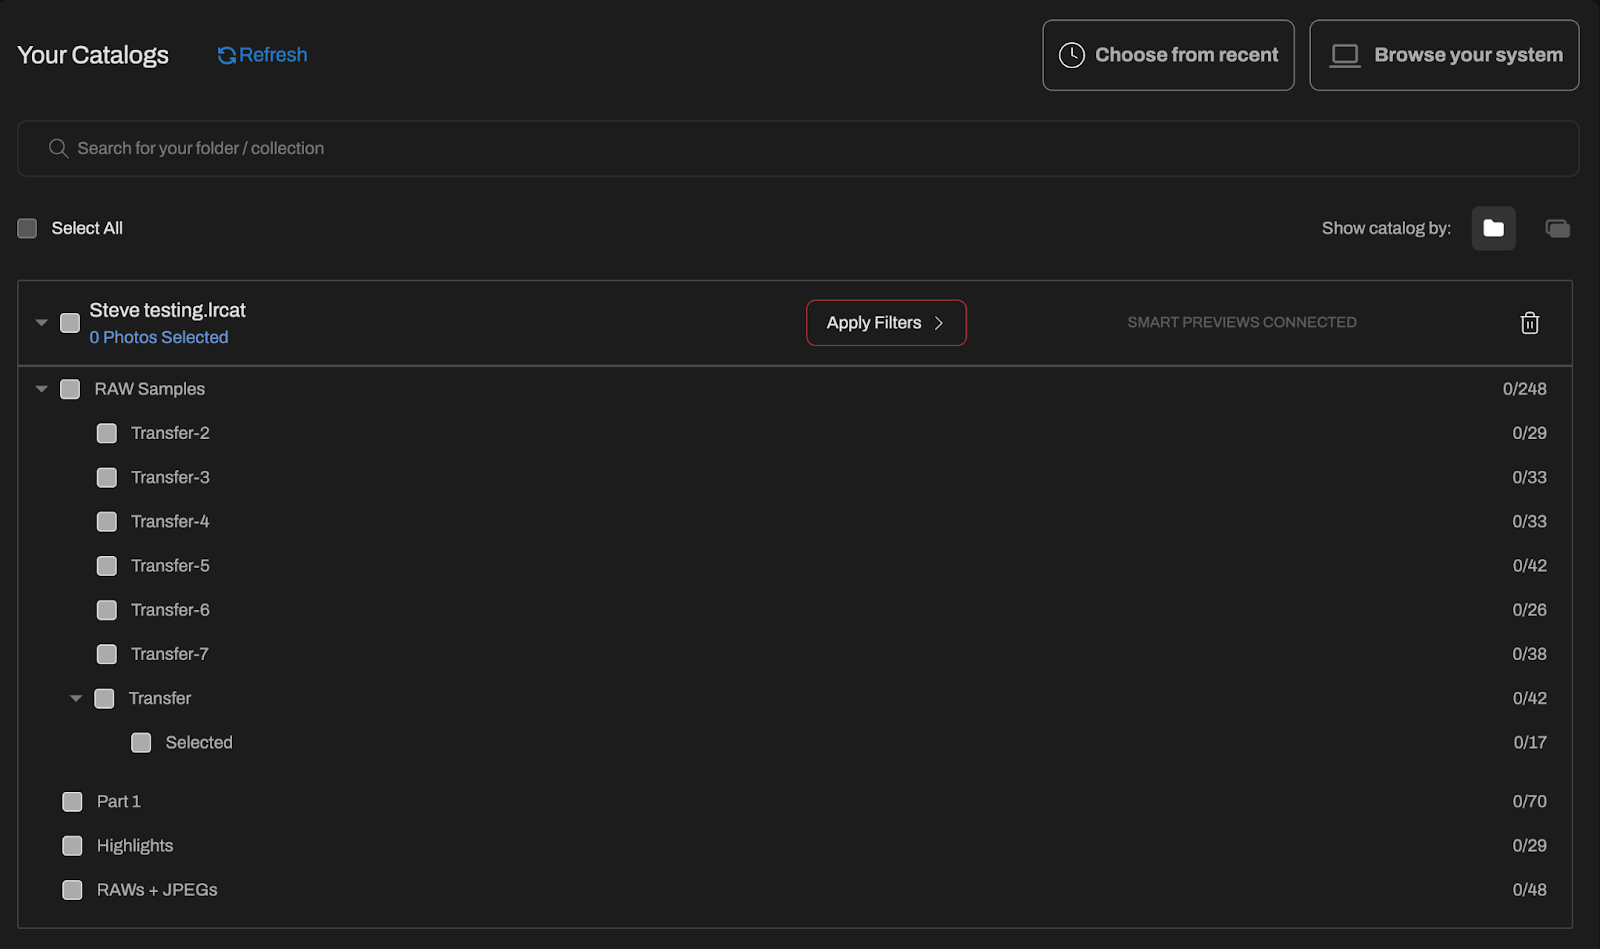
Upload Edited Catalogs:
- Import Lightroom or Capture One catalogs containing at least 2,500 of your previously edited images. This allows Aftershoot to analyze and learn your editing style.
Train the Profile:
- Aftershoot will process the uploaded catalogs to create a profile that mirrors your editing style.
Once trained, this profile can be applied to future projects, ensuring consistency and efficiency in your editing process.
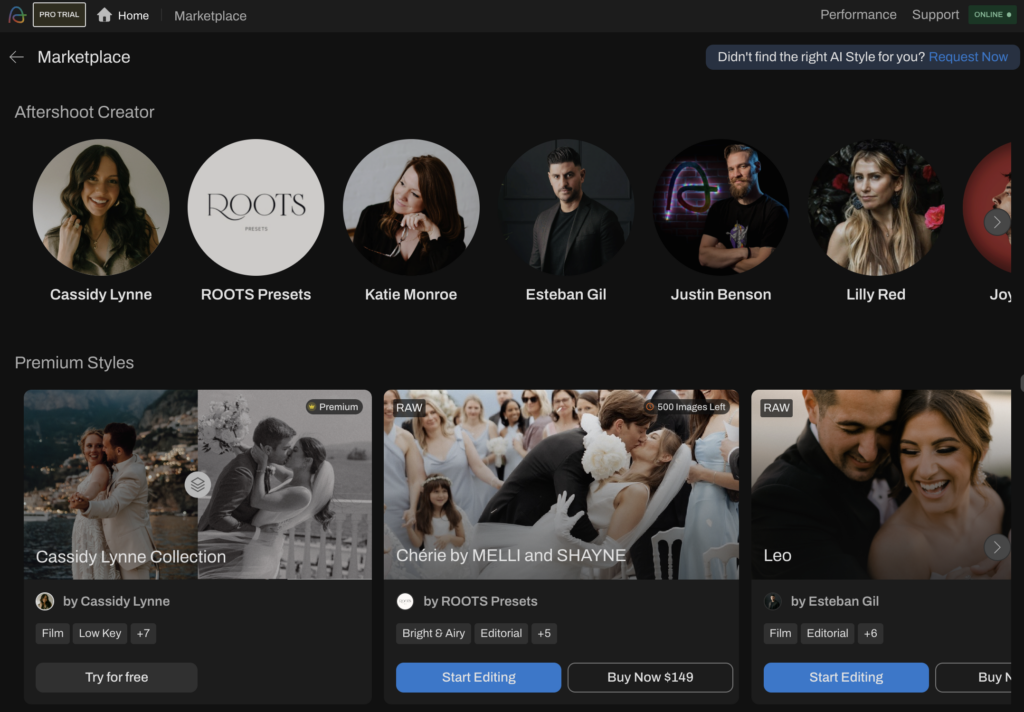
Utilize Pre-Built AI Styles
If you don’t have 2500 images to train your personal profile or wish to experiment with different styles, Aftershoot offers a variety of Pre-Built AI Styles(AI Presets):
Access the Marketplace:
- From Aftershoot’s Home Screen, click ” Marketplace ” at the top left.
If you want to check out the available AI Styles on the marketplace, click the button:
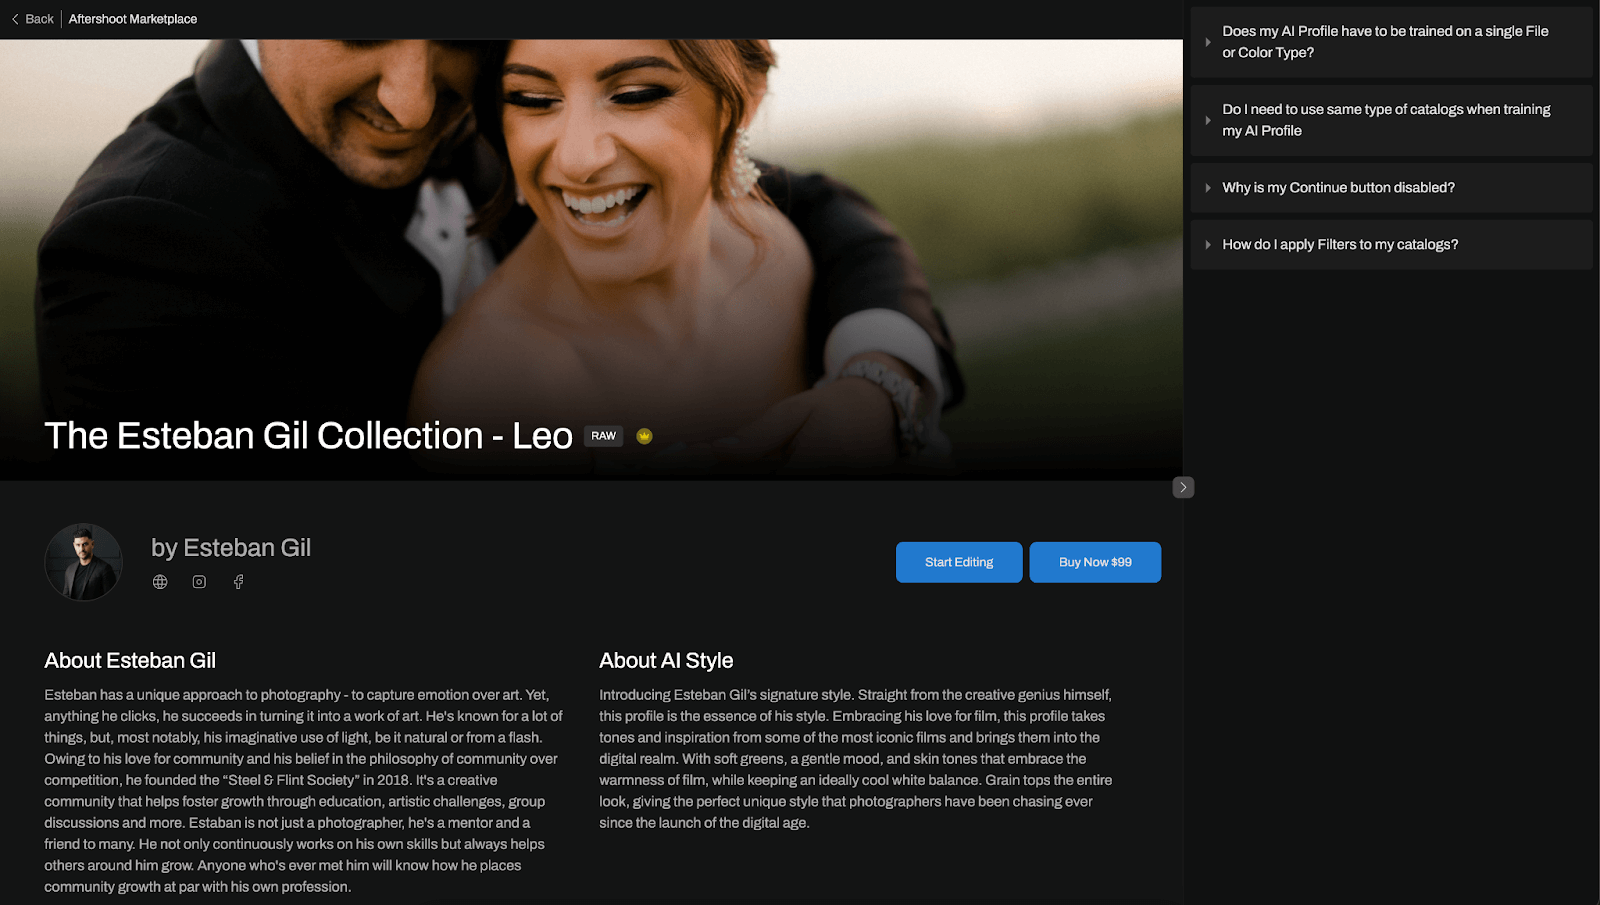
Browse and Download Styles:
- Explore the available AI Styles, which professional photographers curate.
- Click “Download” on a style that aligns with your desired aesthetic.
Apply the AI Style:
- Select the downloaded AI Style and apply it to your images.
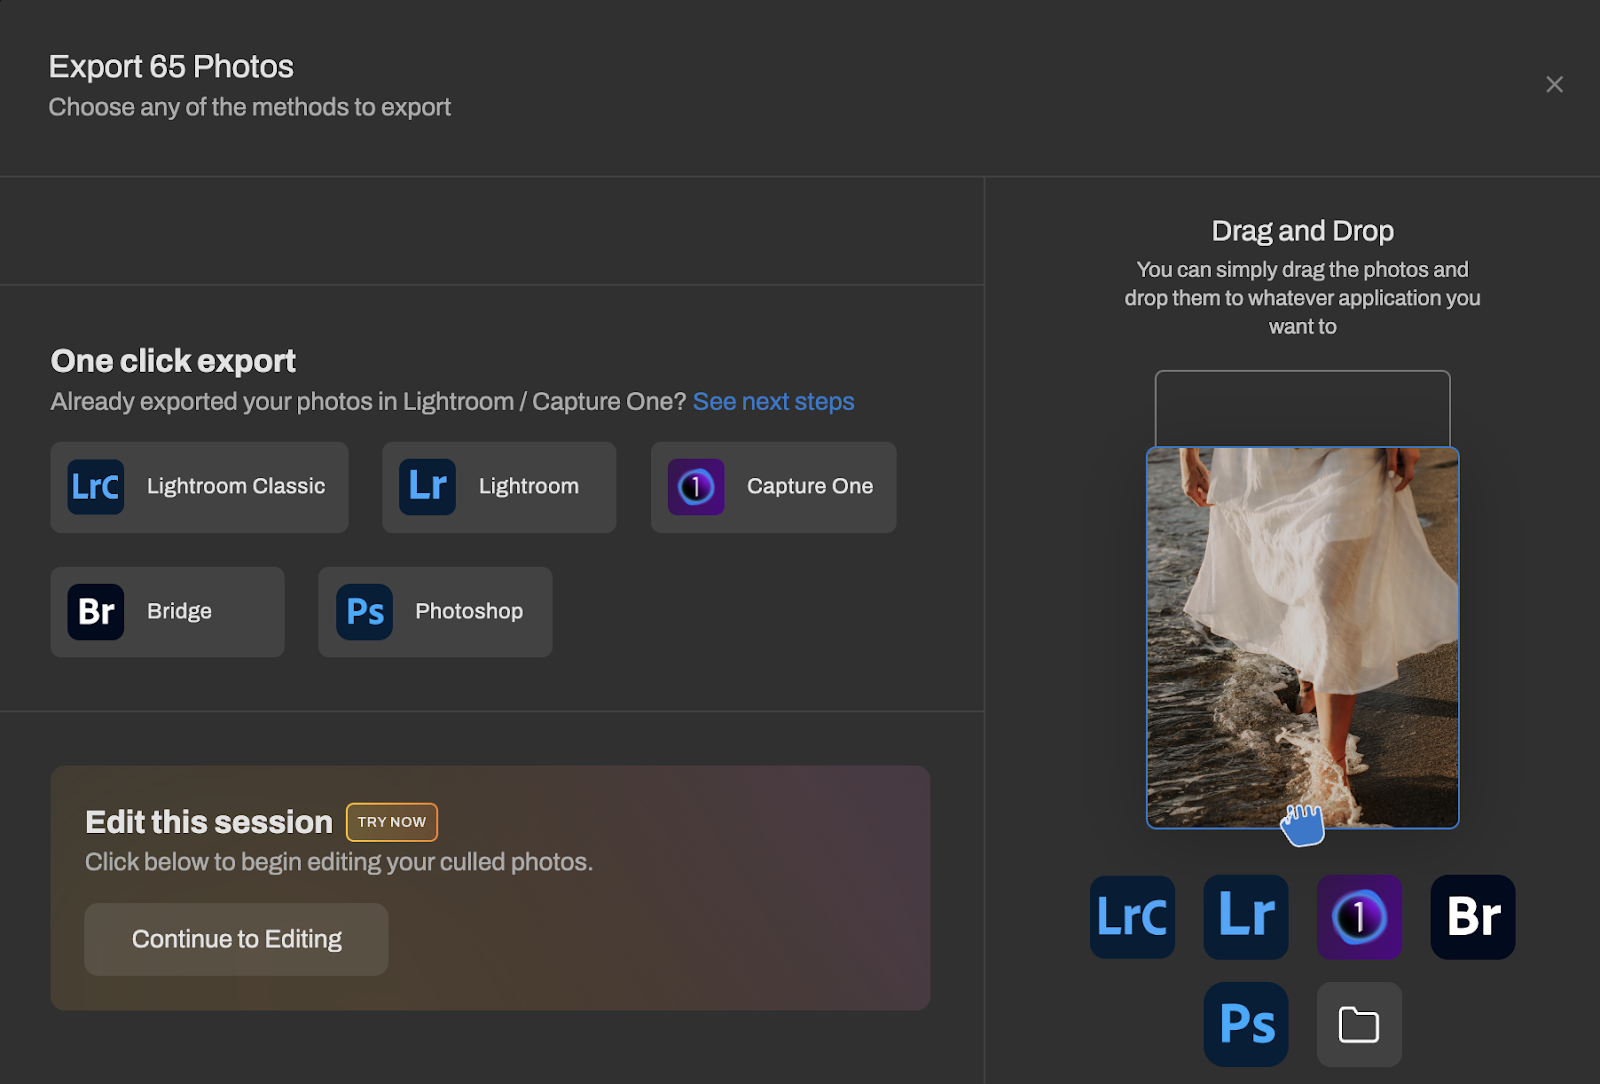
Step 4: Review and Export Edited Images
The last step in your wedding photography editing workflow is getting everything ready to deliver. Whether you export directly from Aftershoot or send files back to Lightroom or Capture One for final tweaks, this step should be fast and clean.
You can export full-size JPEGs, TIFFs, or proofs in batches, making gallery delivery efficient even during busy seasons. If you prefer to fine-tune, Aftershoot preserves your edits when sending files back to your main software.
Step 5: Retouch Your Wedding Portraits
Retouching is the final step in wedding photography editing workflows. Many photographers outsource it, but that adds cost, delays, and limits control. With Aftershoot, you can retouch directly in the app using built-in sliders to smooth skin, enhance features, and remove distractions. It works for both posed portraits and candid shots, with results that stay natural.
Available retouching sliders in Aftershoot include:
- Blemish Removal
- Wrinkle Reduction
- Teeth Whitening
- Skin Smoothing
- Facial Feature Enhancement
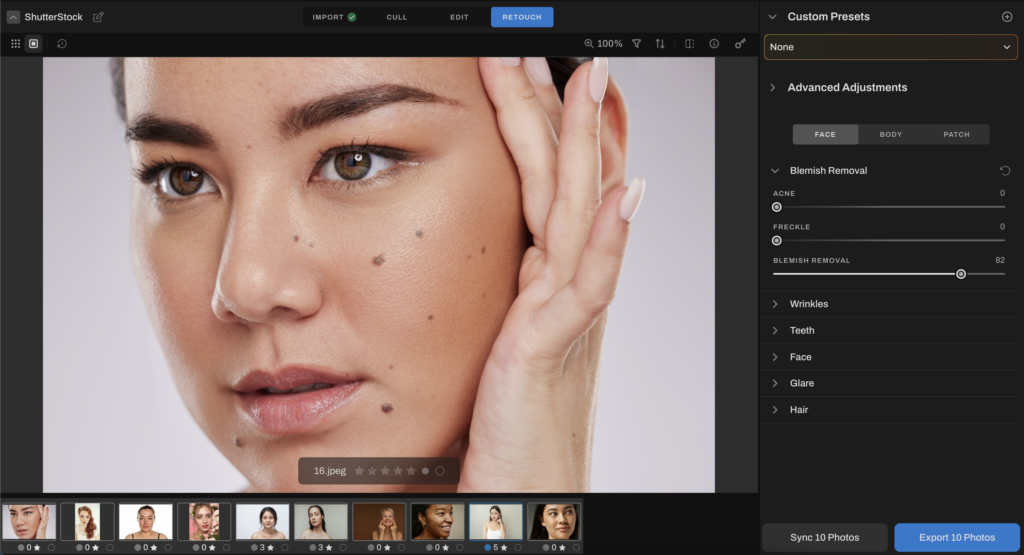
Note: Retouching currently works with JPEG images only.
Want a closer look at how retouching works inside Aftershoot? This guide walks you through the full process, from accessing Loupe View to applying each slider.
Edit Smarter, Deliver Faster with Aftershoot
You got into wedding photography to tell stories, not to spend your nights sorting duplicates, adjusting white balance, or endlessly cloning out blemishes. With the right photo editing workflow in place, editing becomes just another part of the creative process, not a time trap.
Wedding photographers can benefit from using Aftershoot to streamline their workflows. From import to culling, editing, and delivery, each step of the wedding photography editing workflow can be faster, more consistent, and still 100% yours. With AI handling the repetitive tasks and learning your personal style, you’re free to focus on what matters most: the storytelling, the growth, the clients who trust your eye.
And the best part? You always have the final say.
Ready to speed up your wedding editing workflow? Try Aftershoot free for 30 days and see it for yourself!