When you’ve just come home from a weekend spent on your feet clicking pictures and running about trying to capture all the good moments for your clients, the last thing you probably want to think of is the 5000 or so pictures waiting for you to sort through.
The dreaded culling monster looms over all photographers who just want to enjoy their craft and take pictures. Manual photo culling takes time and a heck lot of patience, delays delivery (especially during busy seasons!), eats into valuable editing time, and can even impact your ability to take on more clients or simply enjoy life outside of your business.
Thankfully, in the last few years, photographers have stopped spending hours and days manually sifting through near-identical shots and started relying on technology to speed up the task.
In this article, we’ll dig deeper into the tools available for photographers to speed up their culling workflow. Mainly, we will be talking about how the traditional method of culling, using Adobe Lightroom to manually cull photos, compares with the new way using AI-powered culling tools like Aftershoot.
Want to see it in action? Take this 3-minute self-paced, interactive product tour:
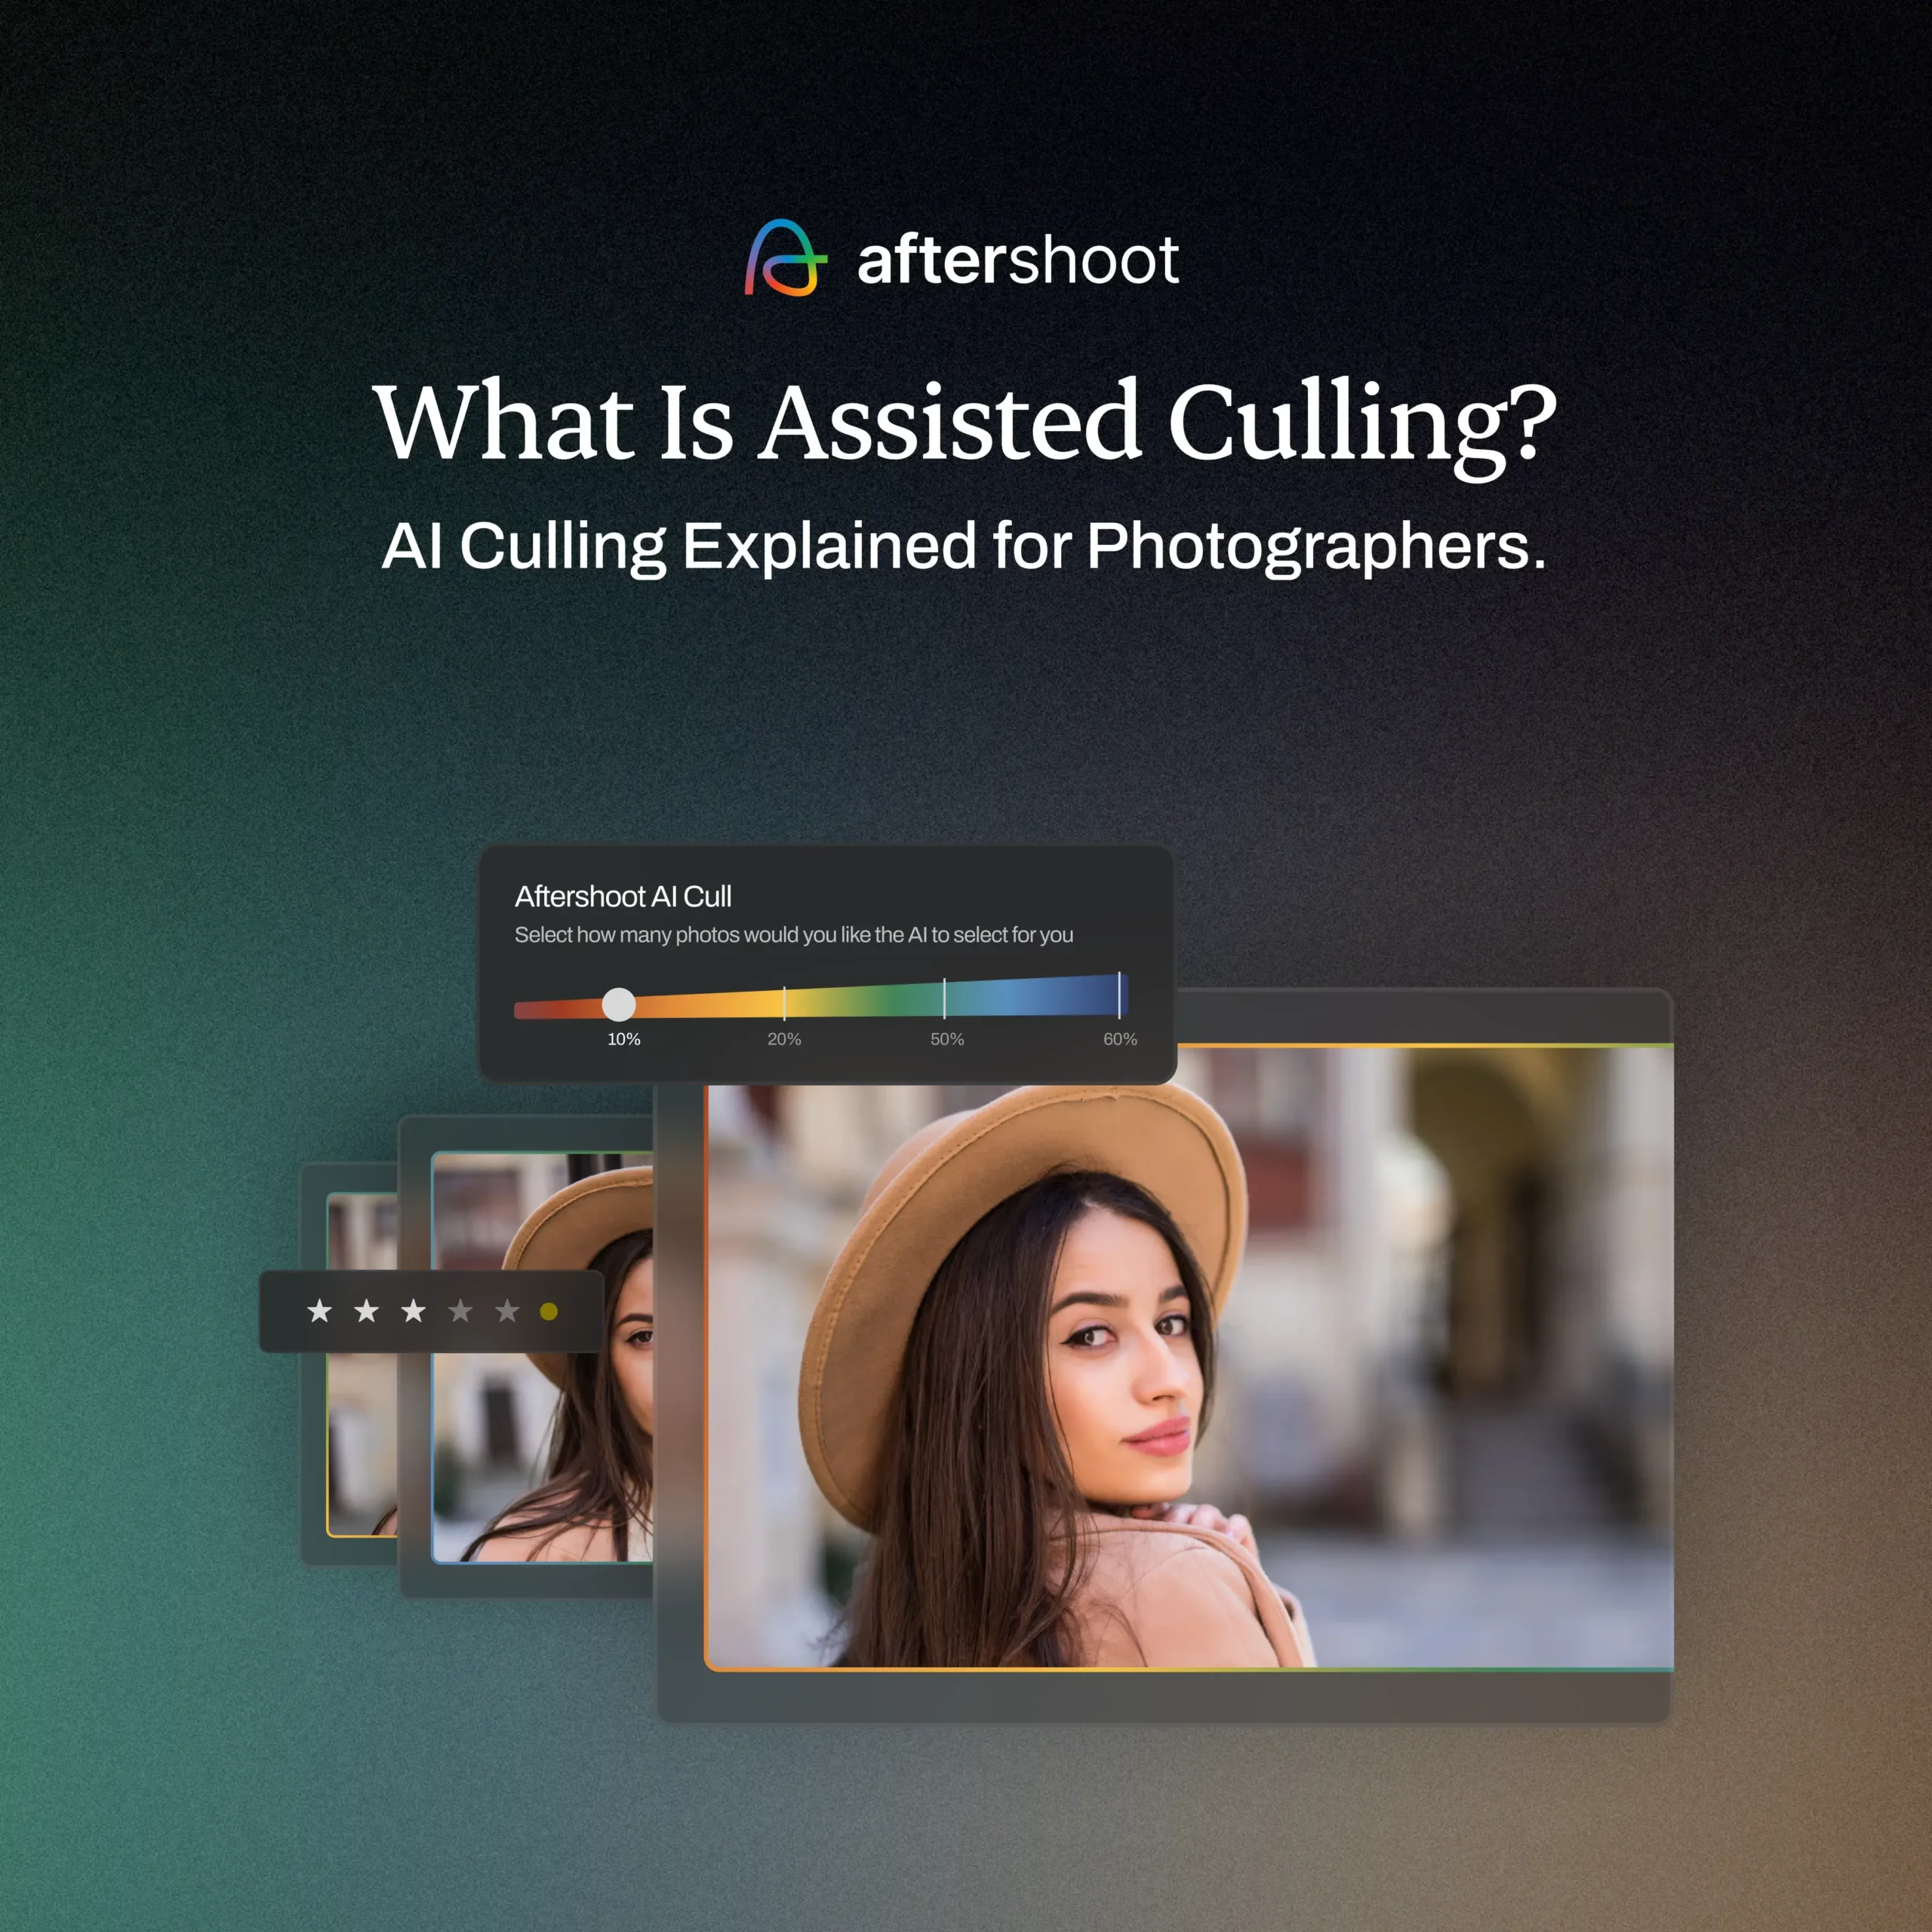
What is AI Culling?
AI culling is the smart use of artificial intelligence to speed up the often painstaking process of selecting the best images from a photoshoot.
These intelligent tools analyze various aspects of your photos, such as sharpness, composition, exposure, closed eyes, and your own culling preferences, to filter out the weaker shots, group duplicates, and highlight the winners.
In fact, Aftershoot also flags blurry images or ones with closed eyes, in case those were creative decisions instead of accidents. It allows for these kinds of decisions based on smart genre selection before you begin culling, which understands the difference between closed eyes in a kissing shot at a wedding versus in a portrait photoshoot. This kind of AI-assisted culling saves significant time for busy photographers, boosts workflow efficiency, and even learns your unique culling preferences over time.
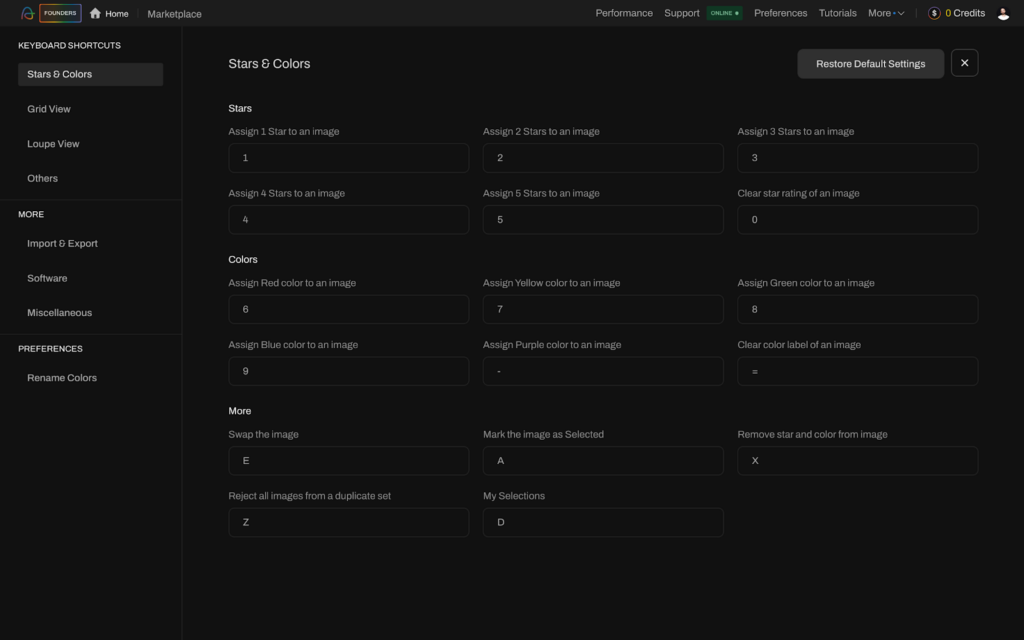
Additionally, photographers can always choose to use tools like Aftershoot, with its intuitive interface, to cull manually if they prefer. Aftershoot offers three different view formats to make culling easier — Loupe view, Grid view, and Survey view. Besides that, there are various keyboard shortcuts such as using the S key to swap an image with a duplicate, the A key to mark an image as Selected, the X key to clear its Star Rating and Color Label, and more.
“Aftershoot has been a game changer for me. It’s like my very reliable assistant that takes care of 70% of my workload.”
Here’s a quick step-by-step guide on how to optimize your photo culling workflow with AI.
What is Lightroom Culling?
Traditionally, photographers have always used Adobe’s suite of tools to cull and edit photos. This primarily involves Lightroom but also often includes Photoshop for advanced editing and retouching.
Adobe Lightroom offers a comprehensive, though tedious, culling workflow for photographers. The process typically looks like this:
- Photographers import images,
- Manually do a quick first pass to flag the rejects,
- Then do a more thorough cull using star ratings, labels, and flags to mark and categorize them for selection or rejection, to use in your portfolio or client previews, and more.
Pro photographers usually have their own process and set of tools to help make this process more efficient, such as a labeling system during various stages of culling. Lightroom also offers two different views, Grid view for an overview or Loupe view for a closer inspection, to help photographers select through their images.
Mastering keyboard shortcuts is key for an efficient manual culling process: press ‘P’ or ‘X’ to pick or reject pictures; C to toggle to Compare view and evaluate shots side-by-side; arrow keys for navigation; 1-5 for star rating and 6-9 for color labels, and more.
Learn more about how to cull photos in Lightroom with our comprehensive guide.

AI Culling vs Lr Culling: The Ultimate Face-Off
Now that you know what each of the two culling processes typically looks like, it’s time to figure out what works for YOU. After all, what’s best for one photographer doesn’t necessarily mean it’ll offer the same value to another.
Lr Culling
AI Culling
Let’s break down the key differences between AI culling and Lightroom culling across several important parameters:
Speed & Efficiency
The most striking difference lies in speed. AI culling tools like Aftershoot can process thousands of images in minutes, a task that would take hours to complete manually in Lightroom.
Fun fact: In 2024, Aftershoot helped 200k+ photographers save 13.8M+ hours of time and helped process a whopping 5.4 BILLION images. That’s 575k days returned to creativity, family, and growth!
For photographers dealing with high-volume shoots like weddings or events, this time-saving can make the difference between delivering a batch of photos this week or getting buried under 4 different photoshoots that require culling in the same month.
On the other hand, for photographers who click fewer pictures per photoshoot and focus more on the creative composition of each photo, Lightroom might be their preferred option as it offers complete control during the cull and manual culling might be faster if the types of photos are varied.
Accuracy & Selection Quality
AI excels at identifying technically flawed images, consistently detecting issues like blur, poor exposure, and closed eyes. However, the ability of AI to select the “best” images from an artistic perspective is still evolving.
Tools like Aftershoot offer genre selection, with each genre trained on a specific set of images to identify what makes for the best shots. Still, while AI can learn your preferences, some photographers prefer the complete manual control of Lightroom to make nuanced artistic and emotional choices.
Many find a hybrid approach, using AI for the initial cull and then manually refining the selection, to be the most effective.
Customization & User Control
AI culling tools like Aftershoot offer a good degree of customization, allowing photographers to adjust parameters for strictness, handling of blur, closed eyes, and duplicates. While AI makes the first call, you always have the option to override its decisions during your manual review after the initial cull. You have the option to switch between views, such as Loupe view, Grid view, and Survey mode, to refine your cull. As you cull more with AI, it learns your preferences and style, helping you tailor the AI’s behavior to your specific needs.
Of course, while Aftershoot offers AI culling, some photographers also like to take advantage of the easy to use interface to manually cull on their own — with full control over their culling decisions.
Lightroom’s culling is fully manual, offering ultimate control so you can call the shots yourself from beginning to end. There’s also room for as much customization as you need in terms of tools and shortcuts (like how Sam Hurd uses a game controller in his own workflow!) which can help you make your process more effective.
Learning Curve & Ease of Use
AI culling tools are generally designed to be user-friendly with intuitive interfaces. The automation can be particularly helpful for beginners or those wanting a streamlined workflow, as mastering efficient manual culling can take time and practice.
On the other hand, photographers who are already familiar with Lightroom will probably find it more comfortable to build their workflow within its environment even if it takes them a little longer.
Cost & Accessibility
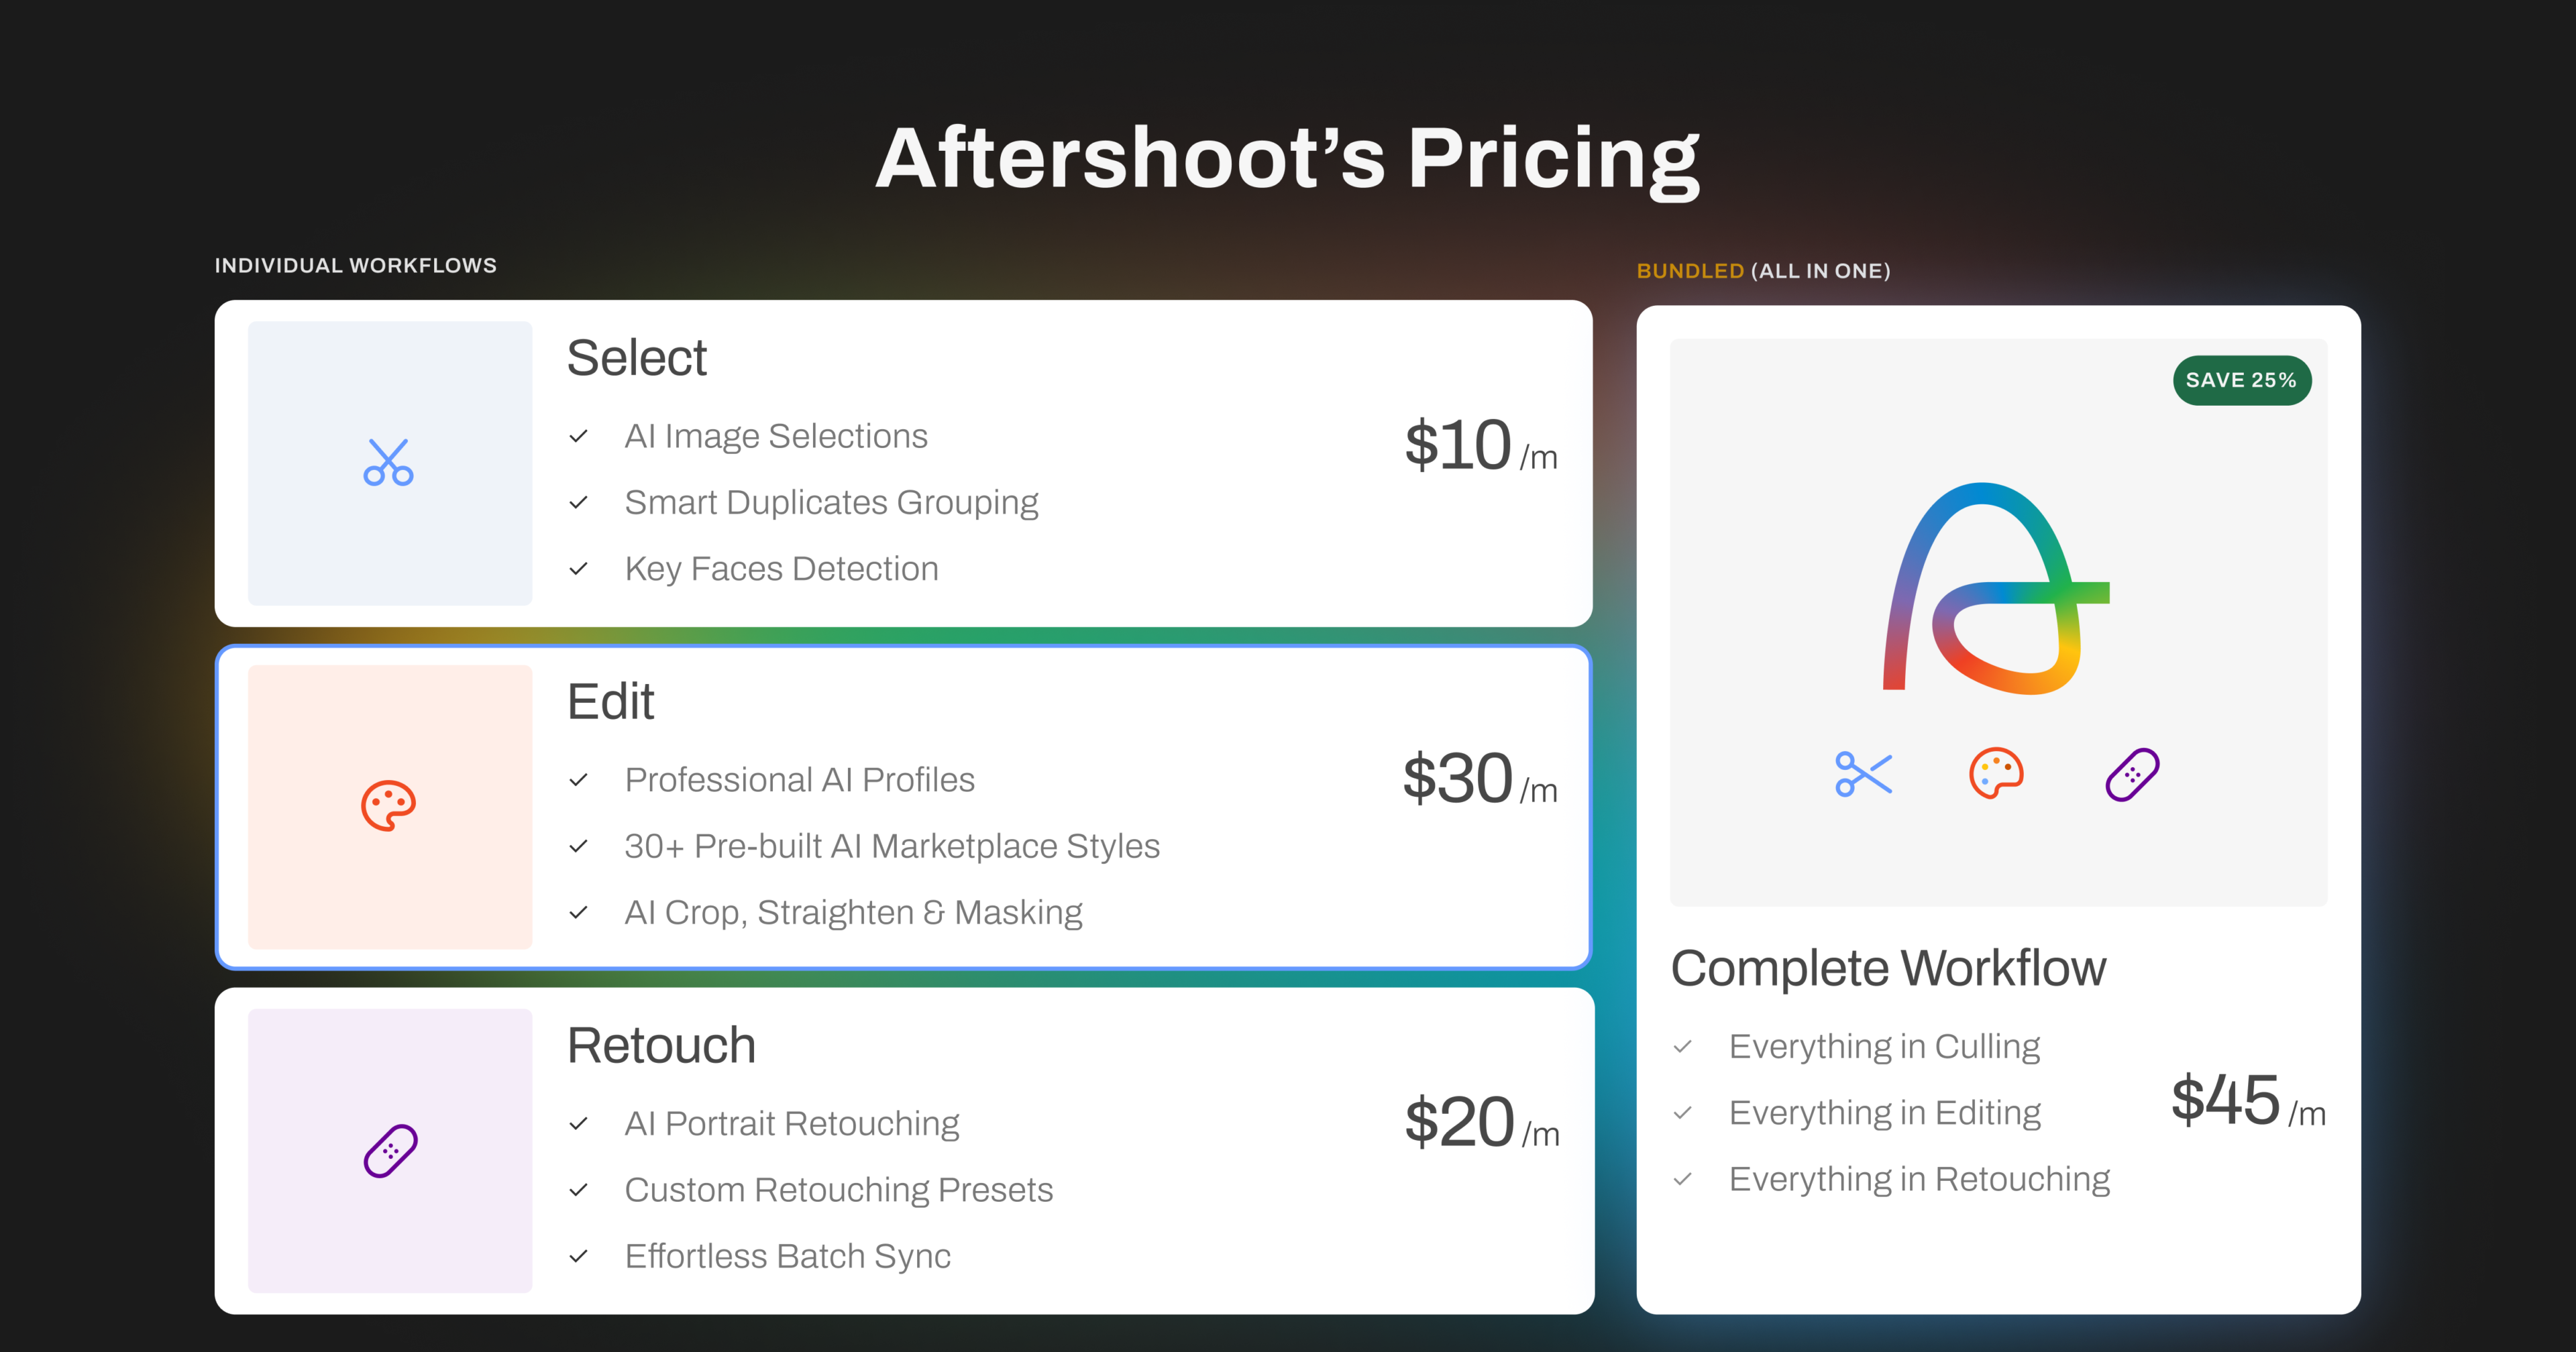
AI culling tools typically operate on subscription models with various pricing tiers. Aftershoot offers various flexible pricing models based on photographers’ needs, starting at just $10/month for the Select (culling-only) annual plan, with both annual and monthly billing available.
The Complete (Select + Edit + Retouch) bundle comes in at $45/mo (annual) or $55/mo (monthly) – a 25% saving over individual modules.
Lightroom, on the other hand, is usually available as part of an Adobe Creative Cloud subscription at 60 USD per month, under the Photography plan with Photoshop at 20 USD per month, or as a standalone subscription for 12 USD per month.
The crucial factor for photographers is to evaluate whether the investment in a separate AI tool translates to tangible time and cost savings, ultimately boosting their revenue potential.
Consider a wedding photographer who might spend an average of 5-10 hours culling images from a single wedding. If an AI culling tool can reduce this time to just 1-2 hours, it frees up a significant 4-8 hours per shoot. This saved time can be reinvested in various ways, such as editing, client communication, marketing, or even taking on additional clients.
Fun fact: Just last year, Aftershoot saved an average of 102 hours (that’s 12.5 working days!) per user, processing over 59K images per photographer.
Let’s illustrate the potential impact on revenue. If a photographer charges an average of $100 per hour for their time (considering editing, admin, etc.), saving 4-8 hours per wedding translates to a potential saving of $400-$800 per wedding. For photographers shooting multiple weddings a month, these savings can quickly add up, making the monthly subscription cost of an AI tool a worthwhile investment.
To further illustrate the value, let’s consider a break-even point. If an AI tool saves a photographer approximately 10 hours per month in culling time, and their effective hourly rate is $50, this translates to a potential value of $500 per month. In this scenario, even the highest tier subscription of most AI culling tools would likely pay for itself within a short period, especially when considering the increased capacity to handle more clients due to the time saved. This allows photographers to scale their business and increase their overall revenue.

Additionally, for photographers who prefer manual culling, an AI tool like Aftershoot allows you to cull both manually and with AI as you need, when you need it, all within a single subscription and app.
“Aftershoot gave me my life back!” says Lizz Krobath. “It’s a dream come true for everyone who spent endless nights and days culling and editing thousands of pictures manually. As a wedding photographer who shoots around 30-50 weddings a year, this software is like a gift from heaven. It was super easy to integrate into my workflow. It saves me like 70% of the time I’ve spent culling & editing before. And since it’s super easy to use, it wasn’t a big deal to really ‘learn’ how to use it properly. The results are amazing and the AI learns super fast. Some pictures even look better than my manual version of edits.”
Real-World Performance Metrics
| Manual Culling | AI Culling with Aftershoot | |
| Processing time (for 5,000 images) | 2-3 hours or more | Under 10-15 minutes |
| Technical accuracy | Variable upon decision fatigue and bias. Higher accuracy for experienced photographers vs beginners. | Consistently high, since it involves automated cull followed by manual review |
| Mental fatigue | Significant | Minimal |
| Customization | Manual workflows, so you have full control | Personalised workflows. AI learns your preferences over time while you retain control of the final decisions |
| Ease of use | Significant learning curve | Even beginners can get started immediately |
AI vs Lightroom: What Is the Best Way to Cull Photos?
The best choice depends on your individual needs and workflow. If you’re a high-volume photographer who values speed and efficiency above all else, AI culling with a tool like Aftershoot is likely the better choice. The time saved can be reinvested in your business or personal life.
“I have spent the last 3.5 years doing everything manually. I then shot a 14-hour wedding, two shooters, and we had 12,000+ images. I sat there that night reeling about how I was going to cull them. So I finally decided to try Aftershoot after seeing it on all of my socials and seeing other photographers talking about it. I was able to deliver a 110 image sneak the next morning. I would have never been able to do that without Aftershoot.
Aftershoot saved me so much time during my busy season. I had 3 weddings to edit, Christmas minis, school pictures… I was drowning and this software threw me a floatation device. I love this software and will continue being a user as long as it is offered!”
If you prefer complete control over every image selection and handle smaller volumes of work, Lightroom’s manual culling might be the way to go. However, depending on your needs and workload, even Lightroom users can benefit from incorporating AI culling for the initial pass to quickly eliminate technical rejects.
When to Choose AI Culling
- High-volume photography (weddings, events, portraits)
- Seeking workflow optimization
- Limited post-processing time
- Desire for consistent results
When to Stick with Lightroom Culling
- Small, intimate shoots
- Highly specialized artistic work
- Preference for complete manual control
- Limited budget for additional tools
“Genuinely can’t imagine going back to life before Aftershoot – my hard drives are happier, my eyeballs are less fried, and I’ve got time to do wild things like see my family. Five stars. Would give it six if it also did my taxes. Also – their support is crazy good!”
— Dave
Addressing Common Concerns Around AI Culling
While some skepticism around AI use is valid, there are also a lot of misconceptions floating around. If you, like many other photographers, are worried using AI will mean a lack of control or compromising on your artistic vision, then let us help you set your mind at ease.
- “Does AI make mistakes or lack precision?”
While AI algorithms are highly advanced, they aren’t perfect. However, AI culling tools like Aftershoot are designed to provide suggestions, and you always have the final say. You can easily review and adjust the AI’s selections as per your needs. The more you use an AI tool, the better you can slowly train it to adapt to your own style and preferences.
- “Can AI replace a photographer’s eye?”
No, AI is a tool to assist, not replace, your artistic judgment. It excels at the technical aspects, freeing you to focus on the creative and emotional nuances of your images.
- “Will I lose control over my selections?”
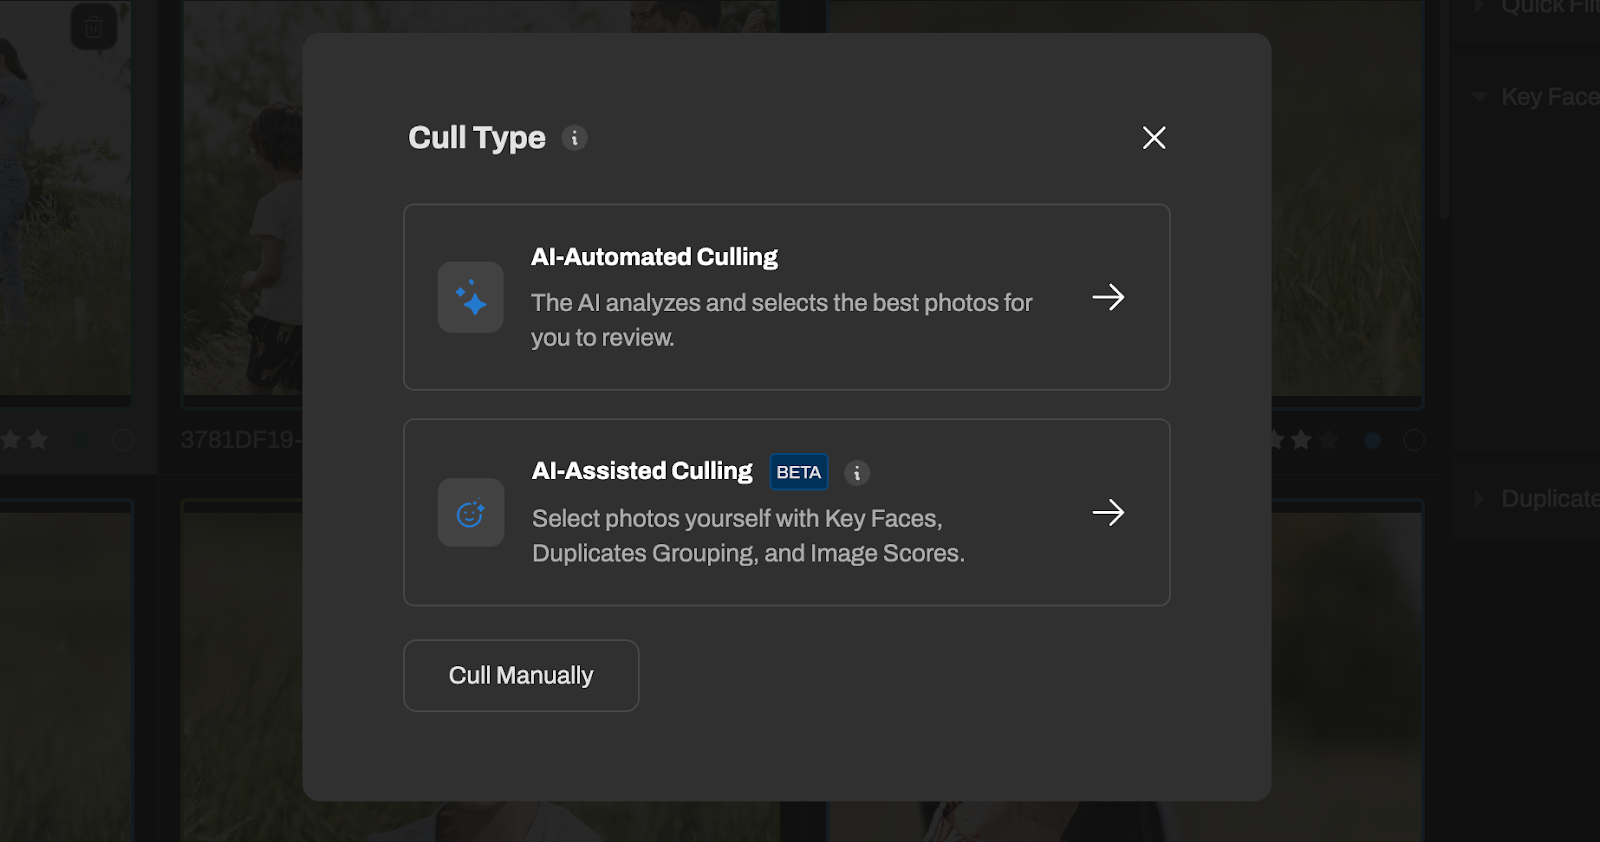
AI culling tools like Aftershoot offer various levels of automation, such as AI-automated vs AI-assisted modes, to tailor the amount of AI involvement in your cull. The final choice lies with you, so you always retain complete control. You can also customize the AI’s settings to align with your preferences.
“After years of avoiding AI, I gave Aftershoot a shot (pun intended), and now I’m regularly patting my past self on the back. It’s incredibly easy to use and fits seamlessly into my workflow, saving me a ton of time.”
— Kim
Transform Your Photography Workflow
Using AI in your workflows is a strategic business decision. Speed and efficiency are key to standing out as a photographer today, to provide a client experience that feels effortless. And by reducing administrative time, you can focus on what truly matters: enjoying your craft and expanding your business.
Besides that, while today this speed will help you become faster than the competition, the day isn’t far when it actually becomes an industry standard.
Ready to transform your post-processing workflow? Try Aftershoot for free and experience the future of efficient, intelligent photo culling!