Using Keyboard Shortcuts in Aftershoot
AfterShoot is the solution to all your culling problems.
We speed up your workflow and help you take back hours in your day!
Keyboard shortcuts are keys or key combinations that help you perform a variety of different tasks.
To help you speed up your culling workflow even more we have created a vast amount of Keyboard Shortcuts that you can utilise within AfterShoot!
In this brief tutorial, we will present some of AfterShoot’s helpful Keyboard Shortcuts.
Using Keyboard Shortcuts in the Grid View
Once AfterShot has completed the culling process, you are presented with the Result Grid which allows you make changes to the selections if needed.
While you can use your mouse to make these changes, you can also use keyboard shortcuts!
A screenshot showcasing the possible Keyboard Shortcuts for changing the Star Ratings
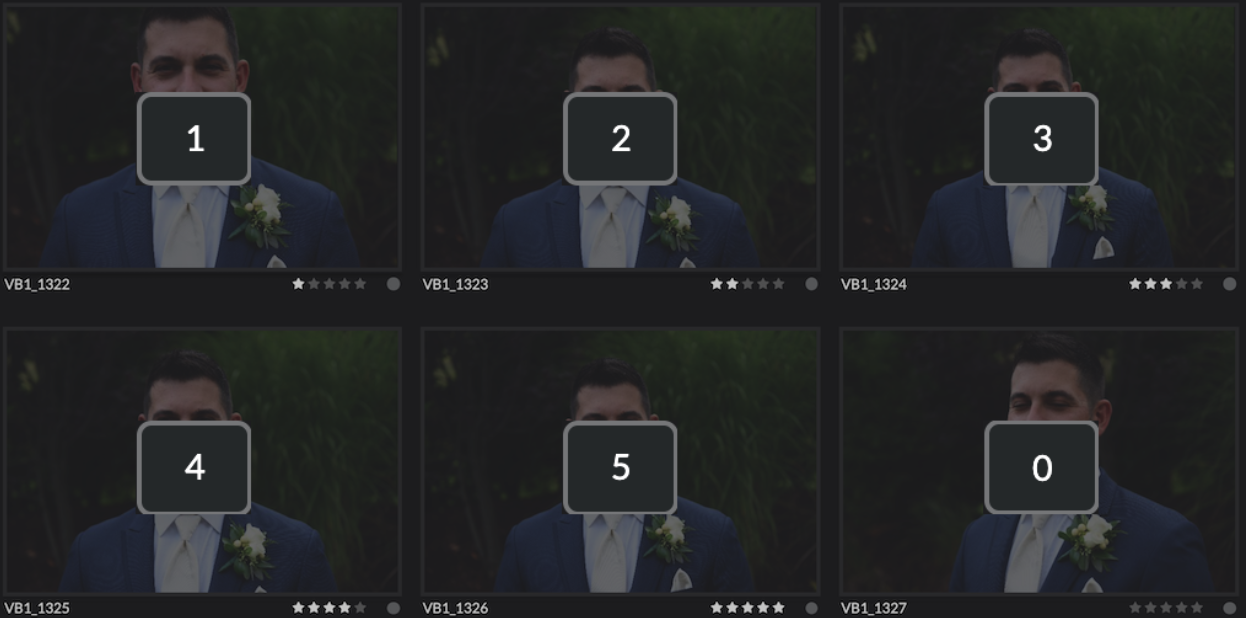
To toggle between the Stars, you can use the following keys:
“1” to mark an image with 1 star
“2” to mark an image with 2 star
“3” to mark an image with 3 star
“4” to mark an image with 4 star
“5” to mark an image with 5 star
“0” to clear the star rating of the image
Similarly, AfterShoot also has options to change the Color Labels from the Grid View as well!
We have another screenshot showcasing the keyboard shortcuts that let you do so.
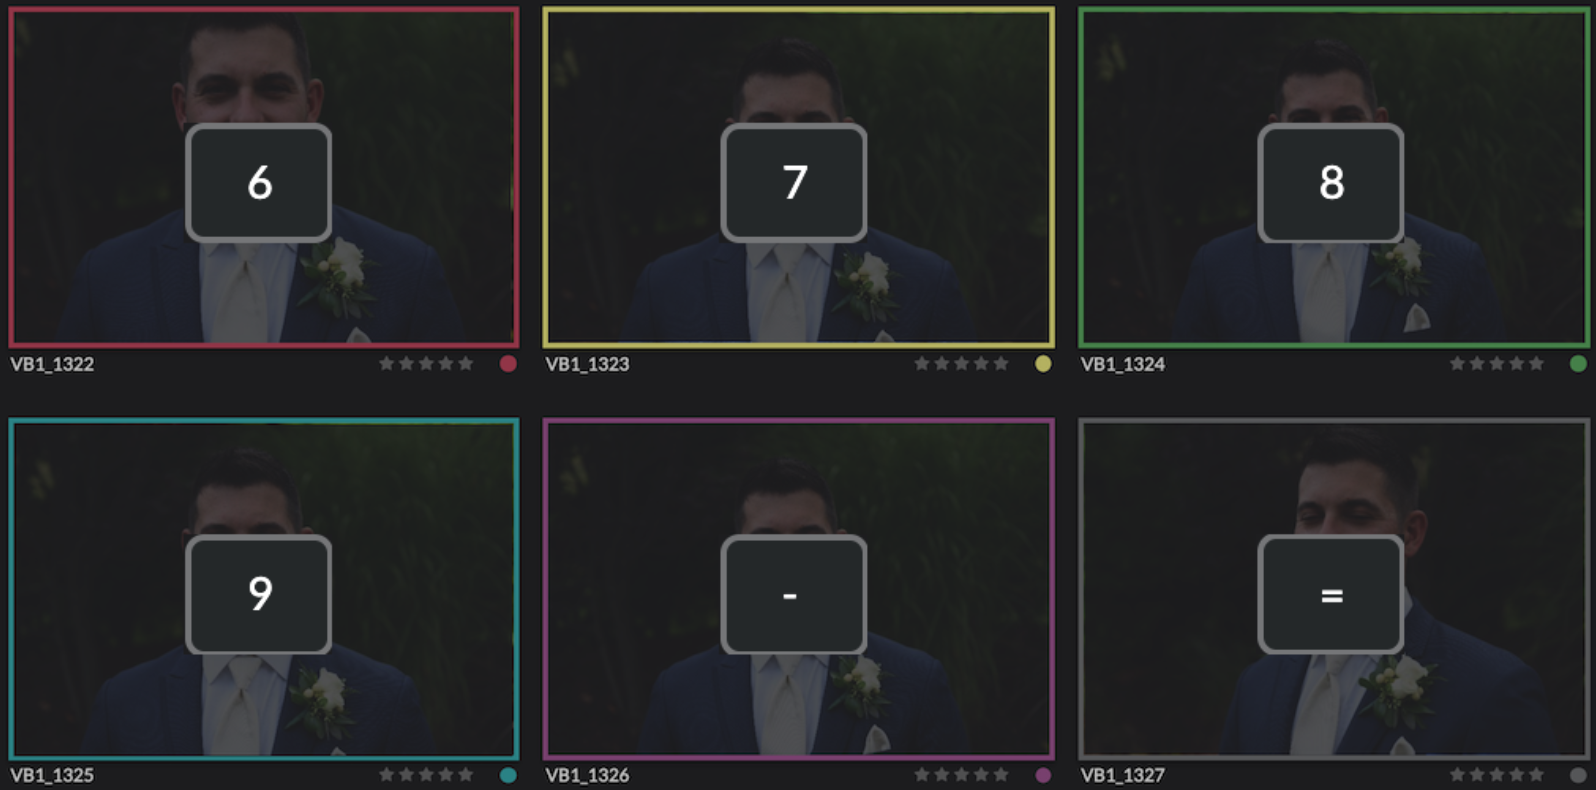
To toggle between the available colors, you can use the following keys:
“6” to mark the image with Red Color
“7” to mark the image with Yellow Color
“8” to mark the image with Green Color Label
“9” to mark the image with Blue Color Label
“-” to mark the image with Purple Color Label
“=” to Clear the color label of the image
Using Keyboard shortcuts in Loupe View
While Grid View gives you a brief overview of your results, you can double click on an image to enter the Loupe View which will give you more details about the image.
You will also be provided with quick options to reject an image or select an alternate image.
There are 4 main components to the Loupe View: The main Image (1), Filmstrip at the bottom (2), Key Faces (3) and Similar Images (4).
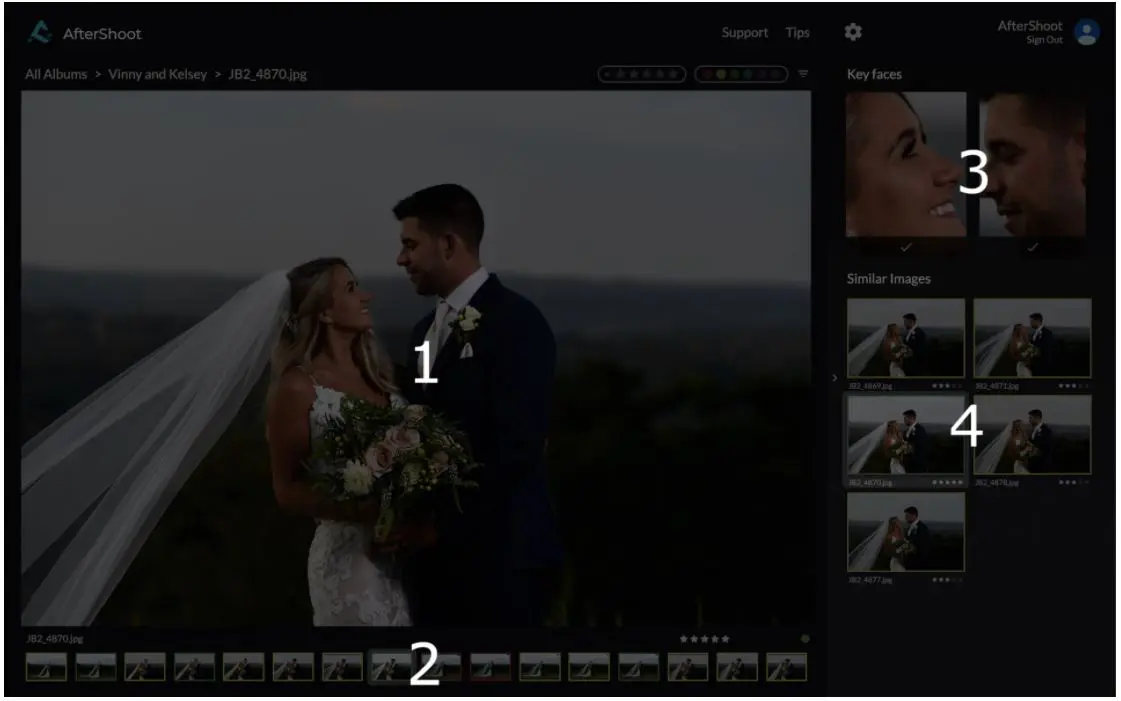
Let’s cover the keyboard shortcuts that are associated with each of the sections one by one.
Main Image
You can press the Space Key to zoom in or out in the Main Image.
Similar to the Result Grid, you can use the same keyboard shortcuts to change the color and star for the image that’s currently shown.
Film Strip
While in the Film Strip, you can keep pressing the next or previous arrow key to quickly scroll through the images
Pressing and holding the Next/Prev key automatically moves through the Film Strip thereby Super-Scrolling through it!
Key Faces
For an image that has Key Faces shown in the right, you can either click on the faces to directly zoom the main image straight to that face. You can also press Alt + Next Arrow or Alt + Prev Arrow to scroll between the faces present in the image.
This lets you inspect each face more closely for any potential issues.
Similar Images
For an image that has Similar Images shown in the right, you can click on a similar image to show that as the main image.
You can also press Cmd + Next Arrow (or Ctrl + Next Arrow on Windows) or Cmd + Prev Arrow (or Ctrl + Prev Arrow on Windows) to scroll through the similar images.
Once you have a similar image shown as the main image, you can use the keyboard shortcuts to change the color or star rating of this image to mark it as a keeper/reject.
You can also press the Escape Key (Esc) to move back to the previous screen at any time in the app.
Changing the keyboard shortcuts
Everyone’s workflow is unique. To ensure that AfterShoot doesn’t interfere with your workflow in any way, we offer full customization to the keyboard shortcuts we just covered above.
To do so, you can head over to the Preferences (or Settings in Windows) screen of the app where you have the option to change these shortcuts.
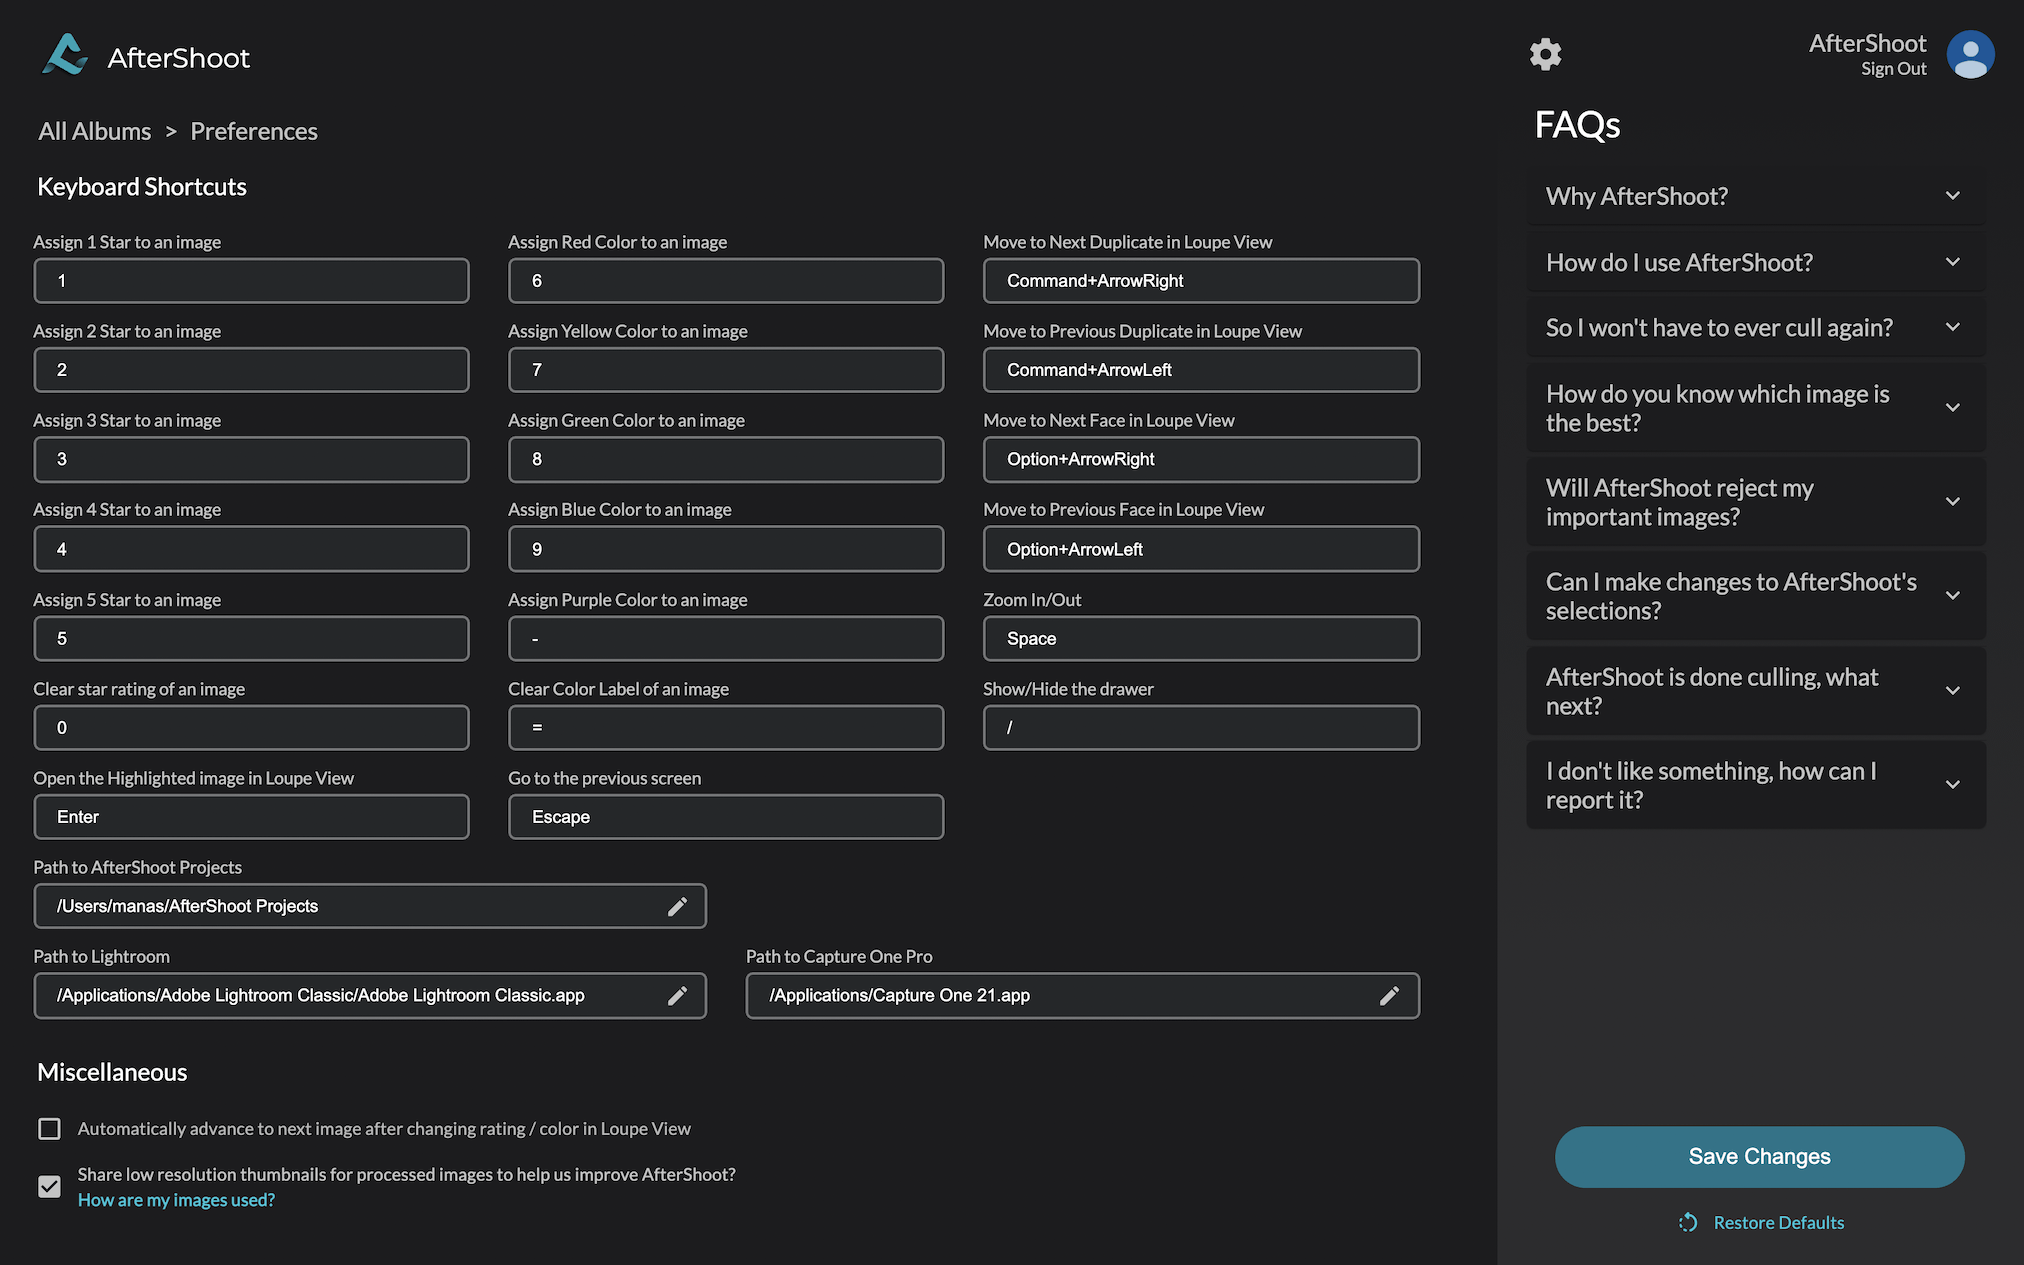
To Change a keyboard shortcut, click on it and assign an alternate shortcut than the one that’s already assigned to it.
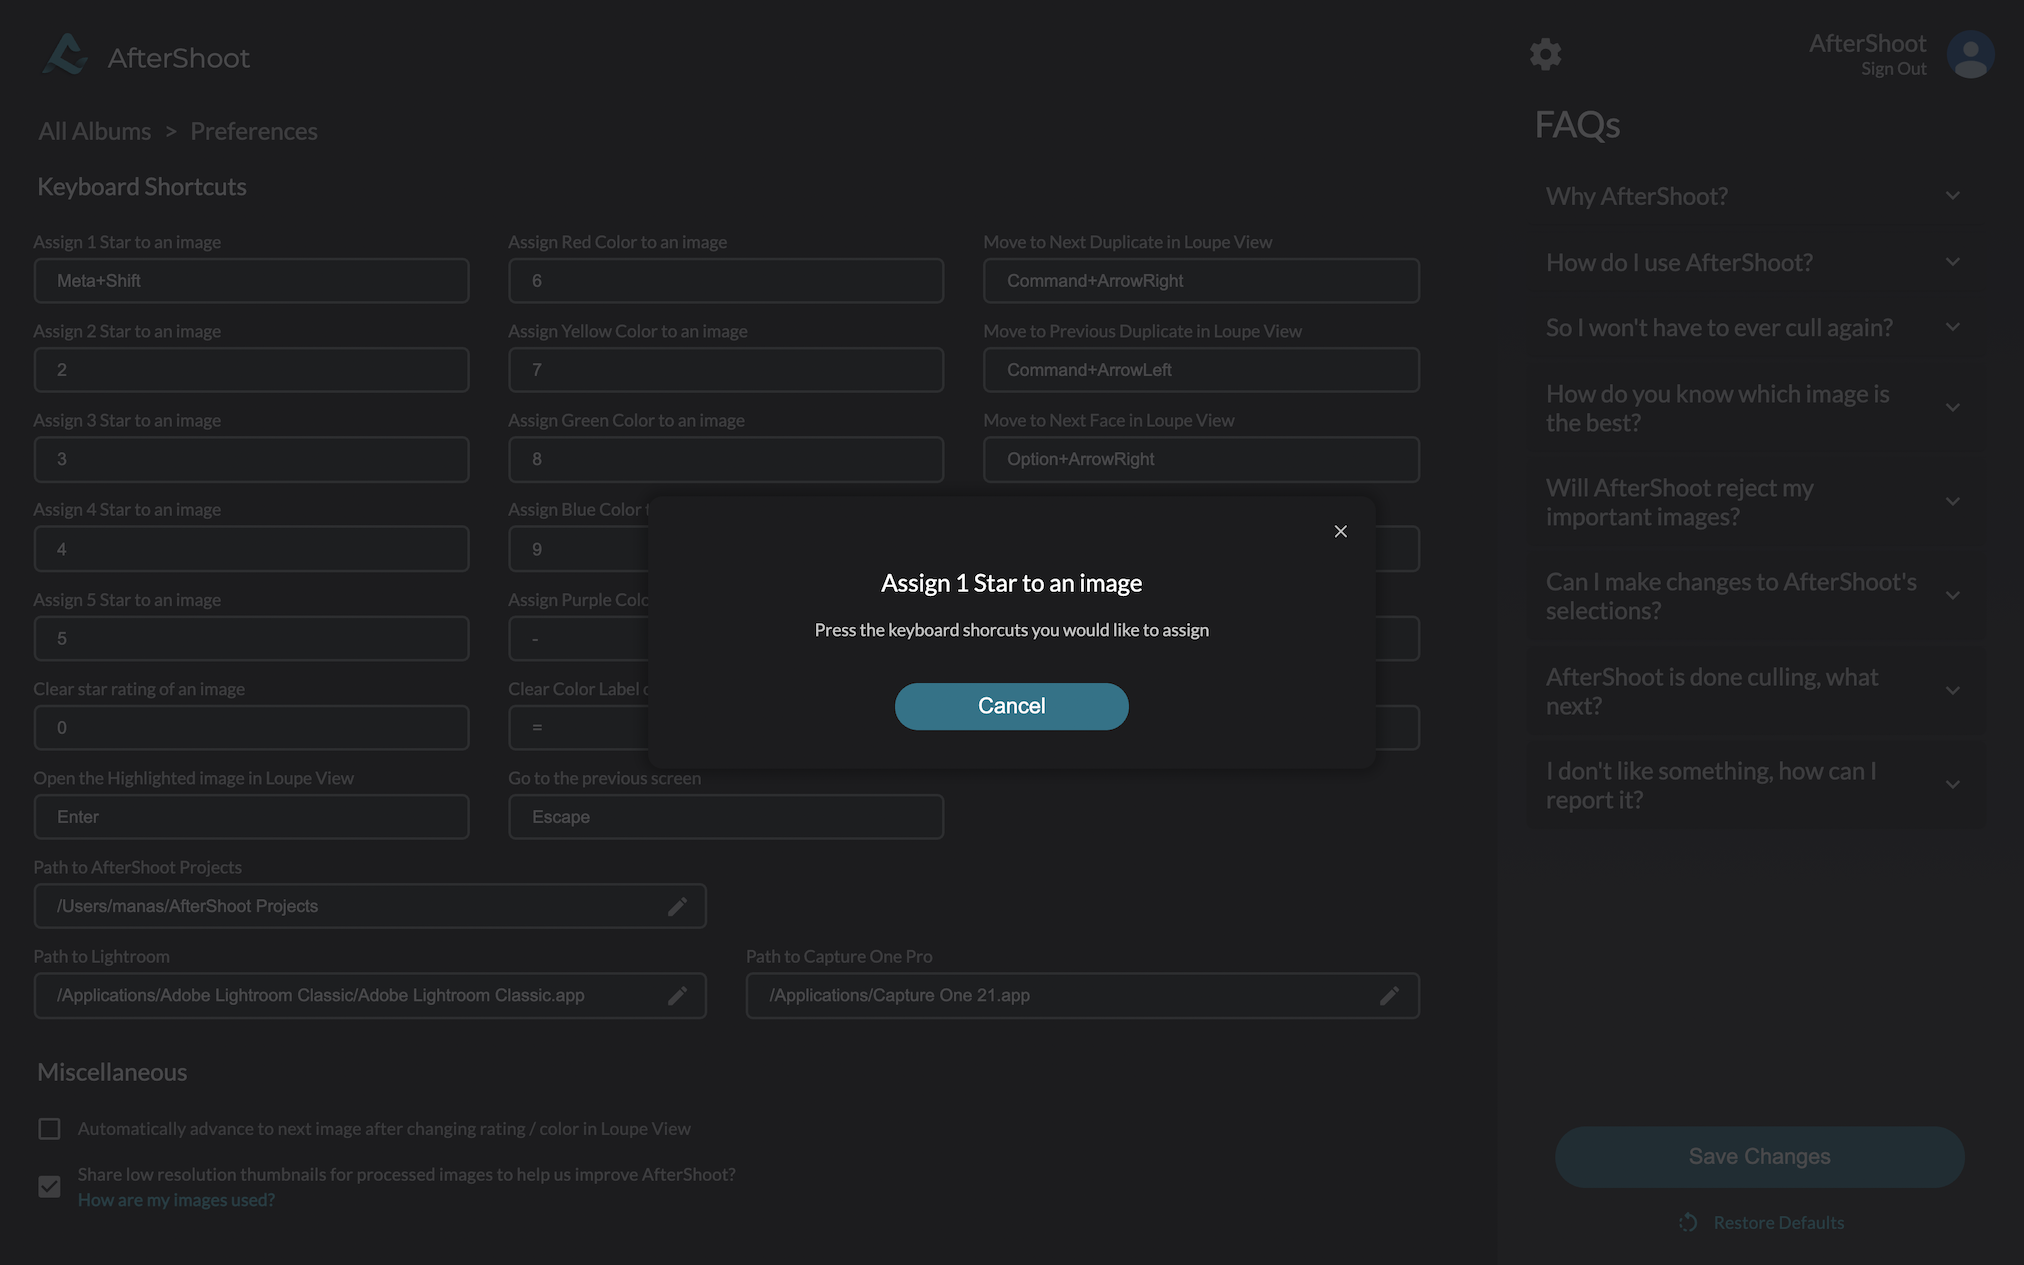
Once you’re done, remember to save your changes by clicking on the “Save Changes” Button in the Bottom-Right corner.
You can also revert to the original keyboard shortcut by clicking on the “Restore Defaults” option here.
Now that you’ve gotten to know the keyboard shortcuts that AfterShoot offers, enjoy an even more optimized workflow!
Running into any issues with AfterShoot? Fret not, we got your back! Here are some issues you might rarely run into and their possible resolutions.