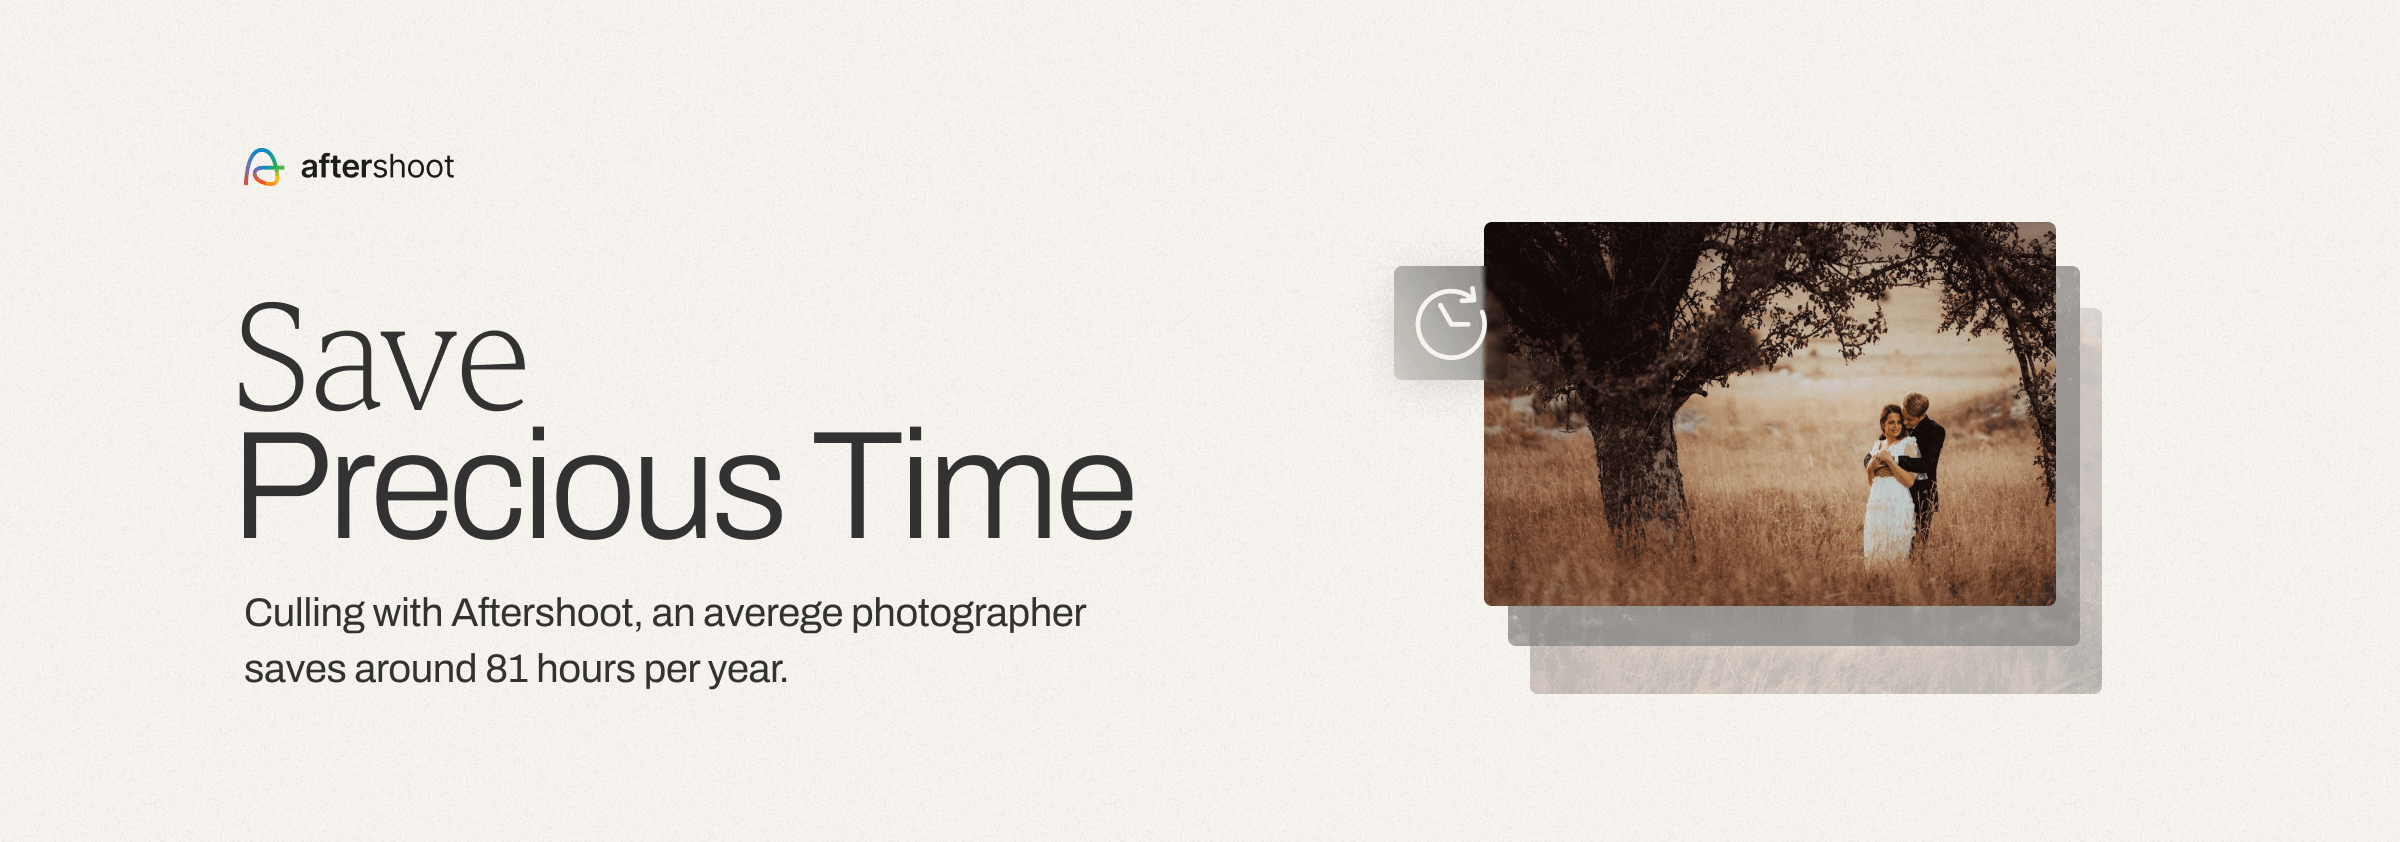
How to Cull & Select Your Photos Quickly with Aftershoot
We’ve all been there, trying to maximize time with a streamlined workflow that ends up taking hours anyway.
What if you knew how to cull photos in minutes, not hours?
Photo culling is an essential but very tedious and time-consuming process. But in this article, we'll show you that it doesn't have to be if you just use the right software.
With Aftershoot, you can improve your workflow exponentially by letting it do the heavy lifting while you take back precious hours from your day to focus on things that are more important to you!
Introducing Aftershoot
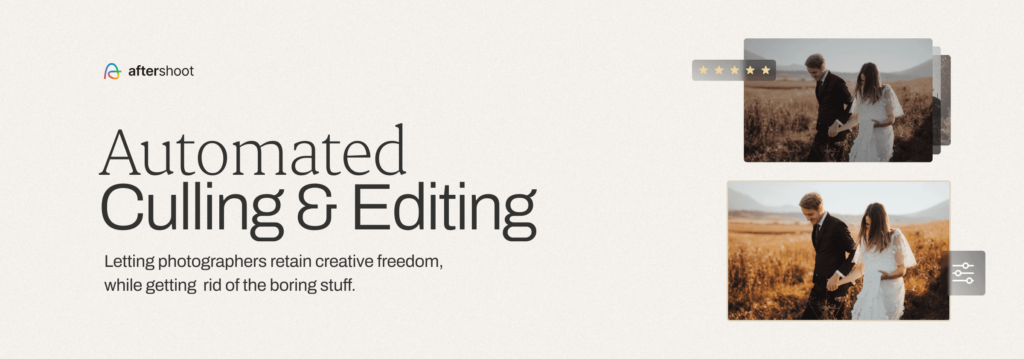
Aftershoot is a fully automated image culling software that aims to cut down the time you spend on culling and selecting your photos drastically.
Aftershoot also has an AI photo editing function that automates your editing process by learning from past edits you've done (you upload previous edits from your Lightroom or Capture One Catalogs and the AI learns your style).
Unlike other AI-powered image culling solutions, Aftershoot runs locally on the user’s system and lets the user retain full control of the selections.
It makes it extremely easy to review and edit the selections made by Aftershoot with a user-friendly app interface.
With the help of Aftershoot, you can save hours and take back control of your time – be it spending more time with the ones you love or working on growing your business.
Who is Aftershoot meant for?
While automated culling is something that all genres of photographers will benefit from, Aftershoot is primarily for photographers who deal with a large volume of photos.
This would make photographers shooting Weddings, Events, Portraits, and Journalism ideal users of Aftershoot.
That said, if your photoshoot involves humans, Aftershoot will work without any issues. However, some of our users have found Aftershoot to work well on Product and Landscape shoots as well!
Platforms & image formats supported by Aftershoot
Aftershoot supports both Windows and macOS devices, having at least 4 core CPUs and 8 GB RAM.
As far as image formats go, we support all the leading RAW formats and JPEGs.
How to cull with Aftershoot
Culling with Aftershoot is a four-step process.
- Create an album and import your photos
- Select your culling type and set your preferences
- Review the selections
- Save changes and export
Two culling types in Aftershoot
Aftershoot lets you cull your way with two distinct culling types:
- AI-Assited Culling
- Automated AI Culling
AI-Assisted Culling lets you make selections yourself and just get a little bit of AI assistance along the way with duplicate sorting and key faces.
Automated AI Culling is where Aftershoot's AI culls for you and gives you suggested selections based on your preferences.
Watch this video for a step-by-step guide on Automated Culling with Aftershoot... or read the steps below.
Before you dive in, make sure you have a folder of RAW/JPEG photos that you want to cull ready.
For best results, please ensure that you ingest and cull your photos with Aftershoot prior to importing them into Lightroom or Capture One.
Note: If you would like to cull your photos after importing them into Lightroom or CaptureOne, please head over to the following blog post on alternate workflows with Aftershoot.
Step 1: Create an album and import photos
To get started, create a new album in Aftershoot. You'll have the following options available to you:
- Ingest: This is the part of the culling process where you import your photos directly from a memory card to your hard drive.
- Folder: You can also bring the photos in from an existing folder on your computer.
- Backup Photos: You have the option to choose a working directory where the photos will be copied and culled, as well as a backup directory (optional) where your photos will be safely backed up.
Drag and drop your folder of photos into Aftershoot.
Aftershoot will then acknowledge the added folder and automatically start importing your photos.
You can either wait for the import process to complete (it usually takes a few minutes for a typical shoot) or click on the Start Culling button to proceed with the next steps.
Step 2: Select your preferences & thresholds
Once you click Start Culling, you will be directed to a screen where you need to select your preferences and thresholds for culling.
Firstly, you can select the Color Labels and Star Ratings that you would like to set to photos that are assigned to various filters like Blurred, Closed Eyes, Duplicates, Selected, etc.
Customize these according to your preferences, or leave everything as default if you’d like.
Secondly, you can select the strictness for culling the photos.
Note: This screen is important as the thresholds you select here will affect how many or how few photos you get from Aftershoot!
Culling Blurred Photos
This setting will always give you 1 photo from the set.
For example, if you have 5 blurred photos, Aftershoot will deliver the one it deems the best from the set.
This allows you to make creative choices when you shoot and not worry that Aftershoot will exclude the photos.
- Lenient: If you are more concerned about emotion than a photo that is a little soft/blurred, choose this setting. This may be a good setting for you if you shoot wide open (1.4 - 1.8).
- Moderate: The in-between setting! If you want some blurred/soft photos included but don’t want to be as strict as excluding anything that is not super sharp, this is a good setting for your shooting style.
- Strict: If you want very sharp photos with little leniency for soft focus, this setting will apply the most rigorous parameters and choose the sharpest image. If you shoot more closed down (2.8-4.0), this is a good setting.

Grouping of Duplicates
This is how Aftershoot clusters your images together.
- Lenient: Breaks your images into smaller groups and will select more images from your cull. It will pull up subtle differences in the cull. For example, if you are doing headshots and have a subject whose face is turned in different directions to the camera, Aftershoot will choose one photo from each pose.
- Moderate: The happy middle. Will choose image clusters without applying lenient or strict settings.
- Strict: If you are shooting many similar images, you may want this setting as it will make more clusters of images but fewer images overall. For example, if you are shooting weddings, you’re probably taking lots of images of one scene, and Aftershoot will choose the best from each scene.
- Extreme: This will cluster as many photos as possible together. For example, if you take photos of birds flying by in the sky in the same exact location, Aftershoot will cluster all of those photos together.
Selection in Duplicate Sets
The percentages of the grouping of duplicates.
- Less: If you choose this setting and shoot 10 images, Aftershoot will choose one image.
- Moderate: Will choose 2/10.
- More: Will choose 3/10.
Volume of Sneak Previews
This setting will help you choose images for your sneak peeks.
The choice is based on an algorithm that follows trending photos on social media that have performed well. You can then see if the chosen photos are on-brand for you and post them to social media quickly.
- Volume: Choose from None to 20% of the take for sneak previews.
Note: As a rule of thumb, keeping your slider on the extreme right will give you the least number of selected photos, while keeping it on the left will give you the most selected photos.
A detailed breakdown of these filters and sliders can be obtained by hovering the mouse over the slider.
After the thresholds have been set, press Start Culling and Aftershoot will start importing and culling your photos.
You can sit back and relax. Once Aftershoot is done, it will send you a notification (and a completion email if you are logged in).
Advanced settings in Aftershoot
Turning Filters Off
These filters can be handy if you have a particular shooting style and want to ensure that photos that might otherwise be excluded are not.
For example, if you are a newborn photographer, changing the closed-eye detection setting will prevent a photo of a sleeping baby from being excluded.
Turning off blur detection is a good choice if you are shooting landscapes or anything with a deep depth of field.
If you want more images than less in the cull, turning off duplicate detection is a good choice.
Overwriting Star Filters
If you have done any in-camera culling and ranked your images, turning off this setting will prevent the software from overwriting that information.
Restarting Culling
If you look through the images and the final cull isn’t what you would like, you can restart the cull.
This will reset the parameters, start from scratch, and re-cull the photos in about 3-5 minutes.
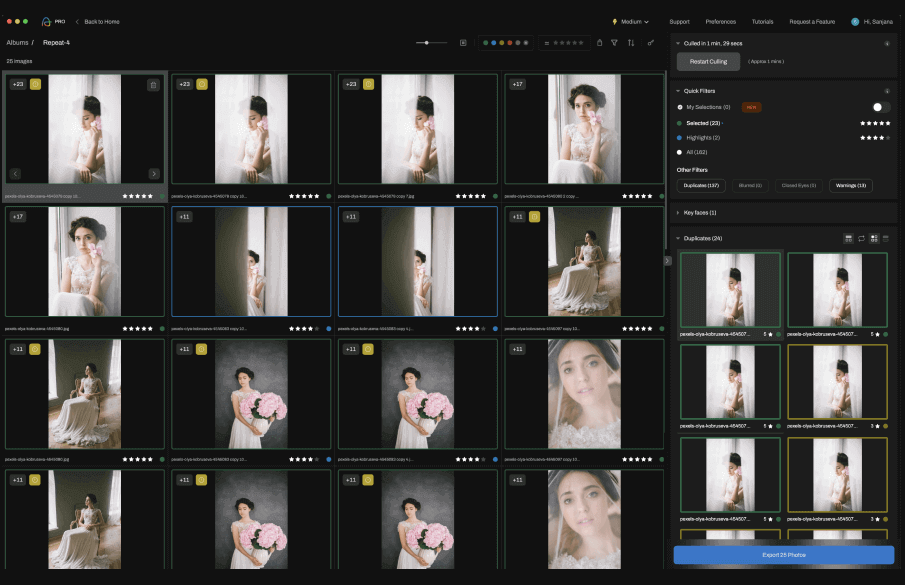
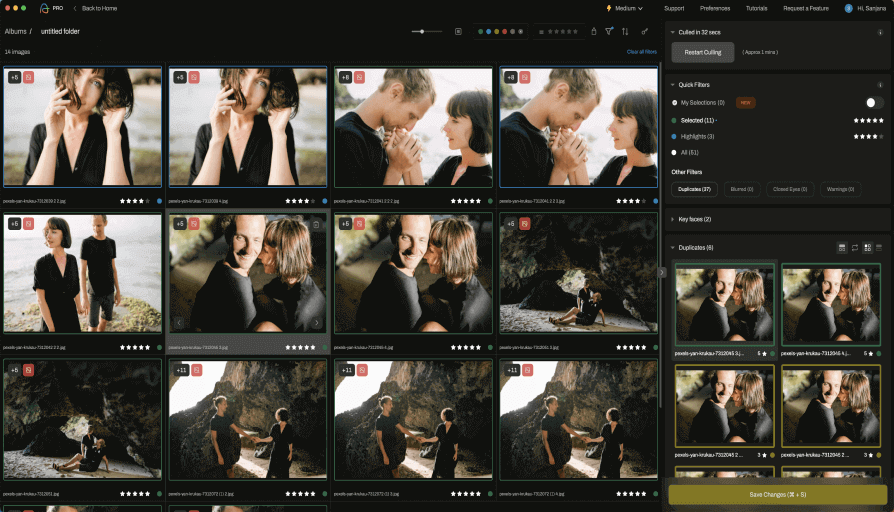
Step 3: View & change selections
Once Aftershoot is done culling, you can either directly export the culled photos into Lightroom Classic or Capture One, or edit the selections in Aftershoot before you export.
Navigating through Aftershoot
Grid view: This is where you will view your culled images.
You can adjust the size of the grid to show you the images in whatever size thumbnail suits you.
When you are in grid view looking at your culled images, there are a few things to note:
- The number in the upper left-hand side of the photo shows you that there are similar images to the image chosen. If you click on that number, it will show you the images on the right side of the screen so you can compare them to the one that Aftershoot chose. You can use your scrollbar or the arrow key to navigate through them.
- If you see an image you want to exclude, simply hit the X key and Aftershoot will move the image into the excluded category.
Loupe View: Double-click on the image to make it larger so you can see more detail, and you’ll notice on the right-hand side of the screen that there will be a close-up view of faces so you can really zoom in on expressions.
You can also use the keyboard shortcut (Options + Arrow Keys on Mac and Alt + Arrow Keys on Windows).
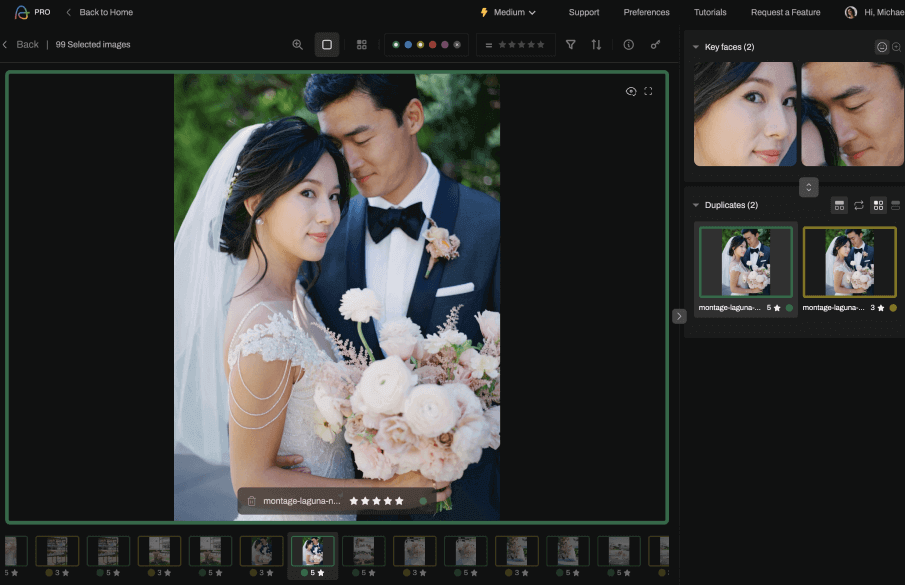
Swapping Images: If you find an image that you prefer, hit the S key, and Aftershoot will swap out the image it chose for the one you prefer.
Adding Images: If you like the one that Aftershoot chose and want another image included, hit the A key to add that photo to the cull.
Space Key: If you want to zoom in on a particular part of an image to check on expression, blur, etc., then place your cursor over that part of the image and hit the space key to zoom in.
Switch Between Images: You can instantly switch between the photos by clicking on a different image displayed on the bottom right. You can also use keyboard shortcuts to do this (Cmd + Arrow Keys on Mac and Ctrl + Arrow Keys on Windows).
Change Color/Star Ratings: Aftershoot also lets you use keyboard shortcuts to change the Color/Star Ratings. You can head over to this blog post to see how you can do so!
Step 4: Save changes & export photos
When you're happy with your selections, the next step is to save the results and export the photos into Lightroom or Capture One for editing.
Alternatively, you can stay in Aftershoot and use the AI editor to edit your photos for you; then export your edits to Lightroom from there.
Saving the Results
Note: If you haven’t made any changes to Aftershoot’s selections, you don’t need to do this and you can directly export your results.
After making changes to Aftershoot’s selections (if needed), you’ll notice that the Export Photos button in the Grid View changes to the Save Results button.
Click this button to save your changes, and once the results are saved, this button will turn back to Export Photos.
You can also press Cmd + S on macOS or Ctrl + S on Windows to save the results.
Aftershoot will save the .xmp files, which are small sidecar files that will go next to the original file.
These files will allow the changes to be stored without changing the original file.
Keywords, ratings, and star selections are all saved in the .xmp file. All those changes will appear when you bring the .xmp file into your editing program.
Exporting Photos
When it’s time to export, Aftershoot allows you to import to a folder or your editing program of choice.
You control which photos are exported. For example, if you want to export the sneak previews, you can export them to post.
To begin exporting the photos, head over to the Grid View and choose Selected Photos from the Quick Filters to export the selected photos into Lightroom or Capture One.
Note: If you want to export all your photos instead, choose All Photos from the Quick Filters.
Then click the Export Photos button in the bottom right, which should open up a dialog that lets you choose where you want to export your photos to.
Currently, we have support for Lightroom and Capture One and also an option to copy/move your photos to a folder of your choice.
Once you click on the app where you want your photos to be exported to, it will open up the chosen app and open the Import Screen with the selected photos chosen for you.
After the import is complete, you should be able to see the star rating and color labels applied by Aftershoot reflected here as well.
If you would like to import the photos manually, you can head to your source folder and drag-drop that directly into Lightroom or Capture One.
Doing so will have the same results as exporting All Photos from Aftershoot into Lr or CO.
Ready to supercharge your culling workflow?
Now that you know how to cull with Aftershoot and how it will speed up your workflow, we hope you'll enjoy more free time doing what you love – capturing captivating images, growing your business, and spending time with loved ones.
If you notice that something is not working as expected or encounter other issues with the app, it’s recommended that you head over to our blog on troubleshooting some common issues.
We also offer 24/7 in-app support, so please get in touch with our team if you have any questions.